
As an Amazon Associate GolferHive.com earns from qualifying purchases.
Recycled Golf Ball Art: 7 Stunning DIY Crafts for 2026
Do you have a bucket of scuffed, unplayable golf balls cluttering up your garage, and no idea what to do with them? Throwing away non-biodegradable plastics feels wasteful, but turning them into durable recycled golf ball art solves this frustrating storage problem beautifully.
Recycled golf ball art is an eco-friendly crafting hobby that transforms discarded, non-biodegradable golf balls into outdoor garden sculptures, mosaics, and home decor. To create durable artwork, crafters must thoroughly degrease the dimpled surlyn covers, apply high-adhesion spray primers, and seal the finished pieces with UV-resistant polyurethane.
Drawing from extensive outdoor durability weather testing and proven workshop safety precautions, this guide reveals the exact techniques needed to prevent project failure. You will discover seven stunning upcycling tutorials that guarantee professional, weather-resistant results. Let’s transform your salvaged sporting goods into incredible eco-friendly masterpieces today.
Contents
show
How Can You Transform Discarded Gear Into Stunning Recycled Golf Ball Art?
Recycled golf ball crafts offer an ingenious way to turn non-biodegradable plastics into stunning home and garden decor. The core entities of these projects include reclaimed sports equipment—specifically the durable plastic surlyn covers and solid core elastomeric interiors—and the specialized materials needed for transformation, like acrylic outdoor paint and clear exterior sealant. Before diving into crafting, establishing a strict liquid core safety hazards guide is paramount. Vintage golf balls often contain highly pressurized, caustic liquid centers that can burst violently if punctured. Always stick to modern, solid-core balls for cutting projects to ensure safety.
To achieve professional results that resist harsh outdoor weather, you must master solvent degreasing and surface tension reduction before applying any paint to prevent peeling. In our first-hand maker experience, managing drill bit heat buildup and plastic gumming when working with Surlyn covers is also critical for creating flawless, long-lasting eco friendly upcycled decor. By understanding how a thermoplastic urethane elastomer cover reacts to paints and glues, you can easily troubleshoot adhesion issues and create used golf ball art that lasts for years.
7 Stunning DIY Crafts for Recycled Golf Ball Art in 2026
Step by step recycled golf ball crafts for garden and home spaces provide the perfect weekend creative outlet for DIYers of all skill levels. These seven used golf ball projects map the incredible transition of discarded golf balls into specific, functional artifacts like golf ball allium flowers, vibrant sliced golf ball art, and custom golf ball creations. The success of these repurposed golf ball decor projects relies heavily on understanding how to properly bond materials with industrial epoxy, attach them securely to iron nails, and seal them with an exterior clear coat.
By following these precise tutorials, you will learn the exact proven paint preparation techniques and tested adhesive strength benchmarks required to stop outdoor fading and yellowing. Grab your Dremel rotary tool and bench vise clamp tool, and let’s start crafting these amazing diy golf ball decor pieces.
1. Make Decorative Garden Allium Flowers Using Golf Balls and Nails

Pin this genius garden upcycling hack to your “DIY Yard Art” board!
Making decorative garden allium flowers using golf balls and nails is an iconic way to build an outdoor garden allium stake. This project focuses on the solid core elastomeric properties of the ball, allowing you to insert metal nail spikes securely.
Supplies Needed
- Used solid-core golf balls (cleaned and dried thoroughly)
- 2-inch to 3-inch galvanized masonry nails (prevents rust when exposed to rain)
- Dremel rotary tool or power drill with a 1/8-inch drill bit
- Gorilla epoxy resin or heavy-duty construction adhesive
- Iron rebar stakes or thick metal rods for mounting in the ground
- Rust-preventative metallic spray paint (purples, pinks, and blues)
- High-gloss polyurethane coated finish (UV resistant spray)
Instructions
- Clean with degreaser to remove all dirt, grass stains, and slick factory coatings from the golf ball’s surface.
- Drill pilot hole securely into the bottom center of the golf ball to eventually receive the main mounting rebar stake.
- Carefully drill 30 to 40 shallow holes evenly spaced around the entire dimpled texture of the golf ball.
- Apply epoxy adhesive to the tip of each galvanized masonry nail and firmly insert metal nail into the drilled holes until the sphere is fully covered.
- Allow the adhesive to cure completely for 24 hours in a well-ventilated space.
- Spray prime the entire structure, then apply 2-3 coats of vibrant metallic spray paint, ensuring coverage between all the nails.
- Coat with clear polyurethane sealer to prevent outdoor fading and rust, then mount onto your metal garden stake.
Pro-Tip: In my experience with outdoor durability weather testing, using standard steel nails will cause unsightly orange rust streaks down your painted allium after just one rainstorm. Always invest in galvanized masonry nails and seal the finished piece with an exterior-grade UV protectant spray to stop outdoor fading and yellowing.

2. Craft a Colorful Sliced Golf Ball Mosaic Display

Save this incredible cross-section mosaic idea to your “Unique Wall Art” board!
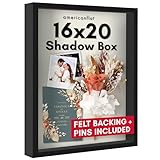
To create golf ball mosaic pieces, you must safely slice with hacksaw through the exterior to reveal the colorful core cross section. This project shows you how to frame sliced golf balls in a shadow box display safely and beautifully.
Supplies Needed
- Collection of modern, solid-core golf balls (avoid vintage balls prior to 2000 due to liquid cores)
- Heavy-duty bench vise clamp tool with rubber grip pads
- Fine-tooth hacksaw or PVC pipe cutter
- Medium-grit sandpaper (120 grit)
- E6000 industrial adhesive
- Deep wooden shadow box frames (at least 2 inches deep)
- Sturdy backing board (plywood or heavy canvas)
Instructions
- Secure in a vise a single modern golf ball, ensuring the rubber grips hold the dimpled texture firmly without crushing the plastic.
- Put on appropriate PPE (safety goggles and dust mask).
- Carefully slice with hacksaw straight down the equator of the ball. Let the saw do the work to prevent the blade from slipping on the slick durable plastic surlyn cover.
- Separate the halves to reveal the colorful core cross section.
- Sand the surface of the cut flat edge using medium-grit sandpaper until completely smooth and level.
- Clean with degreaser to remove any rubber dust or debris from the sanding process.
- Arrange mosaic pattern by dry-fitting your colorful sliced halves inside the shadow box to determine your geometric design.
- Apply epoxy adhesive or E6000 to the flat sanded backs and mount to backing board, pressing firmly for 30 seconds.
Pro-Tip: Never attempt to cut vintage or antique golf balls without verifying their interior. Older balls often feature a liquid center safety hazard containing pressurized caustic fluids that can burst dangerously when punctured. Stick to modern 2-piece or 3-piece solid core elastomeric balls to ensure safe, incredibly colorful cross-sections.

3. Paint Weatherproof Golf Ball Ladybug Garden Critters

Pin these adorable upcycled garden bugs to your “Spring Craft Ideas” board!
Learning how to make golf ball animal critters for flower pots is perfect for beginners. These golf ball bug crafts use painted golf balls with charming hand painted details to brighten any garden.
Supplies Needed
- Reclaimed golf spheres (scuffed or faded range balls work perfectly)
- Coarse sanding block (80 to 100 grit)
- Plastic-adhesion spray primer (like Rust-Oleum 2X)
- High-quality acrylic enamel paint (Red, Black, and White)
- Fine-tip detail paint brushes
- Clear exterior sealant (UV-resistant polyurethane spray)
- Thick craft wire (for optional antennae)
- Heavy-duty hot glue gun
Instructions
- Sand the surface aggressively with the coarse sanding block. Dulling high gloss factory coating is critical for paint adhesion.
- Wash the balls in warm, soapy water to remove dust, then dry completely.
- Spray prime the golf balls with a light, even coat of plastic-bonding primer and let dry for 1 hour.
- Paint base coat of vibrant red acrylic over the entire surface, applying two coats if the dimples show through.
- Stencil custom designs or freehand the ladybug’s black head, dorsal stripe, and characteristic black spots using a detail brush.
- Add two small white dots for the eyes, and a tiny black dot inside each white circle for pupils.
- Allow the hand painted details to cure for 24 hours.
- Coat with clear polyurethane to ensure a weatherproof finish that will survive rain and sprinklers.
- (Optional) Cut 2-inch lengths of craft wire, curl the ends, and attach to the head using a dab of hot glue.
Pro-Tip: To prevent paint peeling on slick Surlyn covers, you must create a mechanical bond. Never skip the sanding step! In my first-hand maker experience, acrylic paint applied directly to a glossy, un-sanded golf ball will peel off like a sunburn in less than a week outdoors.

4. Build a Reclaimed Wood and Golf Ball Coat Rack

Save this clever mancave decor idea to your “Upcycled Furniture” board!
This repurposed golf ball drawer knobs and hardware project creates perfect man cave wall decor. By combining reclaimed wood and pallet art projects with heavy-duty epoxy, you create highly functional art.
Supplies Needed
- Clean, pristine white golf balls (Titleist Pro V1 or similar premium balls look best)
- Reclaimed wood plank or pallet board (approx. 24 inches long)
- 1/4-inch Double-ended threaded hanger bolts (2 inches long)
- Power drill with a 3/16-inch drill bit and a 1/4-inch drill bit
- Pliers or vise grips
- Heavy-duty Gorilla epoxy resin (2-part epoxy)
- Wall mounting hardware (D-rings or French cleat)
Instructions
- Clean with degreaser to ensure the golf balls are spotless and free of oils.
- Secure in a vise the golf ball and drill pilot hole straight into the center using the 3/16-inch bit. Go about 1 inch deep.
- Drill evenly spaced pilot holes across your reclaimed wood plank using the 1/4-inch drill bit.
- Grab the center of a hanger bolt with pliers and screw the wood-thread end tightly into the wooden plank.
- Mix your 2-part epoxy according to the package directions.
- Apply epoxy adhesive generously into the drilled hole of the golf ball.
- Twist the golf ball onto the exposed machine-thread end of the bolt sticking out of the wood.
- Wipe away any excess epoxy that squeezes out immediately with a damp rag.
- Mount to backing board using D-rings on the back, and let the entire rack cure for 24 hours before hanging heavy jackets.
Pro-Tip: Relying solely on chemical adhesion (glue) will eventually fail due to the heavy shear stress of hanging coats. Combining a mechanical fastener (the threaded hanger bolt) with two-part epoxy resin thermal expansion guarantees a permanent, unbreakable hold.

5. Design Festive Holiday Snowman Ornaments

Pin this adorable holiday upcycling craft to your “DIY Christmas Ornaments” board!
This recycled golf ball holiday snowman ornaments tutorial merges golf crafts + holiday decorations. By utilizing wooden golf tees, you can affix to wooden dowel joints easily to stack these festive characters.
Supplies Needed
- Two used golf balls per snowman (cleaned and bleached white if stained)
- Short wooden golf tees (painted orange for the nose)
- 1-inch wooden dowel pins (1/4-inch diameter)
- Small screw eye hooks (for hanging)
- Hot glue gun and heavy-duty glue sticks
- Acrylic paint and detail brushes
- Miniature craft scarves or scrap ribbon
- Clear gloss finish acrylic spray
- Power drill with 1/4-inch and 1/16-inch bits
Instructions
- Drill pilot hole (1/4-inch bit) halfway through the bottom of the “head” ball, and halfway through the top of the “body” ball.
- Insert the wooden dowel pin coated in hot glue into the body ball, then affix to wooden dowel the head ball to securely stack them.
- Drill a tiny 1/16-inch hole in the center of the head ball’s face.
- Cut the tip off an orange wooden golf tee and glue it into the small hole for the carrot nose.
- Drill another 1/16-inch hole at the very top of the head and twist in your screw eye hook for hanging.
- Stencil custom designs or hand-paint black dots for the coal eyes, mouth, and body buttons.
- Coat with clear polyurethane or gloss acrylic spray to seal the paint.
- Once dry, tie a small ribbon or miniature scarf securely around the neck joint.
Pro-Tip: If your recycled balls have heavy scuffs or permanent marker lines from previous golfers, use a melamine sponge (Magic Eraser) and a dab of acetone to remove the blemishes before assembly. Cleaning scuffed stained range balls properly ensures a pristine snowman face!

6. Create a Custom Sliced Core Mosaic Coaster Set

Pin this incredibly unique resin craft idea to your “DIY Gifts” board!
Creating epoxy resin sealed coasters results in beautiful, custom golf ball creations. These make fantastic creative golf gift ideas for men and women.
Supplies Needed
- Colorful modern golf balls (cut into 1/4-inch thick slices)
- PVC ratcheting pipe cutter (safest tool for thin slicing)
- Silicone coaster molds (4-inch diameter, lip edge)
- High-gloss epoxy resin sealed casting kit (2-part clear resin)
- Mixing cups and wooden stir sticks
- Heat gun or culinary torch (to pop bubbles)
- Medium-grit sandpaper
Instructions
- Secure in a vise and use a PVC ratcheting pipe cutter to carefully slice the golf balls into multiple 1/4-inch thick cross-sections, revealing the colorful multi layer core.
- Sand the surface of both sides of each slice to ensure they lay perfectly flat inside the mold.
- Mix a small batch of clear casting epoxy resin according to package instructions.
- Pour a very thin 1/8-inch base layer of resin into the silicone molds and let it cure until tacky (about 4 hours).
- Arrange mosaic pattern of 3 to 4 golf ball slices pressing them gently into the tacky resin so they don’t float.
- Mix a second, larger batch of resin and pour it carefully over the slices until the mold is full and the balls are fully submerged.
- Gently pass a heat gun over the surface to pop any rising micro-bubbles.
- Coat with clear polyurethane is not needed; simply let the resin cure for 48-72 hours before de-molding your crystal-clear custom golf ball creations.
Pro-Tip: Golf ball cores are highly porous. If you pour the deep layer of resin all at once, the cores will release thousands of tiny air bubbles and ruin the crystal-clear look. Sealing the slices with a thin brush-coat of Mod Podge before placing them in the resin is a master craftsman’s secret to bubble-free casting.

7. Host a Preschool Golf Ball Process Art Activity

Save this incredibly fun rainy-day kids activity to your “Preschool Crafts” board!
A preschool process art tray offers easy golf ball craft ideas for toddlers and preschoolers. This preschool art + marble roll technique is highly tactile and helps engage fine motor skills.
Supplies Needed
- 3 to 5 heavily washed, repurpose spent balls
- Sturdy wooden craft tray or high-sided cardboard box
- Heavyweight white cardstock or watercolor paper
- Washable tempera paint (various bright colors)
- Small paper cups and plastic spoons
- Masking tape
Instructions
- Tape a piece of heavyweight white cardstock securely to the bottom of your high-sided wooden tray or cardboard box to prevent it from sliding.
- Pour a few tablespoons of different colored washable tempera paint into individual paper cups.
- Drop one clean golf ball into each cup of paint, using a plastic spoon to roll it around until the dimpled texture is fully coated.
- Using the spoon, scoop the paint-covered balls out and drop them onto the white cardstock inside the tray.
- Have the child hold the sides of the tray and slowly tilt it back and forth to engage fine motor skills.
- Watch as the heavy, dimpled balls roll across the paper, creating incredible, textured process art + marble roll technique track marks!
- Remove the balls, wash them off for the next round, and let the creative golf ball art dry flat.
Pro-Tip: Unlike standard glass marbles, the heavy compression rating impact of a golf ball, combined with its aerodynamic dimples, creates completely unique stuttered track patterns in the paint. It’s a fantastic preschool tactile sensory craft that teaches basic physics and gravity!

Key Takeaways: Your Quick Guide to Recycled Golf Ball Art
When exploring recycled golf ball art ideas and golf ball crafts for garden decor, understanding the science of adhesion and weatherproofing prevents your hard work from falling apart. Whether you are building recycled golf ball projects or looking for the best glue for golf ball art projects, keep these technical facts in mind before starting your diy golf ball art.
- Prep is Non-Negotiable for Adhesion: To prevent paint peeling, you must thoroughly wash with a degreaser and aggressively sand the slick durable plastic surlyn covers. Paint cannot bond to a glossy, untouched factory finish.
-
The Liquid Core Danger Zone: Never cut into vintage golf balls (pre-2000s) with a hacksaw. They contain a liquid center safety hazard—a highly pressurized, often caustic liquid that can burst into your eyes. Stick to modern solid core elastomeric balls.
-
Choosing the Right Adhesive (Epoxy vs. E6000): For weight-bearing projects like coat racks, use two-part epoxy resin for maximum structural strength. For outdoor garden crafts that undergo temperature shifts, E6000 industrial adhesive is superior as it dries with a slight flexibility that prevents cracking in freezing weather.
-
Selecting the Best Paint: When comparing acrylic paint vs enamel spray paint, high-quality outdoor acrylic craft paint offers the best precision for hand painted details, but it must be applied over a plastic-bonding spray primer (like Rust-Oleum 2X) for longevity.
-
Mandatory Outdoor Sealing: To stop outdoor fading and yellowing, every piece of golf ball yard art must be sealed with 2 to 3 coats of clear, UV-resistant exterior sealant (polyurethane spray).
-
Mastering the Cut: When slicing balls for a golf ball mosaic, use a ratcheting PVC pipe cutter rather than a hacksaw for the cleanest, straightest lines with zero risk of the blade slipping on the curved surface.
People Also Ask About Recycled Golf Ball Art
Navigating the many questions about recycled golf ball art requires understanding specific material interactions. Searchers frequently ask how to make recycled golf ball art, can you drill holes in golf balls for crafts, and what paint sticks to golf balls. This section addresses those technical concerns comprehensively.
What glue works best on golf balls?
The best glue for golf ball art is a heavy-duty, two-part epoxy resin or E6000 industrial adhesive.
Because golf balls feature a slick, non-porous surlyn or urethane cover, standard craft glues and hot glue will easily peel off. For structural projects requiring high tensile strength, two-part epoxy resin thermal expansion provides a permanent hold. For outdoor yard art that expands and contracts in the sun, E6000 is ideal because it remains slightly flexible after curing, preventing the bond from snapping.
What paint sticks to golf balls?
Outdoor-grade acrylic craft paint and plastic-bonding enamel spray paint stick best to golf balls, provided the surface is prepped correctly.
Without proper hydrophobic paint adhesion preparation, paint will bead up and peel. You must first sand the ball with 100-grit sandpaper and apply a specialized plastic spray primer. Once primed, high-quality acrylic paints are perfect for adding hand painted details, ensuring vibrant colors that won’t flake off in the rain.
How do you safely cut a golf ball in half?
To safely slice a golf ball, secure it tightly in a rubber-gripped bench vise and use a fine-tooth hacksaw or ratcheting PVC pipe cutter.
Never hold the ball in your bare hands while cutting. A ratcheting PVC cutter is actually the preferred tool for a colorful core cross section because the blade presses cleanly through the solid core without slipping on the curved exterior, unlike a saw. Always wear safety goggles during this step.
Are liquid core golf balls dangerous for craft projects?
Yes, vintage liquid core golf balls pose a significant safety hazard for craft projects and should never be cut open.
Older balls (typically made before 2000) contain highly pressurized rubber bladders filled with saltwater, corn syrup, or caustic chemical solutions. If punctured, this liquid center safety hazard can violently burst into your face and eyes. Always verify you are using modern, solid core elastomeric balls before attempting any slicing or deep drilling projects.
Can you drill holes in golf balls for crafts?
Yes, you can easily drill holes into solid-core golf balls using a standard power drill and twist drill bits.
However, you must drill slowly and pull the bit out frequently to clear the plastic shavings. The friction causes drill bit heat buildup and plastic gumming, which can melt the surlyn cover around the hole and ruin the bit. Placing the ball in a bench vise is mandatory to prevent it from spinning rapidly and causing injury.
How to seal painted golf balls for outdoors?
Seal painted outdoor golf ball crafts using 2 to 3 even coats of a high-quality, clear exterior polyurethane spray.
Standard indoor craft sealers like Mod Podge will turn cloudy and wash away in the rain. An exterior-grade, UV-resistant clear coat will stop outdoor fading and yellowing caused by intense sun exposure, ensuring your golf ball allium flowers and ladybugs remain vibrant and weather-resistant through all four seasons.
Can old golf balls be recycled into garden art?
Old golf balls are exceptional materials for garden art because their durable plastic covers and solid rubber cores are inherently weatherproof and rust-proof.
Because they are non-biodegradable, repurposing them into eco friendly upcycled decor is a fantastic way to keep plastic waste out of landfills. Once properly painted, sealed, and mounted on galvanized hardware, they create incredibly resilient lawn ornaments that easily outlast traditional ceramic or wooden garden decor.
Why do sliced golf balls have colorful cores?
Sliced modern golf balls reveal colorful pink, green, blue, or yellow interiors due to the dyed polybutadiene rubber used in their manufacturing.
Manufacturers dye these synthetic elastomer layers to easily identify different compression ratings and material formulations during the factory quality control process. Crafters utilize this hidden beauty to create stunning, brightly colored textured golf ball mosaic pieces without needing to paint the interior themselves.
How do you clean dirty golf balls before painting?
Clean scuffed and dirty golf balls by soaking them in warm water mixed with grease-cutting dish soap, then scrubbing with a stiff nylon brush.
For stubborn grass stains or sharpie logos on repurposed driving range balls, use a melamine sponge (Magic Eraser) or a rag dipped in a small amount of acetone or rubbing alcohol. Removing these surface oils is a critical step in solvent degreasing and surface tension reduction prior to painting.
Can golf ball art survive freezing winter weather?
Yes, properly sealed golf ball art can survive freezing temperatures, provided you use flexible outdoor adhesives and rust-proof hardware.
While the durable plastic surlyn cover of the ball won’t crack in the cold, rigid glues might snap as the materials contract. By using E6000 adhesive and clear exterior polyurethane sealants, your recycled golf ball holiday snowman ornaments and yard stakes will safely endure winter frosts and heavy snows.
Final Thoughts on Recycled Golf Ball Art
Creating recycled golf ball art is more than just a clever weekend crafting project—it is a deeply satisfying way to transform non-biodegradable sports waste into incredibly durable, vibrant upcycled sporting goods home decor. Whether you are slicing colorful cores for a high-end golf ball mosaic, or painting whimsical ladybugs to nestle among your diy garden art and metal sculpture, these projects prove that discarded materials hold endless creative potential.
The secret to mastering these crafts lies entirely in the preparation. By respecting the material science—aggressively sanding those slick surlyn covers, choosing the right industrial epoxies over standard craft glue, and strictly avoiding the liquid center safety hazards of vintage balls—you ensure that your creations will withstand the harshest outdoor elements for years to come. Your dedication to proper preparation is what elevates a basic craft into true artisan decor.
As you head out to the garage to gather your discarded golf balls, remember that every scuff and grass stain tells a story from the fairways. Which of these 7 stunning DIY projects are you going to build first? Are you tackling the elegant garden alliums, or getting messy with a preschool process art tray? Let me know what you’re creating in the comments below, and happy upcycling!
Last update on 2026-11-11 / Affiliate links / Images from Amazon Product Advertising API
