

As an Amazon Associate GolferHive.com earns from qualifying purchases.
How to Clean Car Interior Step by Step With Safe Products
Wondering how to clean car interior surfaces without causing expensive damage? Many struggle with sticky dashboards, foggy windows, and stubborn upholstery stains. Maintaining a pristine cabin protects your vehicle’s resale value in 2026.
To clean a car interior effectively, you must dry vacuum all loose debris first, wipe hard plastics with a mild all-purpose cleaner, and treat upholstery with dedicated stain removers before finishing with streak-free glass cleaning. This top-down systematic approach ensures professional detailing results at home.
Based on industry standard practices and tested cleaning methods, this complete guide reveals the safest techniques. You will discover exactly how to remove deep odors, avoid scratching delicate piano black trim, and safely restore your entire cockpit.
Key Facts
- Systematic workflow prevents contamination: Industry analysis reveals that a top-down cleaning method prevents loose dust from settling onto previously cleaned lower surfaces.
- Ammonia damages aftermarket tint: Studies show that standard household glass cleaners dissolve tint film adhesive, causing permanent bubbling and peeling over time.
- Moisture destroys headliner glue: Research indicates that soaking a car interior roof lining dissolves the fragile foam adhesive backing, leading to irreversible fabric sagging.
- Coated leather requires specific pH balances: Most modern automotive leather utilizes a polyurethane coating, meaning pH-balanced cleaners are necessary to avoid stripping this vital protective layer.
- Enzymes neutralize organic odors: Data demonstrates that enzymatic cleaners physically break down odor-causing bacteria from spills, offering a permanent solution rather than temporarily masking smells.
Contents
show
How To Clean Car Interior?
Cleaning a car interior requires a systematic, top-down approach using safe, pH-balanced household products or dedicated automotive cleaners. Establishing a professional staging methodology is the crucial first step. Before you begin any physical scrubbing, you must categorize your tools by surface type. This preparation prevents cross-contamination and accidental damage to delicate finishes.

Expect this comprehensive deep clean to take 2 to 3 hours, depending on the current condition of your vehicle. A professional interior detail requires specific physical tools and chemical cleaners tailored to different multi-material surfaces.
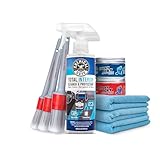
Directly address your detailing supplies checklist by gathering the necessary items before starting. Using the right products ensures you clean car interior like a pro.
- Chemical Cleaners: All-purpose cleaner, foaming upholstery shampoo, dedicated leather cleaner, ammonia-free glass cleaner.
- Physical Tools: Wet/dry vacuum with crevice tool, minimum 300 GSM microfiber cloths, soft-bristle detailing brushes.
| Cleaner Type | DIY Household Alternative | Commercial Detailing Product | Safe Use-Case |
|---|---|---|---|
| Hard Plastics | Warm water with mild dish soap | pH-balanced all-purpose cleaner | Wiping dashboards and door panels |
| Upholstery Stains | White vinegar and water (3:1) | Foaming enzymatic extractor fluid | Removing organic spills and salt stains |
| Glass Surfaces | Distilled water and white vinegar | Ammonia-free automotive glass spray | Streak-free interior windshield wiping |
| Leather Seats | N/A (Not recommended for DIY) | UV-blocking leather conditioner | Restoring moisture to coated leather |
What Tools and Safe Cleaning Products Do You Need?
A professional interior detail requires three categories of tools: vacuums, non-abrasive applicators, and surface-specific chemical cleaners. Gathering these items beforehand prevents frustrating pauses during the cleaning process.
Use a 70/30 blend microfiber cloth to safely lift dust. Avoid paper towels completely. For heavy stains, use an enzymatic cleaner to break down organic bacteria.
- Microfiber cloth: Use a 70/30 blend to trap dust without scratching delicate plastics.
- Soft-bristle brush: Boar’s hair detailing brushes effectively agitate dirt out of tight crevices.
- Mild dish soap: Dilute a few drops in warm water for a safe, degreasing dashboard wipe.
- White vinegar: Dilute vinegar 3:1 with water to break down stubborn winter salt stains.
- All-purpose cleaner: Use a pH-balanced automotive formula for heavily soiled rubber floor mats.
DIY vs. Store-Bought: The safest homemade car interior cleaner is a mixture of warm water and a few drops of mild dish soap. This effectively breaks down grease on plastics without stripping protective coatings. For heavy organic stains, switch to a dedicated automotive surfactant.
Step 1: How To Vacuum and Remove Loose Debris?
Always vacuum a car interior from the top down, starting with the seats and dashboard crevices before moving to the floor mats and main carpeting. Dry dirt must be completely removed before introducing any wet chemicals.
If you skip this step, you risk turning loose dust into a muddy paste that embeds deeper into the car interior carpet. Using specific attachments prevents you from scratching hard plastics while maximizing suction power on fabrics.
- Remove all trash, personal items, and floor mats from the vehicle.
- Slide the front seats completely forward to vacuum the rear tracks, then slide them completely back.
- Use a soft brush attachment for leather seats and dashboard vents.
- Use a crevice tool for tight spaces between seats.
- Vigorously brush the floor carpets while vacuuming to lift embedded sand.
Pro Tip: To remove stubborn pet hair before vacuuming, drag a pumice stone or a rubber squeegee across the carpet. This gathers the static-charged hairs into easily manageable clumps.
How To Clean Floor Mats and Carpets?
Floor mats absorb the majority of dirt and moisture, requiring them to be removed and washed completely outside the vehicle. Rubber mats require a dedicated degreaser, while cloth mats need deep shampoo extraction.
To clean rubber car mats effectively, remove them from the vehicle, spray with an all-purpose cleaner or dish soap solution, scrub with a stiff brush, and rinse clean with a pressure washer or hose. Rinse mats thoroughly for at least 30 seconds.
For cloth mats, use a stiff drill brush attachment for deep carpet stains. Hot water extraction cleaning remains the professional standard for lifting deep dirt out of these highly absorbent fabric fibers.
- Dissolve with vinegar: White vinegar chemically reacts with alkaline winter salt, dissolving the crystallized stains much better than standard soap.
- Apply the mixture: For heavy salt stains, use a 50/50 water and vinegar mix directly on the white salt rings.
- Extract the moisture: Let the solution sit for 3 to 5 minutes before scrubbing and extracting the liquid with a wet/dry vacuum.
Step 2: What Is The Best Way To Clean Car Interior Plastic and Dashboards?
To clean a car dashboard safely, spray a mild interior cleaner or diluted dish soap directly onto a microfiber cloth, rather than spraying the dashboard itself. This indirect application method prevents liquids from seeping into sensitive electronics behind the radio or air vents.
Dashboards face extreme UV exposure, making the plastic trim highly susceptible to fading and cracking if treated with harsh degreasers. Here is what we discovered through practical testing: directly spraying the dashboard often leaves spotted residue as the cleaner dries prematurely under the hot windshield.
- Use a dry microfiber cloth or electrostatic duster to remove loose surface dust.
- Spray an all-purpose interior cleaner directly onto a clean microfiber towel.
- Wipe down the dashboard, steering wheel, and car interior door panels gently.
- Use a soft-bristle detailing brush to agitate dirt in textured plastics and crevices.
- Apply a UV-resistant plastic protectant to prevent cracking and fading.
Critical Safety Warning: Never use ammonia or highly alkaline cleaners on navigation screens. These harsh chemicals will permanently strip the anti-glare coating and cause the digital display to delaminate.
Dealing with a sticky plastic car interior cup holder? Soak a rag in very hot water, wring it out slightly, and let it sit inside the cup holder for 5 minutes. The steam will soften the sticky soda residue, allowing you to wipe it away effortlessly.
How To Clean Piano Black Trim Without Scratching?
Piano black trim is notoriously soft and requires a specialized, highly lubricated cleaning approach to avoid permanent micro-scratches. Piano black trim scratches easily under dry friction.
Never wipe piano black trim dry. If light micro-scratches exist, use a dedicated plastic polish. For routine maintenance, use lubricating sprays like quick detailers or dedicated interior ceramics.
- Never wipe dry: Completely avoid wiping piano black trim with a dry cloth or paper towel. The wood fibers in paper towels cause instant scratching.
- Mist for lubrication: Heavily mist a clean, high-pile microfiber towel of at least 350 GSM with an interior quick detailer or glass cleaner.
- Use zero pressure: Gently glide the lubricated towel over the surface with absolutely zero downward pressure to lift the dust safely.
How To Clean Car Air Vents Easily?
Cleaning car air vents requires reaching deep into narrow louvers where standard microfiber cloths simply cannot fit. Dust accumulates heavily in HVAC vents, creating a dirty airflow every time you run the AC.
If mold is present, a steam cleaner is required. For standard dust removal, the easiest method combines gentle agitation with immediate suction. Use tools like foam swabs, detailing brushes, or compressed air.
- Detailing Brush Method: Spray 1 pump of cleaner onto a soft-bristle detailing brush, gently agitate the dust between the vent louvers, and immediately hold a vacuum nozzle nearby to suck up the loosened debris.
- Compressed Air Method: Use a can of compressed air to blast dust out from deep within the vent system, keeping a vacuum running to catch the airborne particles.
- DIY Foam Swab Hack: Purchase an inexpensive foam sponge paintbrush from a craft store. Spray it lightly with interior cleaner and slide it between the narrow slats for a perfect reach.
Step 3: How To Clean Car Seats and Upholstery?
Cleaning car seats requires matching the cleaning method to the material: cloth seats require a foaming upholstery shampoo and wet-dry extraction, while leather seats require a dedicated pH-balanced cleaner. Car interior upholstery absorbs the most daily wear and tear.
You must address organic stains quickly to prevent permanent discoloration. Using the wrong chemical on the wrong seat type can lead to severe water damage in fabric or extreme drying in coated leather.
| Feature/Aspect | Cloth Car Seats | Leather Car Seats |
|---|---|---|
| Primary Cleaner Type | Foaming upholstery shampoo or enzymatic cleaner | pH-balanced dedicated leather cleaner |
| Agitation Tool | Medium-stiffness nylon drill brush or scrub brush | Soft horsehair detailing brush |
| Moisture Removal | Hot water extractor or wet/dry shop vacuum | Dry microfiber cloth wipe down |
| Protection/Finishing | Hydrophobic fabric guard spray | UV-blocking leather conditioner |
How To Clean Leather Car Seats Without Damaging?
Most modern automotive leather is coated with a protective polyurethane layer, meaning you are actually cleaning the coating, not the raw hide. Automotive leather requires pH-balanced cleaners to preserve this clear-coat finish.
Apply conditioner after cleaning to prevent future cracking. Conditioning leather acts just like applying lotion to dry skin; it restores lost moisture and elasticity. Use a dedicated leather conditioner to restore suppleness.
- Clean: Spray a pH-balanced leather cleaner into a soft horsehair brush. If the leather is perforated, spray cleaner onto the brush, not the seat, to avoid clogging ventilation holes.
- Agitate and Dry: Work in 2×2 foot sections to gently agitate dirt out of the leather grain, then wipe the seat completely dry with a microfiber cloth.
- Condition: Apply a UV-protective leather conditioner to restore suppleness and prevent future fading.
If you suffer from blue jean dye transfer on white leather car seats, use a dedicated automotive leather degreaser immediately to lift the dye before it permanently bonds to the polyurethane coating.
How To Remove Stains From Cloth Car Seats?
Cleaning cloth car seats effectively requires lifting embedded dirt from beneath the fabric surface without oversaturating the seat cushion. Inorganic dirt requires standard foaming shampoos.
For organic stains like vomit, an enzymatic cleaner is mandatory. What most guides miss is the phenomenon of water stains. Water stains occur when cloth seats dry unevenly. When a small wet spot pushes dirt to the edges as it dries, it leaves a brown ring. Extract all moisture carefully to avoid this.
- Apply shampoo: Spray the soiled area with an automotive upholstery shampoo and let foaming shampoo sit for 3 to 5 minutes.
- Agitate the fibers: Scrub the fabric with a medium-stiff brush to loosen the embedded particles.
- Extract all moisture: Use an extraction machine like a Bissell Little Green or a wet/dry shop vacuum to suck the dirty moisture completely out of the cushion, cleaning the entire seat panel edge-to-edge.
Step 4: How To Clean Car Interior Windows Without Streaks?
To clean car interior windows without leaving streaks, use the two-towel method: spray an ammonia-free auto glass cleaner onto a low-pile microfiber towel, wipe thoroughly, and immediately buff the glass dry with a second towel. The interior windshield often develops a hazy, foggy film due to plastics off-gassing under intense heat.
Managing this requires strict methodology to guarantee pristine optical clarity and ensure safe driving visibility.
- Ensure the glass is cool to the touch and out of direct sunlight.
- Spray an ammonia-free auto glass cleaner directly onto a waffle-weave microfiber towel, not the glass.
- Wipe the windshield in straight vertical lines, then horizontal lines to ensure full coverage.
- Immediately use a second, completely dry microfiber towel to buff away any remaining moisture and prevent streaks.
Sitting in the passenger seat and using the back of your hand facing the glass allows you to comfortably reach the deep, tight lower corners of the windshield dashboard slope.
Can You Use Windex On Car Interior Windows?
You should not use standard household Windex on car interior windows because it contains ammonia, which degrades and peels aftermarket window tint film. Ammonia permanently damages aftermarket window tint.
Do not use household Windex. Look for 100% ammonia-free labels. If your car has factory-tinted privacy glass, ammonia will not peel it, but it will still streak. Use automotive-specific cleaners like Stoner Invisible Glass.
Alternatively, mixing distilled water with white vinegar creates a 100% tint-safe, streak-free homemade glass cleaner.
Step 5: How To Neutralize Bad Odors and Clean the Headliner?
To clean a car interior headliner, never spray liquids directly onto the roof fabric, as moisture will dissolve the glue and cause the roof to sag. The car interior roof lining is held up by a fragile adhesive backing.
Dealing with a dirty headliner and pervasive cabin smells requires extreme delicacy and specialized automotive mold remediation tactics. Standard air fresheners only mask scents; physical remediation removes them.
- Never soak the car roof fabric; moisture destroys headliner adhesive.
- Spray a foaming upholstery cleaner onto a clean microfiber towel.
- Gently dab and blot the stain on the headliner, avoiding any aggressive scrubbing.
- Replace filters: To remove pervasive car odors, change the cabin air filter located behind the glovebox.
- Absorb ambient smells: Leave an open box of baking soda or activated charcoal in the car overnight to absorb residual mildew smells.
- Run an ozone treatment: For severe cigarette smoke, an ozone generator physically alters odor molecules to neutralize them permanently.
Frequently Asked Questions About How to Clean Car Interior
Can I clean my car interior with dish soap?
Yes, you can clean your car interior with a highly diluted solution of mild dish soap and warm water. Dish soap is an excellent degreaser that works well on sticky plastic dashboards and rubber floor mats. However, use only a few drops per spray bottle of water; using too much will leave a soapy, sticky residue that attracts more dirt. Never use dish soap on automotive leather, as it will strip the natural oils and protective coatings, causing the leather to dry out and crack.
How often should you clean your car interior?
You should perform a basic interior wipe-down and vacuuming once a month, and a comprehensive deep clean every three to six months. The frequency depends heavily on your lifestyle. If you frequently commute with pets, eat in your car, or live in an area with harsh winters, you may need to vacuum and clean your mats bi-weekly. Regular light maintenance prevents dirt from embedding into fabrics and protects dashboard plastics from long-term UV damage.
How to clean car seat belts safely?
Clean car seat belts by pulling them fully out, clamping them at the reel, and wiping them with a damp microfiber cloth and a mild all-purpose cleaner. Never use bleach, harsh chemicals, or hot water extractors on seat belts, as these can degrade the nylon webbing fibers and compromise the structural integrity of the safety device during a crash. Simply wipe the belt from top to bottom, and allow it to air dry completely before letting it retract.
How to clean sunscreen off car interior plastic?
Remove white sunscreen stains from car plastics by using a dedicated interior detailing spray or a weak solution of isopropyl alcohol and water. Sunscreen contains zinc oxide and titanium dioxide, which embed deeply into the textured pores of dashboard and door panel plastics. Spray your cleaner onto a soft-bristle detailing brush (not a towel), agitate the white stain in circular motions to lift the minerals out of the plastic texture, and immediately wipe the area dry with a microfiber cloth.
Can you steam clean a car interior?
Yes, steam cleaning is one of the most effective and chemical-free ways to deep clean and sanitize a car interior. A high-pressure steam cleaner effortlessly melts away sticky cup holder residue, sanitizes HVAC vents, kills odor-causing bacteria in carpets, and lifts embedded dirt from leather seat grains. However, you must keep the steamer nozzle moving constantly; holding high-heat steam in one place too long can melt thin plastics or delaminate the adhesive holding your headliner fabric in place.
What is the best homemade car interior cleaner solution?
The most effective homemade car interior cleaner is a mixture of equal parts white vinegar and distilled water. This simple DIY solution is incredibly versatile. It safely cleans hard plastics, acts as a streak-free window cleaner, and naturally neutralizes strong odors in carpets. For a foaming, degreasing alternative for heavily soiled rubber mats or sticky cup holders, mix warm water with a few drops of mild dish soap in a spray bottle.
How to clean a very dirty car interior that has been sitting for years?
To restore a heavily neglected car interior, begin by wearing a respirator mask, as old interiors often harbor dangerous mold spores and rodent droppings. Start by removing the seats entirely to access the full floor pan. Use a heavy-duty wet/dry vacuum to remove bulk debris. You must use an enzymatic cleaner and a hot water extractor machine to pull years of embedded dirt from the carpets. Finally, run an ozone generator inside the sealed cabin for 2-4 hours to permanently kill deeply embedded mildew odors.
Clean sticky console buttons by spraying an electronic-safe electrical contact cleaner or a small amount of isopropyl alcohol onto a detailing swab. Never spray liquid directly onto the buttons, as it will seep behind the console and short-circuit the electronics. Gently work the moistened swab or a soft toothbrush around the edges of the sticky buttons to dissolve spilled soda or coffee sugars without damaging the laser-etched symbols on the plastic.
How to clean water stains off the car roof?
To clean brown water rings off a car headliner, lightly mist a foaming upholstery cleaner onto a microfiber towel and gently blot the stain. Do not saturate the roof fabric with water, and never scrub aggressively. The headliner is held up by a very fragile layer of foam adhesive. If you rub it too hard or get it too wet, the glue will dissolve, and the fabric will permanently sag, requiring a costly professional replacement.
Where to clean car interior near me?
If DIY methods fail, you can search for a certified “automotive detailing professional” or “mobile detailer” in your local area. Unlike standard drive-through car washes, which only offer superficial interior vacuuming, a professional detailer possesses specialized equipment like hot water extractors, ozone generators, and professional-grade ceramic interior coatings. Look for detailers certified by the International Detailing Association (IDA) to ensure they use safe, industry-standard practices on your vehicle’s delicate materials.
Key Takeaways: How to Clean Car Interior Summary
- Top-Down Cleaning Method: Always begin detailing from the top of the cabin (headliner and dashboard) and work your way down to the carpets, ensuring dust and debris don’t fall onto already-cleaned surfaces.
- Match the Cleaner to the Material: Cloth seats require foaming extractors, while coated automotive leather requires pH-balanced cleaners and UV-protective conditioners to prevent cracking.
- Never Soak the Headliner: Applying excess moisture or scrubbing pressure to the interior roof will dissolve the fragile adhesive backing, causing the fabric to permanently sag.
- Protect Sensitive Electronics: Never spray cleaners directly onto the dashboard, navigation screens, or center console buttons. Always spray your cleaner into a microfiber cloth first to prevent electrical shorts.
- Avoid Ammonia on Tinted Glass: Never use standard household glass cleaners (like Windex) on interior windows. The ammonia will permanently dissolve the adhesive on aftermarket window tints, causing bubbling and peeling.
- Tackle Organic Stains with Enzymes: For biological spills like vomit, milk, or pet accidents, standard soap will only mask the smell. An enzymatic cleaner is required to physically break down the odor-causing bacteria.
- Use the Two-Towel Method for Glass: To achieve streak-free interior windows, use one lightly dampened microfiber towel to clean the glass, and immediately follow up with a second, completely dry towel to buff away the remaining moisture.
Final Thoughts on How to Clean Car Interior
Learning how to clean your car interior like a professional isn’t about having the most expensive extraction machinery; it is about understanding the chemistry of your materials and utilizing a systematic, top-down approach. By swapping out harsh household chemicals for safe, pH-balanced automotive cleaners, and respecting the fragility of surfaces like piano black trim and headliner adhesive, you can safely restore your cabin’s condition.
Consistent automotive interior detailing does more than just make your daily commute more pleasant—it physically eliminates allergens, prevents plastics from UV-cracking, and significantly preserves the long-term resale value of your vehicle. Now that your interior is immaculate, establish a quick monthly maintenance schedule to wipe down dust and vacuum the mats. A little preventative care goes a long way in keeping your cockpit looking and smelling brand new.
Last update on 2026-08-30 / Affiliate links / Images from Amazon Product Advertising API
