
As an Amazon Associate GolferHive.com earns from qualifying purchases.
Haunted Golf Cart Parade: 7 Genius DIY Ideas for 2026
Are you ready to transform your ordinary neighborhood cruiser into an award-winning seasonal spectacle? Preparing for a haunted golf cart parade often brings unexpected technical frustrations. Navigating dead batteries and tipping hazards quickly ruins the festive magic.
A haunted golf cart parade is a festive community motorcade where participants decorate low-speed vehicles like golf carts and UTVs with elaborate Halloween props, lighting, and audio systems. These slow-speed processionals are popular in neighborhoods, country clubs, and resorts like Disney’s Fort Wilderness, requiring specific battery modifications and safety protocols for night visibility.
Drawing from national safety coalition guidelines and proven event experience, this breakdown ensures total compliance. You will discover genius DIY modifications that balance extreme visual impact with flawless electrical safety. Let’s build your ultimate spooky cart processional today.
Contents
show
What Is a Haunted Golf Cart Parade?
The neighborhood halloween golf cart parade has rapidly evolved from a niche campground activity into a mainstream community event. Whether navigating local cul-de-sacs or joining a massive municipal procession, participants transform standard utility carts into a mesmerizing lighted night display. However, inexperienced builders quickly encounter severe electrical and structural hurdles. Running elaborate decorations without proper electrical planning leads to a draining golf cart battery fast, leaving you stranded halfway through the route. Furthermore, stacking heavy wooden structures creates an unstable cart center of gravity rollover hazard during sharp turns. To participate safely, you must understand the underlying mechanics of these mobile displays. By adhering to strict low speed vehicle fmvss 500 compliance criteria, you guarantee your custom float remains structurally sound. Let’s explore how ampere-hour battery bank consumption math dictates your creative design choices.
7 Genius DIY Ideas for Your Haunted Golf Cart Parade
Preparing the best decorated golf cart requires more than just draping a few fake cobwebs over the roof struts. A true golf cart float demands careful execution, balancing creative ambition with strict electrical limitations. The following step by step haunted golf cart transformation ideas bridge the gap between pure visual inspiration and technical mechanic guides. We will explore exactly how to safely mount massive structures, implement immersive audio, and route power without destroying your expensive battery pack. These advanced halloween cart decor blueprints rely on proper weight distribution and precise voltage management. Let’s dive into these seven actionable DIY projects that will elevate your cart into a neighborhood legend while ensuring complete mechanical safety for your family and the crowd.
1. Wire a Safe LED Light Show Using a Voltage Reducer

Pin this genius lighting hack to your Halloween Inspiration board!
Creating a vibrant light display requires stepping down your cart’s massive 48-volt power source to accommodate standard 12-volt accessories. Learning how to safely wire 12v strobe lights on golf cart systems prevents catastrophic electrical failures. Installing battery powered led lights incorrectly is the number one cause of melted wires.
Supplies Needed
- 48V to 12V DC step-down voltage reducer (crucial for electric carts)
- Weatherproof IP67 rated LED strip lights (purple and neon green)
- Automotive-grade primary wire (14 AWG)
- In-line fuse holder with 10-amp fuses
- Heat shrink butt connectors and a crimping tool
- Heavy-duty double-sided mounting tape
Step-by-Step Directions
- Disconnect the main positive and negative battery cables from your cart’s pack before beginning any electrical work to ensure safety.
- Mount the voltage reducer to a metal frame component using self-tapping screws, keeping it away from moving suspension parts.
- Wire the 48V input side of the reducer directly to the main battery pack terminals (positive to positive, negative to negative).
- Splice your in-line fuse holder into the 12V positive output wire of the reducer.
- Route the 12V output wires to a marine-grade toggle switch mounted on your dashboard.
- Install the LED strip lights along the roof struts and undercarriage, cleaning the surface with rubbing alcohol first.
- Connect the LED wiring harness to your new 12V dashboard switch, restoring main battery power to test the system.
Pro-Tip: Based on field-tested battery electrical draw calculations, running a dc to dc 48v to 12v step down converter instead of tapping into just two batteries of a 48V pack prevents severe battery imbalance, which can destroy a $1,000 battery pack in a single season. This is the ultimate method for golf cart voltage overload prevention.

2. Secure a Giant Skeleton to the Cart Roof Struts

Save this structural mounting trick for your next giant prop build!
Figuring out how to attach 12 foot skeleton to golf cart roll bar sections safely requires understanding dynamic weight distribution. Massive skeleton props attached to your roof struts become dangerous sails if not locked down correctly. Let’s explore how to secure props with zip ties while actively avoiding cart paint scratches from zip ties during the bumpy procession.
Materials Needed
- Giant 10 to 12-foot plastic skeleton prop
- Heavy-duty UV-resistant black zip ties (250 lbs tensile strength)
- Pool noodles or foam pipe insulation
- Black ratchet straps (1-inch width)
- Bungee cords (for secondary stabilization)
Instructions
- Remove the base plate from the giant skeleton, as the cart itself will serve as the structural anchor.
- Cut foam pipe insulation into 6-inch sections and wrap them around your cart’s roof struts where the skeleton will make contact to prevent paint scratches.
- Position the skeleton straddling the rear-facing flip seat, keeping the heavy torso as low to the chassis as possible to maintain a safe center of gravity.
- Strap the spine of the skeleton directly to the rear roof supports using two ratcheting tie-downs pulled tight.
- Fasten the arms and ribcage to the upper roof struts using heavy-duty zip ties, pulling them flush against the foam padding.
- Secure the legs to the rear footplate or side grab bars using a combination of zip ties and bungee cords to allow slight flexing during movement.
- Test the stability by gently rocking the cart; the skeleton should move as one solid piece with the vehicle chassis.
Pro-Tip: Utilizing zip ties vs bungee cords for prop mounting is a common debate, but for massive props, you must use static ratchet straps for the primary load bearing. Bungee cords stretch under kinetic wind shear stabilization, creating an unstable cart center of gravity rollover hazard when cornering.
3. Construct a Lightweight PVC Pirate Ship Frame

Pin this float-building blueprint to your Halloween DIY board!
Understanding how to build a pirate ship over a club car golf cart starts with strategic material selection. You must strictly evaluate your curb weight payload limits with heavy wooden frames to avoid immense mechanical strain. This is why expert builders constantly debate diy cardboard floats vs pvc frame construction for optimal event mobility.
Materials Needed
- 1-inch Schedule 40 PVC pipes (10-12 lengths)
- 1-inch PVC 3-way corner fittings and T-connectors
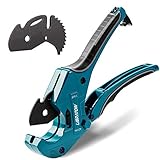
- Ratcheting PVC pipe cutters
- Corrugated plastic sheets or painted foam board (lighter than wood)
- Heavy-duty U-bolts (for securing to the cart frame)
- PVC cement (optional, but recommended for final assembly)
Step-by-Step Directions
- Measure the outer dimensions of your golf cart, adding 6 inches of clearance on all sides to allow for safe navigation.
- Cut the PVC pipes to length using ratcheting cutters, creating a rectangular base frame that will sit just above the tire line.
- Assemble vertical PVC struts that match the height of your cart’s roof, using T-connectors to link them to the base frame.
- Mount the PVC skeleton to your golf cart’s existing metal brush guard, side nerf bars, and rear footplate using tightened U-bolts.
- Construct the bow (front) of the pirate ship by angling PVC pipes into a point, securing them with angled PVC joints.
- Attach your painted foam board or corrugated plastic “wood planks” to the PVC frame using short self-tapping screws or heavy-duty zip ties.
- Inspect the final build to ensure no moving parts (tires, steering column) rub against the frame during sharp turns.
Pro-Tip: Never build a full enclosure frame out of 2×4 lumber. Exceeding your cart’s payload limits causes severe preventing motor overheating at parade crawl speeds issues, likely burning up an electric motor during a slow procession. Always opt for diy cardboard floats vs pvc frame construction to respect these strict weight tolerances.
4. Install a Bluetooth Speaker System for Spooky Sound Effects

Save this audio setup for your ultimate parade playlist!
To connect marine audio speakers successfully, you need resilient equipment that withstands unpredictable evening moisture. A spooky sound + bluetooth speaker combination delivers incredible atmosphere without permanently altering your dashboard. Ensure your golf cart sound system halloween sound effects loop track plays completely uninterrupted.
Tools Required
- IP67 Marine-grade portable Bluetooth speaker
- Adjustable roll-bar speaker mounts or heavy-duty velcro straps
- Smartphone or tablet with offline audio tracks downloaded
- Portable USB power bank (to keep the phone charged)
- Sound editing app (to create a seamless looping track)
Installation Steps
- Download a continuous 60-minute loop of spooky ambient audio (chains clanking, wolves howling, wind blowing) to your device for offline playback, as cell service drops during large events.
- Mount the adjustable speaker bracket to the front dashboard struts, angling the speaker outward toward the crowd, not inward toward the driver.
- Strap the marine-grade Bluetooth speaker securely into the bracket, ensuring the charging port is accessible and facing downward to prevent moisture pooling.
- Sync your smartphone to the speaker via Bluetooth before arriving at the parade staging area to avoid pairing interference from hundreds of other carts.
- Secure your smartphone in a dash caddy and plug it into a dedicated portable USB power bank so the screen and audio don’t drain your phone battery mid-route.
- Test the maximum volume; ensure the spooky sound + bluetooth speaker combination is loud enough to be heard over the hum of electric motors but below municipal noise ordinance levels.
Pro-Tip: When choosing between a bluetooth party speaker vs integrated cart stereo, always opt for a heavy-duty portable IP67 speaker for parades. Wiring an integrated stereo requires complex marine block distribution, which is massive overkill for a seasonal display and risks severe battery drain if wired improperly.
5. Rig a Portable Fog Machine Without Draining the Main Battery

Pin this safe fog machine setup to your DIY Prop board!
Many ambitious builders inevitably wonder, can you use a fog machine on a golf cart safely? Combining a fog machine + golf cart battery directly usually leads to instantly blown main fuses. Utilizing a portable power station vs dc voltage reducer effectively isolates this massive electrical heating element draw from your delicate drivetrain.
Supplies Needed
- 400W compact fog machine (low wattage is critical)
- High-density fog machine juice (designed to hang low)
- Portable lithium power station (minimum 500W output capacity)
- Heat-resistant silicone mat
- Heavy-duty bungee cords
- Wireless remote fob (usually included with the machine)
Instructions
- Charge your portable lithium power station to 100% indoors prior to the parade event.
- Place the heat-resistant silicone mat on the rear footplate or inside the rear utility box to protect the cart’s plastic body from the machine’s hot nozzle.
- Mount the fog machine on top of the silicone mat, securing it tightly with bungee cords to prevent shifting during sudden stops.
- Position the portable power station under the front seat or in the sweater basket, away from the fog machine’s fluid reservoir to prevent spill damage.
- Run a heavy-duty extension cord from the fog machine to the portable power station, securing any loose cord with zip ties.
- Fill the machine with high-density fog fluid, which dissipates slower and creates a better creeping effect around the cart tires.
- Trigger the fog machine using the wireless remote only when creeping at a slow pace; avoid triggering while driving fast to minimize fog machine fluid residue cleanup on the cart’s windshield.
Pro-Tip: When dealing with heating elements, always choose a portable power station vs dc voltage reducer. A standard golf cart battery cannot safely handle the continuous vs peak wattage inverter demand of a fog machine heater core. Using a dedicated Jackery or Bluetti saves your cart from a blown fuse mid-parade.

6. Create a Weather-Resistant Glowing Spider Web Canopy

Save this glowing canopy trick for your neighborhood parade!
Successfully rainproofing electronic halloween props guarantees your display survives unpredictable autumn evening dew. Implementing basic waterproofing outdoor holiday decorations ensures your glow in the dark decorations remain vibrant all night. Using dedicated weather resistant props prevents dangerous electrical shorts mid-route.
Materials Needed
- IP67 Waterproof 12V UV Blacklight LED strips
- Glow-in-the-dark outdoor stretch spider webs
- Assorted sizes of UV-reactive plastic spiders
- Clear zip ties (4-inch)
- Outdoor-rated double-sided mounting tape
- Clear waterproof silicone sealant
Step-by-Step Directions
- Clean the underside perimeter of your golf cart roof thoroughly with rubbing alcohol to ensure maximum adhesion for the LED strips.
- Mount the waterproof UV blacklight LED strips facing downward along the inner lip of the roof, securing them with double-sided tape and clear zip ties at the corners.
- Seal any exposed cut ends or connections on the LED strips with a dab of clear waterproof silicone sealant to ensure full rainproofing electronic halloween props.
- Stretch the glow-in-the-dark webbing across the entire roof structure, hooking it tightly around the rain gutters and rear struts so wind cannot tear it away.
- Layer the webbing thinly rather than in clumps; thin webbing reacts much brighter to UV light and looks far more realistic.
- Embed the UV-reactive plastic spiders deep into the stretched webbing so they are locked in place by tension.
- Power on the UV lights; the invisible blacklight will make the canopy webbing appear to radiate its own eerie, neon glow.
Pro-Tip: Utilizing LED UV strips rather than traditional blacklight bulbs perfectly aligns with nfpa fire safety recommendations for mobile displays. Traditional hot bulbs placed too close to synthetic spider webbing create a significant fire safety with electrical props and straw decor hazard.

7. Rig Motorized Animatronic Props Safely

Save this animatronic mounting guide for your co-pilot build!
Learning to mount animatronic skeleton figures securely prevents disastrous tipping during sudden vehicle stops. Finding the best battery operated animatronics for golf cart roofs requires analyzing base weight and the prop’s natural motion range. When selecting interactive animatronic props, you must carefully weigh a static skeleton display vs motorized animatronics for long-term durability.
Supplies Needed
- Life-size motorized animatronic (preferably one with a metal, not plastic, base stand)
- Portable AC power station (e.g., Jackery or EcoFlow)
- Heavy-duty black ratchet straps (2 pairs)
- Industrial zip ties
- Sandbags or lead ankle weights
- Motion sensor bypass switch (optional, for continuous looping)
Setup Routine
- Assemble the animatronic fully in the passenger seat or rear flip seat of the cart, ensuring the base is completely flat against the floorboard.
- Weight the metal base stand of the animatronic down using small sandbags or heavy lead ankle weights to lower the center of gravity.
- Wrap a ratchet strap entirely around the cart’s backrest and the animatronic’s central pole/spine, ratcheting it down until the foam torso slightly compresses.
- Secure the animatronic’s moving arms with loose zip ties anchored to the dashboard if the mechanical motion is too violent for a moving vehicle.
- Plug the standard 110V AC adapter of the animatronic directly into your portable power station situated on the floorboard.
- Bypass the step-pad or motion sensor by setting the animatronic to continuous “On” mode, or wire a manual trigger button to the steering wheel for on-demand scares.
- Test the movement while the cart is stationary to ensure the animatronic’s swinging arms do not obstruct the driver’s vision or hit the steering wheel.
Pro-Tip: When choosing between a static skeleton display vs motorized animatronics, note that animatronics have fragile internal plastic gearboxes. If you hit a bump at high speed, the jolt can instantly strip the gears. Always drive at absolute idle crawl when running motorized props on a rigid suspension vehicle.

Key Takeaways: Your Quick Guide to Haunted Golf Cart Parades
Before rolling out to the community golf cart parade, reviewing the fundamental safety and engineering constraints is absolutely crucial. The difference between the best decorated golf cart and a broken-down vehicle often comes down to basic electrical planning. This haunted golf cart parade checklist synthesizes complex mechanical rules into highly actionable steps. Preparing your halloween golf cart correctly ensures a smooth, uninterrupted ride for everyone involved. Review these critical insights to guarantee your rolling display operates safely under demanding parade conditions.
- Voltage Reducers are Mandatory for Electric Carts – Never wire 12V LED lights directly to a single battery in a 48V pack; always install a dc to dc 48v to 12v step down converter to prevent severe battery imbalance and failure.
- Portable Power Stations Beat Inverters for High-Draw Props – For heating elements like fog machines or AC animatronics, use a standalone lithium power bank to avoid draining golf cart battery fast and blowing main cart fuses.
- Structural Framing Demands Lightweight Materials – Always prioritize diy cardboard floats vs pvc frame construction over heavy 2×4 lumber to respect curb weight payload limits and prevent the cart’s motor from overheating at walking speeds.
- Ratchet Straps Outperform Bungee Cords for Massive Props – When attaching a 12-foot skeleton, use static ratchet straps on the main spine to ensure strict kinetic wind shear stabilization and prevent rollover hazards.
- Marine-Grade Equipment Survives the Elements – Opt for IP67 waterproof Bluetooth speakers and UV-rated zip ties to ensure rainproofing electronic halloween props against unpredictable autumn weather and evening dew.
- Center of Gravity is Your Primary Safety Metric – Keep all heavy items (batteries, generators, sandbags) on the floorboards to counter the unstable cart center of gravity rollover hazard created by tall roof-mounted decorations.
- Follow Municipal and HOA Street Legal Guidelines – Ensure headlights remain unobstructed and the driver maintains 360-degree visibility to comply with low speed vehicle fmvss 500 compliance criteria during the parade route.
People Also Ask About Haunted Golf Cart Parades
Even after mastering the technical builds, many creators have lingering questions about navigating a haunted golf cart parade successfully. From figuring out how to decorate a golf cart for a halloween parade to understanding local municipal laws, event logistics can feel overwhelming. You might wonder, can you use a fog machine on a golf cart or are golf carts in parades street legal in your specific town? Furthermore, calculating how do you power halloween lights on an electric golf cart correctly remains a top concern for first-time participants. We have compiled authoritative answers to resolve these specific knowledge gaps. Review these expert insights to ensure your custom vehicle remains fully compliant, powered, and safe.
How do you power Halloween lights on an electric golf cart?
To safely power 12V Halloween lights on a 36V or 48V electric golf cart, you must install a DC-to-DC voltage reducer. Tapping into just one or two batteries of the main pack will cause uneven power draw, leading to irreversible battery damage. The voltage reducer connects to the entire pack, safely stepping the voltage down to a steady 12 volts for LEDs and strobes.
Can you use a fog machine on a golf cart?
Yes, but you should power the fog machine using an independent, portable lithium power station rather than the cart’s battery. Fog machines require high-wattage heating elements that draw massive current. Attempting to run a 400W fog machine through a golf cart inverter will likely blow the main fuse or rapidly drain your cart, leaving you stranded on the parade route.
What battery do I need for golf cart parade lights?
For extensive lighting setups, a standalone 12V deep cycle marine battery or a modern lithium portable power station (like a Jackery) is highly recommended. While a voltage reducer runs off your main cart batteries, using a separate auxiliary battery entirely isolates your decorative power draw, ensuring your cart has maximum range and torque to finish the annual halloween golf cart parade.
Are golf carts in parades street legal?
Participation in a neighborhood golf cart parade does not automatically make your vehicle street legal. Unless your cart is registered as a Low Speed Vehicle (LSV) with a VIN, DOT windshield, seatbelts, and turn signals, it is generally restricted to private communities or roads with speed limits under 25 mph. Always verify the neighborhood hoa halloween golf cart parade permission rules or municipal permits.
How do you attach props to a golf cart without damaging paint?
The safest way to mount props without scratching your cart is to wrap the roof struts in foam pipe insulation and use heavy-duty zip ties or rubberized wire. Never use metal hose clamps or bare ratchet strap hooks directly against the fiberglass body or painted struts. When zip-tying, thread the tie over the foam padding to create a protective friction barrier.
What are common golf cart parade judging categories?
Most events, including the Disney Fort Wilderness parade, utilize distinct judging categories such as Best Overall, Most Creative, Scariest, Funniest, and Best Theme. Judges typically look for a cohesive costume and cart integration, where the passengers’ outfits match the float’s narrative, as well as the creative use of spooky sound effects and dynamic lighting displays.
How many lights can a 48V golf cart support?
A standard 48V electric golf cart equipped with a 20-amp voltage reducer can safely support roughly 240 watts of 12V accessories. This is easily enough capacity to run hundreds of LED strip lights, under-glow kits, and LED headlights simultaneously. However, always calculate the total wattage of your combined lights to ensure you don’t exceed the reducer’s maximum amp rating.
Is candy throwing allowed during golf cart parades?
Candy distribution rules vary by municipality, but most organized parades now require candy to be handed directly to spectators rather than thrown from moving carts. Throwing candy encourages children to run into the street, creating a severe spectator crowd safety blind spot hazards for drivers in lifted carts with limited ground-level visibility.
What is the difference between Trunk or Treat and a cart parade?
A Trunk or Treat features stationary, parked vehicles in a designated lot where children walk from car to car, whereas a golf cart parade is a moving, low-speed processional navigating a mapped route. Parades require strict attention to kinetic stability, wind resistance, and battery life, while Trunk or Treat setups allow for fragile props and AC power cords since the vehicles never move.
How do you waterproof electronic props on a cart?
Protect electronic props by sealing all wire connections with dielectric grease and wrapping exposed battery packs in plastic bags sealed with waterproof tape. Opt for weather resistant props rated IP65 or higher. If you must use indoor animatronics, cover the electronic gearboxes and fabric with clear waterproofing spray, and never operate them during a heavy downpour.
Final Thoughts on Building Your Haunted Golf Cart Parade Float
Transforming your standard vehicle into a rolling masterpiece for the annual parade tradition is one of the most rewarding autumn DIY projects you can tackle. However, as we’ve explored, the line between an award-winning float and a frustrating breakdown comes down to thorough electrical preparation and structural respect. By utilizing proper voltage reducers, isolating heavy-draw accessories to portable power stations, and securing tall props with heavy-duty ratchet straps, you guarantee that your cart remains as safe as it is spectacular.
Ultimately, these community golf cart parade events thrive on boundless creativity and neighborhood camaraderie. Whether you are navigating the winding paths of a local country club or participating in the legendary Fort Wilderness parade, your commitment to building a safe, well-lit, and thoughtfully designed float elevates the experience for every single spectator on the route.
It is time to gather your supplies, check your battery water levels, and start sketching your blueprints to build the best decorated golf cart in your town. What theme are you planning to bring to life for your haunted golf cart this season? Let us know in the comments below!
Last update on 2026-11-11 / Affiliate links / Images from Amazon Product Advertising API
