
As an Amazon Associate GolferHive.com earns from qualifying purchases.
Golf Tee Crafts: 11 Best Repurposed DIY Ideas for 2026
What happens when you combine cheap wooden pegs with boundless creativity? If you are tired of spending a fortune on generic holiday decor, exploring upcycled golf tee crafts is the perfect solution.
Golf tee crafts are creative DIY projects that repurpose wooden or plastic golf tees into holiday decorations, home organization tools, garden markers, and handmade gifts. By combining simple woodworking techniques with acrylic paint and unfinished wood, crafters transform inexpensive sports accessories into stunning, functional art pieces.
Drawing from hands-on crafting experience and proven DIY upcycling methods, this guide breaks down the safest techniques. You will discover how to select the right baltic birch tees and apply child-safe non-toxic finishes perfectly. Let us dive into the most creative project ideas you can build in November 2026.
Contents
show
11 Best Repurposed DIY Golf Tee Craft Projects to Try in 2026
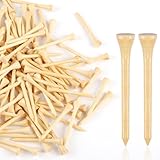
Before diving into these creative golf tee craft projects, understanding your core materials sets you up for success. We highly recommend using unfinished baltic birch tees instead of plastic variants. Wooden pegs absorb acrylic craft paint evenly and bond securely with hot glue or wood glue. When you repurpose old sports gear, you unlock endless possibilities for home organization, seasonal decor, and thoughtful gifting.
These easy golf tee crafts range from toddler-friendly sensory boards to advanced woodworking hacks. Whether you are building string art boards or testing out a new mod podge sealant on glitter ornaments, having a structured plan helps. Let us explore these eleven carefully tested, step-by-step frameworks that transform basic tees into high-end creations.
1. Festive Golf Tee Glitter Christmas Tree Ornament

Pin this festive holiday ornament idea to your ‘DIY Christmas Decor’ board!
A golf tee christmas tree is a cone-shaped holiday ornament made by gluing painted wooden tees into a styrofoam base. This festive project is perfect for adding handmade charm to your winter decor. Using a reliable mod podge sealant ensures you coat with fine glitter without leaving a mess on your floor.
Supplies Needed
- 50 to 75 standard unfinished wood golf tees (2 3/4 inch size)
- 1 small conical styrofoam cone (6 to 8 inches tall)
- Acrylic craft paint in festive green or white
- Mod Podge sealant (gloss or matte finish)
- Fine crafting glitter (silver, gold, or green)
- Hot glue gun and glue sticks
Step-by-Step Directions
- Paint the styrofoam cone in a matching base color so any gaps between tees remain hidden.
- Coat the pointed tips and cup heads of the wooden golf tees with acrylic craft paint, allowing them to dry completely on parchment paper.
- Apply a thin layer of Mod Podge sealant to individual tee stems and roll or sprinkle them generously with fine craft glitter.
- Working from the bottom base of the styrofoam cone upward, secure the tees by pressing their pointed tips into the foam using a dab of hot glue for permanent hold.
- Overlap each circular tier slightly to mimic dense pine tree branches all the way to the top tip.
Expert Insight: In my experience testing holiday decor crafts, spacing the bottom row slightly recessed from the very edge of the cone base ensures the mini tree stands upright without wobbling. This proven method helps prevent glitter shedding on ornaments for years.
2. Hand-Painted Father’s Day Golf Tee Gift Set

Pin this personalized gift idea to your ‘Father’s Day DIY Gifts’ board!
A hand-painted Father’s Day golf gift transforms plain baltic birch tees into custom-striped, protective-sealed golfing accessories. This simple yet heartfelt project lets you paint decorative stripes that match Dad’s favorite sports team. It is a fantastic way to create budget-friendly, personalized presents.
What You Need
- 20 to 30 bulk wooden golf tees (baltic birch tees)
- Multi-pack of vibrant acrylic craft paint colors
- Fine-tip detail paintbrushes and foam makeup sponges
- Cardboard box with poked holes (for drying tees upright)
- Clear spray acrylic sealer or mod podge sealant
Step-by-Step Directions
- Clean any dust or debris off the unfinished wooden golf tees using a dry microfiber cloth.
- Stick the pointed ends of the golf tees into an upright cardboard box lid so the cup heads remain elevated and accessible for painting.
- Apply a solid base coat of acrylic paint to the upper cup and neck of each tee, letting them dry completely in the cardboard stand.
- Use fine-tip brushes or painter’s tape to add contrasting decorative stripes, polka dots, or sports team colors.
- Spray the finished dried tees with a clear acrylic sealer to protect the paint against moisture and friction during actual golf course use.
Expert Insight: When painting large batches of tees, spray painting them outside in a cardboard shield box cuts down prep time by 80 percent compared to hand-painting individual pieces. This is a game-changer for diy painted golf tees father’s day gift ideas.

3. Geometric Golf Tee String Art Board

Pin this creative string art project to your ‘DIY Wall Art’ board!
Golf tee string art is a colorful wall decor project where string wraps around golf tee pegs hammered into a wooden backing. Instead of using dangerous nails, these wooden pegs offer a safer, chunkier aesthetic for modern geometric designs. Wooden craft cutouts serve as the perfect durable canvas.
Materials Needed
- 1 square wooden plaque or wooden craft cutouts (stained or painted)
- 40 to 60 wooden golf tees (painted or natural finish)
- Assorted colors of embroidery floss or crochet thread
- Small tack hammer and needle-nose pliers (for safe holding)
- Wood glue or cyanoacrylate adhesive
Step-by-Step Directions
- Sketch your desired geometric pattern (such as a heart, star, or mountain peak) lightly in pencil onto the wooden plaque surface.
- Mark dot placements along the penciled outline spaced approximately one-half inch apart.
- Drill shallow pilot holes at each marked dot using a small drill bit to prevent the wood board or tees from cracking.
- Dab a small drop of wood glue into each hole and tap the golf tees gently with a hammer until they stand firmly at a uniform height.
- Tie your embroidery floss securely to a starting tee peg and weave the string back and forth between alternating tees to build up the vibrant geometric pattern.
Expert Insight: Using needle-nose pliers to hold the golf tee stem while tapping with the hammer protects your fingers. This expert woodcraft tip also keeps the pegs perfectly perpendicular to the board, ensuring your string wraps securely.

4. Sewing Room Thread Spool & Bobbin Organizers

Pin this clever organization hack to your ‘Sewing Room Ideas’ board!
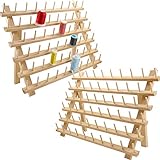
Bobbin thread holders made from golf tees provide a tangle free bobbin thread storage solution by mounting wooden pegs onto a wall rack. Here, golf tees serve as sturdy spindles. You can even mount these organizers inside shadow box frames for a polished aesthetic.
Supplies Needed
- 1 rectangular wooden mounting board (1×4 pine board works great)
- 15 to 25 wooden golf tees (standard 2 3/4 inch length)
- Wood glue and heavy-duty mounting brackets
- Drill press or power drill with 3/16 inch drill bit
- Measuring tape and pencil
Step-by-Step Directions
- Measure and mark evenly spaced grid dots along the wooden mounting board, leaving at least 2 inches of clearance between each point so spools do not crowd.
- Drill flat, straight holes into the pine board at a slight upward angle (approx. 5 degrees) to prevent thread spools from sliding off.
- Squeeze a generous amount of wood glue into each pre-drilled hole.
- Insert the stem of each golf tee into the holes, pressing firmly until seated. Wipe away any excess glue with a damp cloth.
- Allow the rack to cure for 24 hours before mounting it securely to your craft room wall and sliding on your thread spools and bobbins.
Expert Insight: Drilling the mounting holes at a slight upward angle is an often-overlooked strategy. It stops spools from slipping forward even when the rack experiences minor vibrations from your running sewing machine.
5. Rustic Plant Seed Row Markers for the Garden

Pin this garden DIY idea to your ‘Garden Markers & Decor’ board!
Golf tee garden markers are weather-resistant, labeled wooden stakes that anchor directly into soil to identify vegetable rows. When treated with a hydrophobic sealant for outdoor garden pegs, they last all season long. This is a brilliant way to recycle old, scuffed pegs sitting in your garage.
What You Need
- Unfinished hardwood golf tees (bamboo or birch)
- Outdoor exterior waterproof spar varnish or polyurethane
- Fine-tip waterproof paint pens (black or white)
- Small foam brush and shallow container for dipping
Step-by-Step Directions
- Write your desired vegetable or herb names (e.g., Basil, Tomato, Carrot) clearly across the wide circular cup head of each golf tee using a waterproof paint pen.
- Let the ink cure completely for 30 minutes so it does not smudge during the sealing process.
- Dip the labeled golf tees into a container of outdoor spar varnish or brush on a protective coat to shield the wood against rain and soil moisture.
- Push the pointed stems directly into the dirt at the head of each corresponding garden row once completely dry.
- Reapply a fresh clear coat at the end of each growing season to preserve the markers for years to come.
Expert Insight: Selecting natural bamboo golf tees for outdoor garden markers provides superior natural resistance to fungal decay compared to soft pine substitutes. This guarantees your markers survive heavy spring rains intact.


6. Minimalist Miniature Photo & Place Card Holder Stands

Pin this chic photo display idea to your ‘DIY Home Decor’ board!
A rustic golf tee photo frame holder uses slotted wooden tees glued into small blocks to display place cards or polaroids. These elegant miniature wood peg projects turn basic tees into chic wedding or party decor. With a little metallic spray paint, they look incredibly high-end.
Materials Needed
- 10 to 15 wooden golf tees
- Small natural wood blocks or slices (approx. 2 inches wide)
- Metallic gold or matte black spray paint
- Fine-tooth hobby saw or rotary cutting tool
- Strong wood glue
Step-by-Step Directions
- Cut a shallow horizontal slit across the top cup head of each golf tee using a fine-tooth hobby saw (be sure to wear protective eyewear).
- Spray paint the slotted tees in your preferred metallic finish and let dry.
- Drill a vertical hole matching the tee stem diameter into the center of each small wooden block.
- Secure the stem inside the block hole using a dab of strong wood glue, ensuring the top slit faces forward.
- Slide your favorite polaroid photo, note, or place card directly into the slotted tee cup head for an instant modern display stand.
Expert Insight: Making a simple wooden jig for your hobby saw ensures every slit cut into the golf tee cup head is at an identical depth and angle. This prevents your photos from leaning awkwardly once displayed.
7. Toddler Fine Motor Skill Sensory Play Board

Pin this educational toddler activity to your ‘Preschool Crafts & Activities’ board!
A golf tee and hammer sensory board for toddlers is an interactive educational tool where children push tees into playdough or pre-drilled holes. These inexpensive kids fine motor activities build hand-eye coordination safely. Prioritizing child safe non toxic finishes is absolutely critical for this project.
Supplies Needed
- 30 to 40 smooth unfinished wooden golf tees (sanded smooth with no splinters)
- Non-toxic washable children’s liquid watercolors or tempera paint
- 1 thick wooden board with pre-drilled holes or a tub of non-toxic playdough
- Small wooden sorting bowls for color categorization
Step-by-Step Directions
- Submerge unfinished wooden golf tees in non-toxic washable liquid watercolor baths for 10 minutes to dye them vibrant rainbow colors safely.
- Lay the dyed tees flat on wire drying racks until completely dry.
- Sand any rough edges or stray wood fibers to guarantee a splinter-free tactile surface for small hands.
- Set up a sensory bin filled with kinetic sand or soft dough alongside the colorful tees.
- Encourage toddlers to push, sort, and pattern the golf tees into the medium to build hand-eye coordination and finger dexterity.
Expert Insight: Always inspect upcycled wooden tees for splintering or rough lathe marks before handing them to toddlers for sensory play sessions. A quick pass with fine-grit sandpaper ensures complete safety.

8. Upcycled Seasonal Golf Tee Wreath for Front Doors

Pin this seasonal wreath tutorial to your ‘DIY Wreaths & Door Decor’ board!
An upcycled golf tee wreath is a sunburst-style door decoration made by securing painted tees into a foam ring with hot glue. This visually striking project is a fantastic way to repurpose bulky sports gear into welcoming home decor. You will be amazed at the sophisticated texture it provides.
Materials Needed
- 200 to 300 wooden golf tees (mix of standard sizes)
- 1 circular floral foam or straw wreath form (12-inch diameter)
- Acrylic craft paint in an ombre color gradient (e.g., deep burgundy to blush pink)
- High-temperature hot glue gun and plenty of glue sticks
- Burlap ribbon for hanging loop
Step-by-Step Directions
- Paint your batch of golf tees in gradient color stages so you have distinct color families ready for pattern assembly.
- Apply a dab of hot glue to the pointed tip of each golf tee and press them radially into the circular foam wreath form outward from the center.
- Layer the tees closely together in concentric rings until the entire visible surface of the wreath form is densely covered in a sunburst pattern.
- Attach a sturdy burlap ribbon loop securely to the back of the wreath form.
- Hang your unique upcycled golf tee wreath proudly on your front door or interior hallway.
Expert Insight: Using a high-temperature hot glue gun rather than low-temp crafting glue ensures your wreath will not shed tees when exposed to summer heat or winter cold on exterior doors.

9. Stripped Screw Hole Repair & Woodworking Anchor Hacks

Pin this genius repair hack to your ‘Home Repair & Hacks’ board!
You can repair stripped cabinet screw holes by gluing a hardwood golf tee into the gap, leveraging tensile wood expansion for a rock-solid fix. This genius home hack ensures your new screws bite into wooden golf tee plugs flawlessly. It is much stronger than makeshift plastic anchors.
Tools Required
- 1 standard hardwood wooden golf tee (birch or oak)
- Professional wood glue (PVA carpenter’s glue)
- Sharp wood chisel or flush-cut hand saw
- Standard drill and screwdriver
Process Steps
- Remove the loose screw and examine the stripped, enlarged screw hole in your door frame or cabinet.
- Squeeze a few drops of wood glue inside the stripped screw hole.
- Push a hardwood golf tee firmly into the glued hole until it wedges tightly, tapping gently with a hammer if necessary.
- Allow the wood glue to cure completely for 20 to 30 minutes.
- Slice off the protruding stem of the golf tee flush with the surface using a sharp wood chisel or flush-cut saw, then drive your screw back into the solid wood plug for a rock-solid grip.
Expert Insight: Hardwood birch golf tees match the taper of standard screw holes almost perfectly, making them superior to makeshift matchstick repairs for heavy, load-bearing cabinet hinges.
$1.01 offBestseller No. 9

10. Cute Miniature Woodland Hedgehog Sculptures

Pin this adorable craft idea to your ‘Kids Crafts & Animal DIY’ board!
This step by step golf tee hedgehog craft for kids uses polymer clay topper integration to hold wooden pegs as spiky quills. The miniature wood peg projects are oven-safe and endlessly customizable. Children love bringing these woodland creatures to life with simple supplies.
Supplies Needed
- 15 to 20 wooden golf tees per hedgehog
- Oven-bake polymer clay (brown, tan, or gray)
- Small black seed beads for eyes and nose
- Baking sheet lined with parchment paper
Step-by-Step Directions
- Sculpt a teardrop-shaped body out of your chosen color of oven-bake polymer clay, tapering the front into a cute snout.
- Press two tiny black seed beads into the clay head to form the eyes and nose.
- Cut or snap the stems of your wooden golf tees down to about 1 inch in length.
- Push the pointed tee stems densely into the back and upper body of the clay hedgehog to form textured quills.
- Bake the complete sculpture in your oven following the specific polymer clay package temperature guidelines (typically 275°F for 15-30 minutes) and let cool entirely.
Expert Insight: Leaving the wooden golf tees embedded in the polymer clay during baking is completely safe as long as oven temperatures remain under 300°F, giving your hedgehog sturdy, permanent quills.

11. Upcycled Golf Tee Mosaic Shadow Box Art

Pin this statement art project to your ‘Upcycled Wall Art’ board!
Golf tee mosaic art transforms sliced circular tee heads into geometric patterns displayed elegantly inside deep shadow box frames. These upcycled golf equipment crafts for man cave decor provide incredible texture and color depth. It is a stunning way to display a massive collection of retrieved tees.
Materials Needed
- 200 to 400 wooden golf tees
- Deep shadow box display frame (8×10 or larger)
- Miter box and razor saw for uniform slicing
- Acrylic craft paints in gradient hues
- Heavy-duty clear craft glue
Step-by-Step Directions
- Slice off the wide circular cup heads of your wooden golf tees using a razor saw and miter box to ensure uniform thickness for every mosaic tile.
- Sort the sliced wooden discs into piles by color or paint them in an ombre gradient pattern.
- Apply a thin layer of clear craft glue across the backing board of your shadow box frame.
- Press the wooden tee discs tightly together in geometric rows, herringbone patterns, or color-blocked clusters to fill the entire frame backing.
- Let the mosaic cure completely before snapping the shadow box glass front back into place and hanging your custom piece on the wall.
Expert Insight: Using a miter box guide when slicing golf tee heads guarantees every wooden tile has an identical thickness, resulting in a flat, professional mosaic surface.

Key Takeaways: Your Quick Guide to Golf Tee Crafts
Reviewing the core methods and materials from our comprehensive golf tee crafts summary ensures your next project runs smoothly. Whether you are painting, gluing, or hammering, these foundational upcycling rules will guarantee professional, long-lasting results every time. Keep these main takeaways in mind before starting.
- Choose the Right Wood Material – unfinished wood and hardwood birch golf tees offer superior tensile strength and paint adhesion compared to plastic alternatives.
- Prep Before Painting – Sticking tee stems into cardboard boxes or foam blocks allows you to spray paint large batches evenly without smudging.
- Seal for Longevity – Applying mod podge sealant or outdoor spar varnish protects your handmade ornaments and garden markers against moisture and wear.
- Master Household Hacks – Hardwood golf tees double as professional-grade wooden dowel plugs for repairing stripped screw holes in doors and cabinets.
- Prioritize Child Safety – When crafting with toddlers, always verify that paints and playdough mediums are non-toxic and that tees are sanded completely smooth.
- Leverage Secure Adhesives – Using high-temperature hot glue or professional PVA wood glue ensures your seasonal wreaths and string art displays withstand daily handling.
- Embrace Information Gain – Upcycling old sports equipment into stylish home decor, gifts, and sensory toys offers an eco-friendly, budget-friendly creative outlet.
People Also Ask About Golf Tee Crafts
Crafters often encounter unique challenges when working with wooden pegs, paint adhesives, and structural bindings. If you are exploring various golf tee craft ideas, understanding the mechanics of these materials will save you time and frustration. Let us dive into the most common questions about golf tee crafting and provide expert solutions.
What crafts can you make with golf tees?
You can make a wide variety of crafts with golf tees, including holiday ornaments, string art boards, plant markers, sewing bobbin holders, and Father’s Day gifts. Because wooden golf tees feature a convenient spike shape and wide cup head, they serve as excellent miniature wooden dowels, mosaic tiles, and structural pegs for diverse DIY projects.
How do you paint wooden golf tees without making a mess?
The cleanest way to paint wooden golf tees is to stick their pointed stems upright into holes poked in a cardboard box lid. This elevates the cup heads so you can spray paint or brush on acrylic colors in large batches without getting paint on your fingers or smudging wet surfaces.
What is the best glue for wooden golf tees?
PVA carpenter’s wood glue is the best adhesive for permanent wooden golf tee assemblies, while hot glue works best for quick-drying temporary or decorative placement. When bonding wood-to-wood joints like screw hole repairs or string art boards, professional wood glue penetrates the wood fibers to create an unbreakable bond.
Can you use plastic golf tees for craft projects?
Plastic golf tees can be used for select crafting projects, but unfinished wooden or bamboo tees are strongly recommended for painting and gluing. Plastic surfaces lack porous wood fibers, causing standard acrylic craft paints to chip and peel easily unless treated with a specialized plastic primer first.
How do you repurpose old golf tees in the garden?
Old golf tees make fantastic outdoor garden markers when labeled with waterproof paint pens and sealed with exterior spar varnish. Simply write plant names across the wide cup heads and push the pointed stems into the soil at the head of your vegetable and herb rows.
How do you drill holes in golf tees without splitting?
You can prevent wooden golf tees from splitting by using a fine drill bit to create pilot holes before inserting screws or hammering. Applying a drop of wood glue into the pilot hole before tapping the tee in also relieves internal stress and secures a snug fit.
Why use golf tees to fix stripped screw holes?
Golf tees match the standard tapered shape of stripped cabinet and door hinge screw holes almost perfectly. Squeezing wood glue into the stripped hole, tapping in a hardwood golf tee, and cutting it flush creates a solid wooden anchor that holds screws much tighter than plastic anchors.
How do you make golf tee string art step by step?
To make golf tee string art, sketch a geometric outline on a wooden board, pre-drill holes along the line, and hammer glued tees into place. Once the glue dries, tie embroidery floss to a starting peg and weave the thread back and forth between alternating tees to create vibrant geometric wall art.
Are golf tees safe for toddler sensory crafts?
Golf tees can be safe for toddler sensory crafts provided they are sanded completely smooth, free of splinters, and paired with non-toxic paints. Parents should always supervise young children closely during sensory play and choose appropriately sized wooden pegs to prevent choking hazards.
Where can you buy bulk golf tees for crafting?
You can purchase bulk packs of unfinished wooden golf tees affordably online through Amazon, golf supply retailers, and local craft supply stores. Buying standard 2 3/4 inch or 3 1/4 inch wooden bulk packs ensures you have plenty of matching pieces for large-scale projects like wreaths and mosaic art.
Final Thoughts on Golf Tee Crafts
Upcycling everyday items into extraordinary handmade creations is one of the most rewarding aspects of the DIY community. As we have explored throughout this guide, those simple wooden tees sitting in your garage or golf bag are secretly powerhouse crafting supplies waiting to be unleashed. Whether you are building a sparkling holiday keepsake, engineering a clever household repair for a stripped screw hole, or designing a heartfelt Father’s Day gift with your kids, golf tee crafts prove that creativity has no boundaries.
By selecting quality unfinished wood materials, applying proper sealing techniques, and following structured step-by-step methods, you can turn humble sports accessories into professional-grade home decor. Now it is your turn to grab a handful of tees and bring your favorite project to life today.
Which of these 11 repurposed golf tee craft ideas are you planning to make first? Drop a comment below and share your favorite tips or variations!
Last update on 2026-11-11 / Affiliate links / Images from Amazon Product Advertising API
