As an Amazon Associate GolferHive.com earns from qualifying purchases.
11 Golf Senior Picture Secrets And Pro Photography Tips
Worried your golf senior pictures will look like everyone else’s? It’s a common fear when you’re trying to capture a lifelong passion.
You’re dealing with a sport that demands focus and an environment with tricky lighting. Senior pictures are a commemorative keepsake meant to celebrate this huge milestone, and getting them right feels important.
The key to stunning golf senior pictures is mastering two core challenges: timing your shoot for the soft Golden Hour light to avoid harsh shadows, and setting your camera shutter speed to 1/1250th of a second or faster to freeze the golf swing perfectly. This guide reveals the 11 professional secrets that turn a good photo into an unforgettable one. You’ll discover exactly how to plan, pose, and execute flawless shots that truly stand out.
Tired of Cliché Golf Shots? Why Your Senior Pictures Need a Pro Strategy
It’s easy to fall into the trap of generic poses when planning your golf senior pictures. The classic “lean on a club” shot has its place, but your dedication to the sport deserves more creative and professional recognition. The reality is that a golf course is one of the most challenging backdrops for photography. You’re fighting against vast open spaces, unpredictable weather, and harsh midday sun that creates deep, unflattering shadows.
Capturing the power of a golf swing—a critical action shot—requires technical expertise that goes beyond simply pointing a camera. Without the right settings, you’ll end up with blurry, amateur-looking images that don’t do justice to the years of practice. This is where a professional strategy comes in. By understanding the secrets of lighting, gear, and composition, you can elevate your commemorative photos from simple snapshots to powerful, artistic keepsakes. This ultimate guide provides 11 specific, actionable secrets that solve these common problems, ensuring your high school golf pictures are as unique and impressive as your game.
The 11 Golf Senior Picture Secrets And Pro Photography Tips For Flawless Shots
Ready to create truly unique senior golf portraits? We’ve broken down the entire process into 11 professional secrets. These pro photography tips cover everything from mastering the challenging light on the course to the exact camera settings needed for crisp action shots. Whether you’re planning poses, choosing gear, or picking the perfect spot, these insights will ensure your photos are flawless.
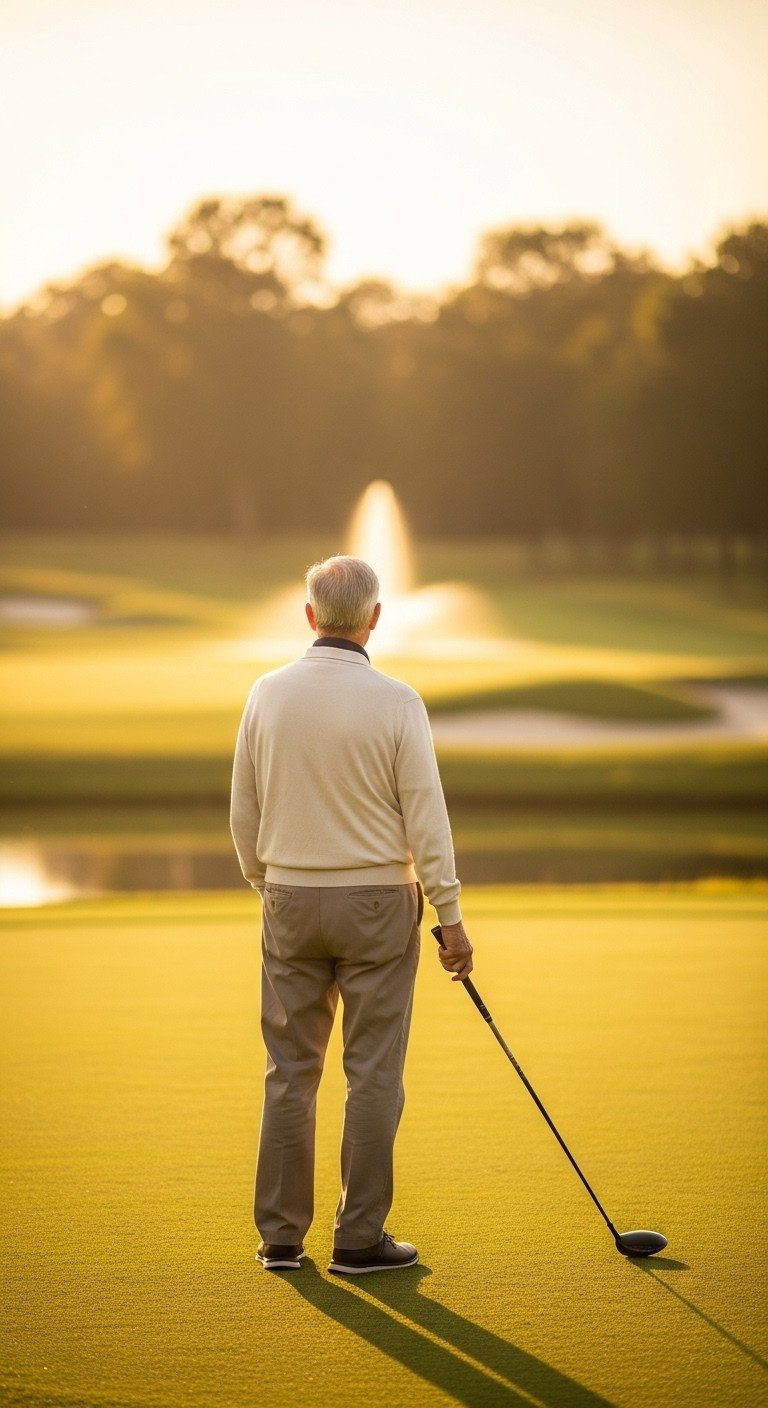
1. Time the Golden Hour Lighting Secret for Flattering Portraits
Pin this genius hack to your ‘Dream Senior Photos’ board!
Golden Hour: The hour just before sunset or after sunrise provides the most flattering light for portraits. This soft, warm light minimizes harsh shadows and creates a beautiful, glowing effect on the subject.
Preparation & Gear Needed:
- Sun Tracker App or Website (to pinpoint precise start/end times for November)
- Reflector Disc (Large 5-in-1, Silver/White side)
- Telephoto Lens (70-200mm is ideal for isolating light)
- Clean Outfit (Avoid dark colors that absorb the soft light)
Execution Steps:
- Track: Use the app to determine Golden Hour. Plan to start shooting 15 minutes before the official start time.
- Backlight: Position the senior so the setting sun is directly behind their head and shoulders, creating a beautiful rim light effect.
- Fill: Use the silver side of the reflector (held by an assistant) to bounce light back onto the face, lifting any shadows caused by the backlighting.
- Isolate: Shoot using a telephoto lens and wide aperture (f/2.8 or f/4) to compress the background and maximize the soft, colorful bokeh effect.
Pro-Tip: For truly dramatic results, shoot immediately after the sun drops below the horizon for a soft, moody ‘Blue Hour’ portrait right after the Golden Hour glow fades.
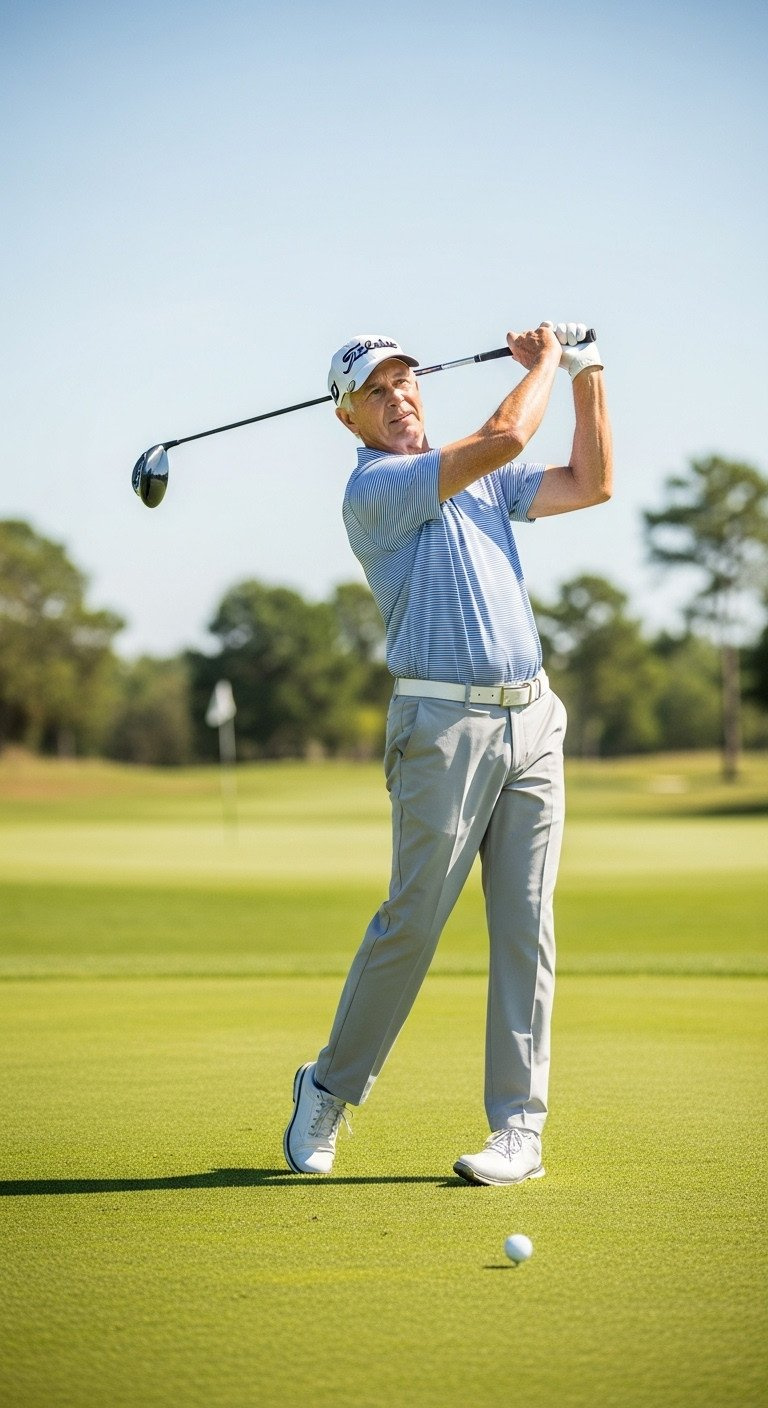
2. Master the Fast Shutter Speed for Crisp Action Shots
Save this clever organization idea!
Sharp Action Shots: To freeze the high-speed motion of a golf swing without any blur, you must use a fast shutter speed. This technical setting is non-negotiable for professional-quality action photography.
Preparation & Gear Needed:
- DSLR or Mirrorless Camera (must support high-speed continuous shooting)
- Fast Memory Card (UHS-II or equivalent to buffer large bursts)
- Telephoto Lens (70-200mm to maximize distance and safety)
- Practice Golf Balls (needed for genuine motion, not just staged poses)
Execution Steps:
- Prioritize: Set your camera to Shutter Priority (Tv or S) mode.
- Speed Set: Set the shutter speed to a minimum of 1/1250th of a second. (Ideally 1/1600th or higher to absolutely guarantee a frozen clubhead.)
- Focus Track: Switch the Autofocus Mode to Continuous Servo (AF-C or Servo AF) and use high-speed burst mode.
- Shoot: Start shooting just as the senior begins the downswing and continue through the follow-through to maximize the number of sharp frames.
Lesson Learned: Trying to freeze a swing below 1/1000th of a second almost always results in motion blur on the club. Prioritize shutter speed over a low ISO when shooting action.
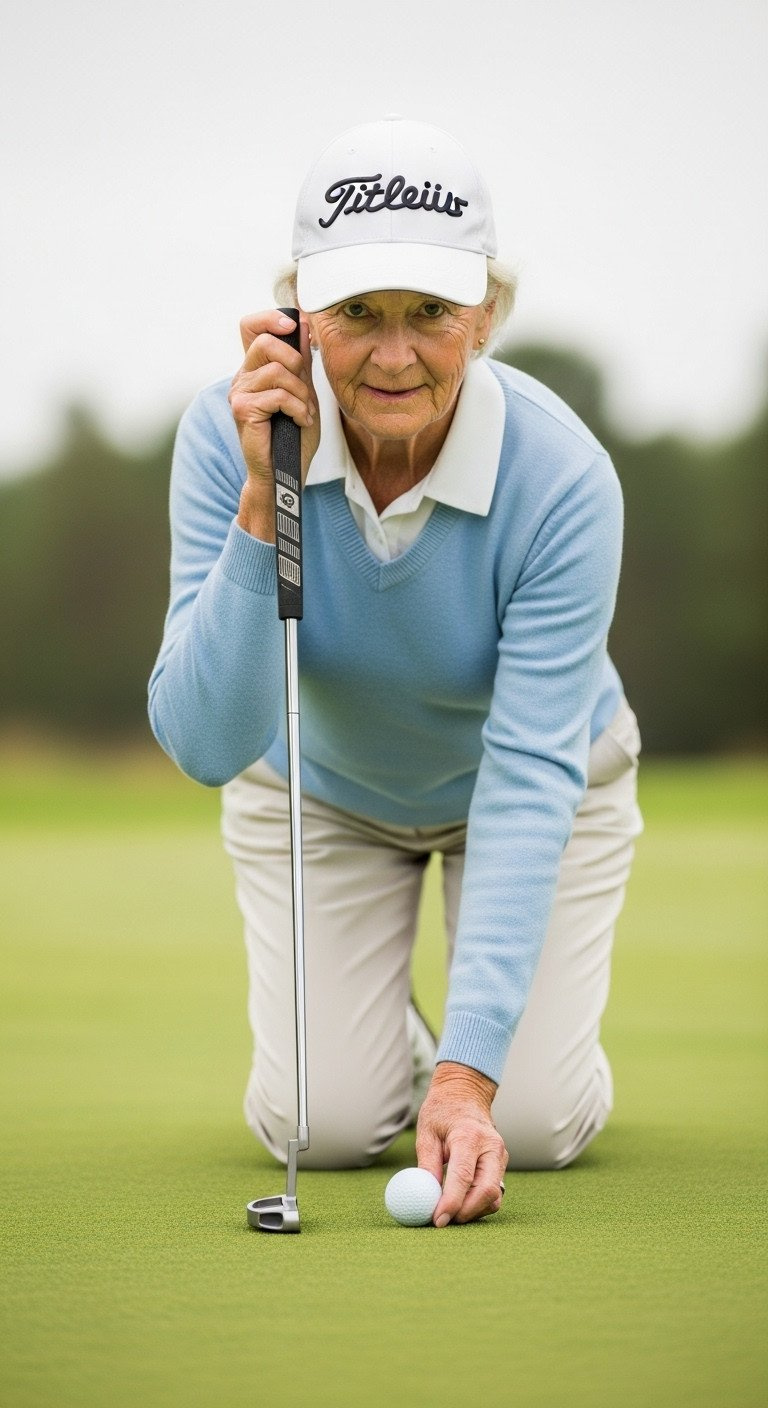
3. The Classic Putter Close-Up Pose for Thoughtful Focus
Pin this thoughtful portrait idea!
This static pose using a putter on the manicured green is perfect for conveying the mental discipline and intense concentration required in golf. It allows for a beautiful close-up portrait that highlights the details of the sport.
Preparation & Gear Needed:
- Putter (Cleaned and polished; minimize chrome glare)
- Knee pad or blanket (to protect knees on the turf)
- Neutral-colored apparel (to keep focus on the face and hands)
- Course Permission (Crucial, as many courses restrict access to greens)
Execution Steps:
- Kneel Low: Ask the senior to kneel or crouch low, looking down the line of the putt. This brings the subject closer to the clean green background.
- Focus Detail: Focus primarily on the senior’s eyes and hands. Use the putter as a natural leading line in the foreground to draw the viewer’s eye.
- Simulate Play: Encourage the senior to actually line up a putt; genuine concentration is better than faked posing.
- Avoid Harsh Shadows: Always shoot in open shade or on an overcast day to avoid distracting shadows across the face or green.
Pro-Tip: If the green is restricted, use the practice putting green or an ultra-clean tee box. The key is the manicured, flat surface that emphasizes the focused activity.
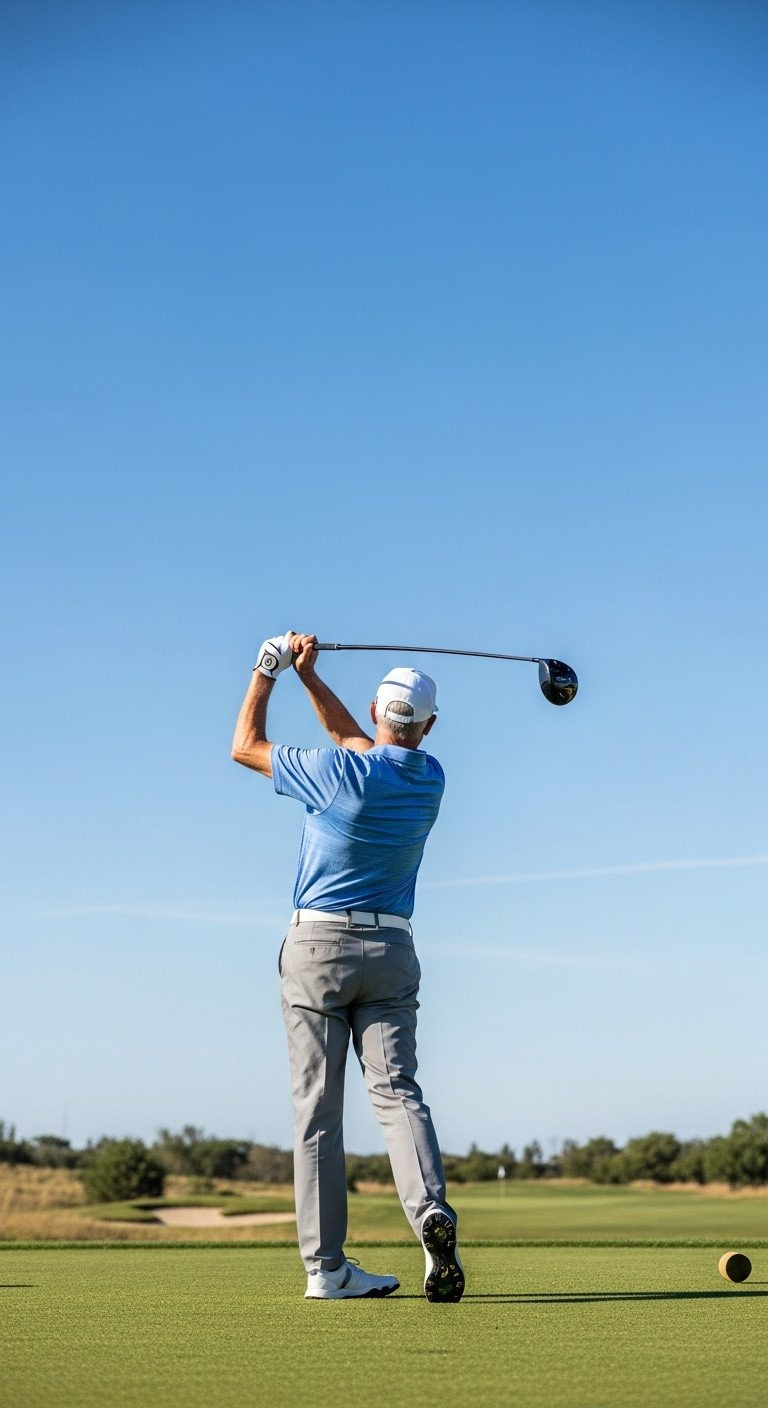
4. The Powerful Driver Action Pose on the Tee Box
Save this powerful athlete portrait!
Using the impressive driver on a clean, expansive tee box creates a powerful, athletic portrait. This pose, frozen at the top of the backswing, symbolizes strength, confidence, and dedication to the sport.
Preparation & Gear Needed:
- Driver (Thoroughly cleaned, shiny head can be tricky)
- High Contrast Apparel (Team uniforms or bright colors work best against the green)
- Low Tripod or beanbag (for stability if shooting from a low angle)
- Wide Tee Box Area (needed for safety and space)
Execution Steps:
- Elevate: Position the camera slightly low and angle up to make the senior look powerful against the sky.
- Pose Stop: Ask the senior to freeze at the very top of their backswing, holding the pose for stability. Ensure the grip is clean and the club is prominent.
- Focus: Use a slightly deeper aperture (f/5.6 to f/8) to ensure the entire senior (from feet to clubhead) is in sharp focus.
- Look Away: Direct the senior to look down the fairway or up at the club, rather than directly at the camera, to emphasize the action and focus.
Pro-Tip: If using a high-shine driver head, check the reflection carefully. If it’s reflecting the photographer or assistant, subtly spray the club head with a temporary matte spray (photographer’s trick).
5. Maximizing Bokeh with Aperture for Pro Depth
Save this professional photography tip!
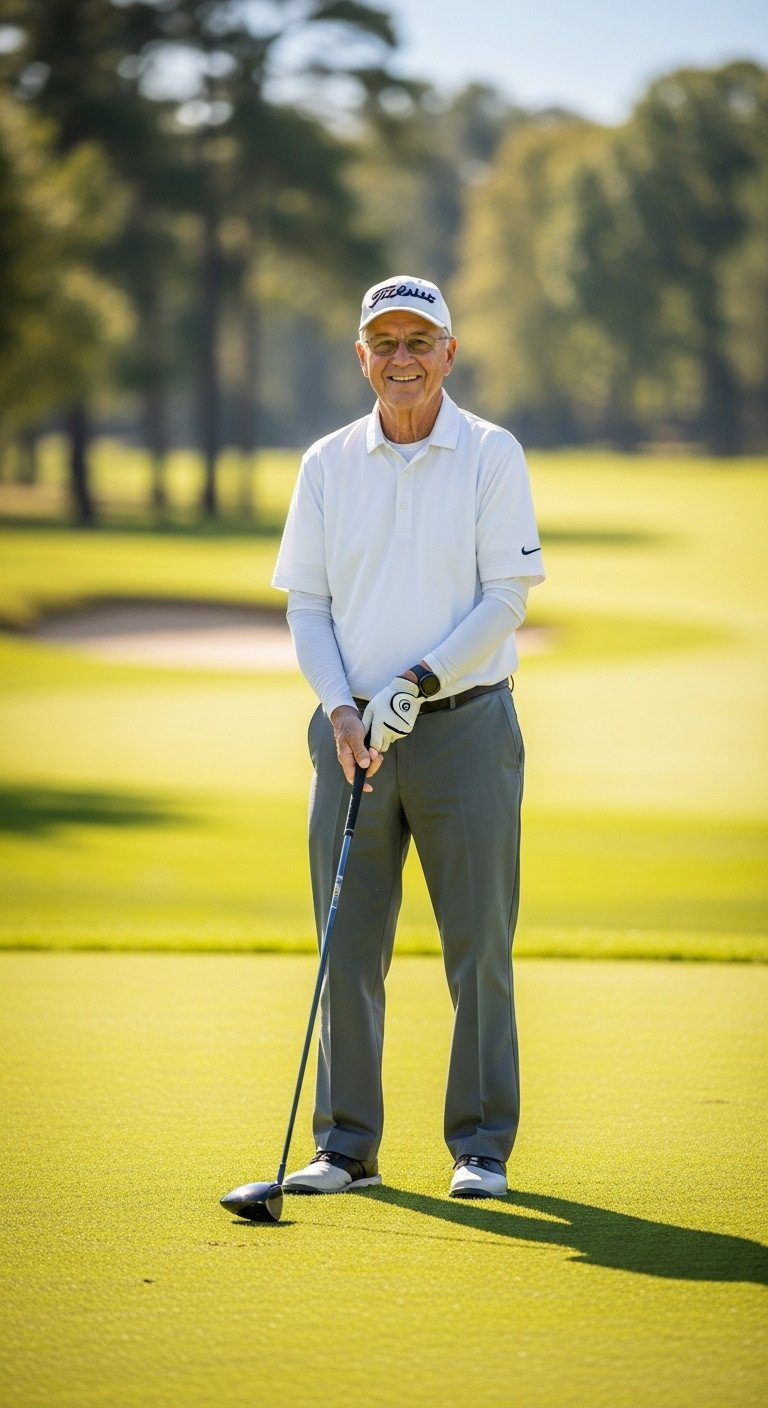
Bokeh: This is the aesthetic quality of the blur in the out-of-focus parts of an image. Using a wide aperture (a low f-number) creates a shallow depth of field, resulting in a creamy, soft blur that makes the subject pop.
Preparation & Gear Needed:
- Prime Lens (50mm or 85mm) or Zoom Lens (70-200mm) with a wide maximum aperture (f/2.8 or lower)
- Manual Mode or Aperture Priority Mode (Av or A)
- Subject Positioning Checklist (Rule of Threes positioning)
- Large distance between subject and background (essential for the effect)
Execution Steps:
- Set Mode: Switch your camera to Aperture Priority mode (Av or A) or Manual Mode.
- Open Wide: Dial the aperture setting as wide as possible (the lowest number available on your lens, ideally f/2.8, f/2.0, or f/1.8).
- Create Distance: Position the senior far away from any background elements (trees, carts, buildings)—at least 20 to 30 feet of separation.
- Focus Spot: Use a single focus point directly on the senior’s nearest eye and ensure the focus is critically sharp.
Pro-Tip: The further the senior is from the background, the softer and creamier the bokeh will be. This technique also helps eliminate distracting background elements like other golfers or carts.
6. The Rustic Clubhouse or Veranda Look
Pin this elegant, traditional senior portrait idea!
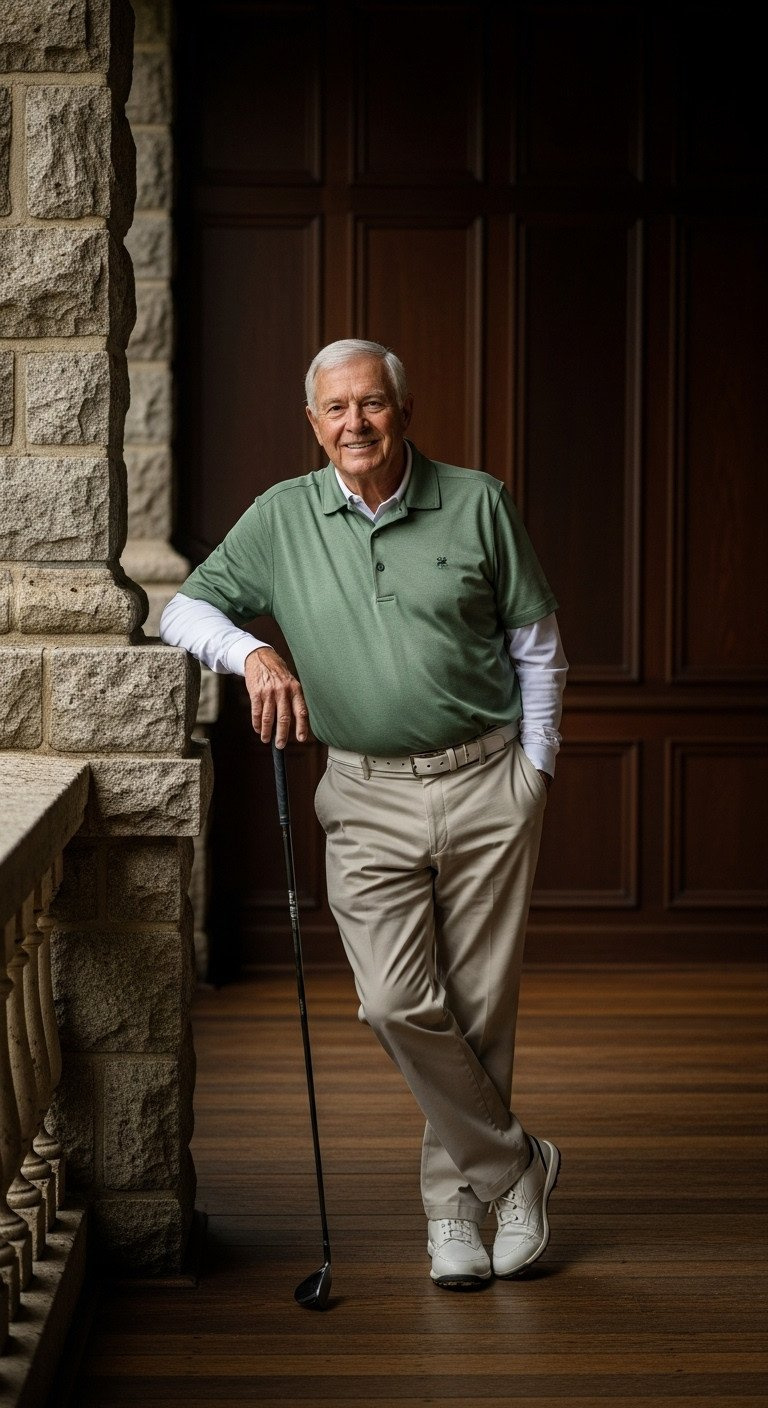
Moving away from the open course, the clubhouse architecture offers a chance for a more formal, traditional portrait. The rustic textures of stone and wood provide a rich backdrop that conveys a sense of maturity and the history of the sport.
Preparation & Gear Needed:
- Formal Golf Attire (Crisp, ironed, wrinkle-free)
- Portable Reflector (Silver/White for subtle fill)
- Permission to use the veranda or locker room entrance
- Single Golf Club (for the senior to hold naturally)
Execution Steps:
- Scout Light: Look for areas on the clubhouse where soft, directional light (like open shade or light coming from a single window) hits the senior’s face.
- Use Texture: Position the senior against a highly textured element (stone wall, wooden door, railing) to add depth and interest to the background.
- Posing: Encourage natural interactions, like leaning on a pillar, holding the club loosely, or adjusting their hat, to avoid stiff “school portrait” posing.
- Depth: Use an aperture around f/4 to f/5.6 to ensure the senior is sharp while keeping enough depth to show the architectural features clearly.
Lesson Learned: Ensure the background is not cluttered (avoid trash cans, electrical outlets, or staff signs). If necessary, use a tight crop to focus only on the senior and the rustic textures.
7. Utilizing High School Uniforms and Team Banners
Save this powerful team pride idea!
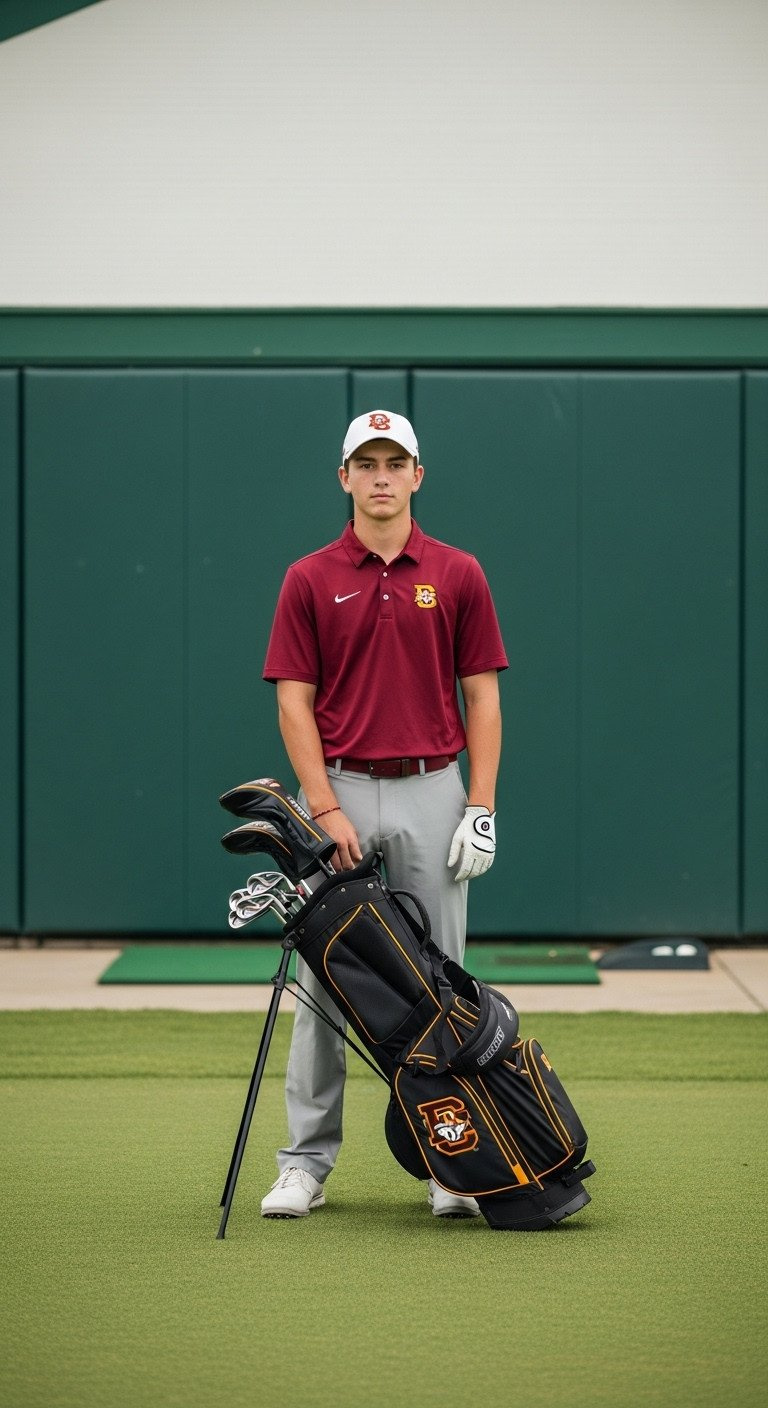
Incorporating the official high school uniform, team banner, or customized golf bag is essential for documenting the senior’s athletic journey and achievement. These photos are about identity and pride.
Preparation & Gear Needed:
- High School Golf Uniform (Cleaned and pressed)
- Team Banner or Flag (Check for school permission to use)
- Polished Golf Bag (Focus on embroidered name or school logo)
- Garment Steamer or Wrinkle Remover (to ensure the uniform looks sharp)
Execution Steps:
- Prep Gear: Ensure the uniform is wrinkle-free and all props (bag, hat) are clean.
- Find Neutral: Shoot against a clean, uniform background (like a simple green hedge or a plain wall) to let the uniform colors pop without competition.
- Posing: Opt for a proud, straight, slightly more formal pose. Have the senior hold the banner, or stand beside the bag, with a direct, confident gaze.
- Post-Processing: Enhance color saturation slightly in editing to make the team colors and emblem stand out sharply.
Pro-Tip: If using a high-contrast uniform (e.g., white and black), shoot in open shade or use fill flash to ensure the white doesn’t blow out and the black retains detail in the shadows.
8. The Telephoto Background Compression Trick
Pin this pro composition secret to your board!
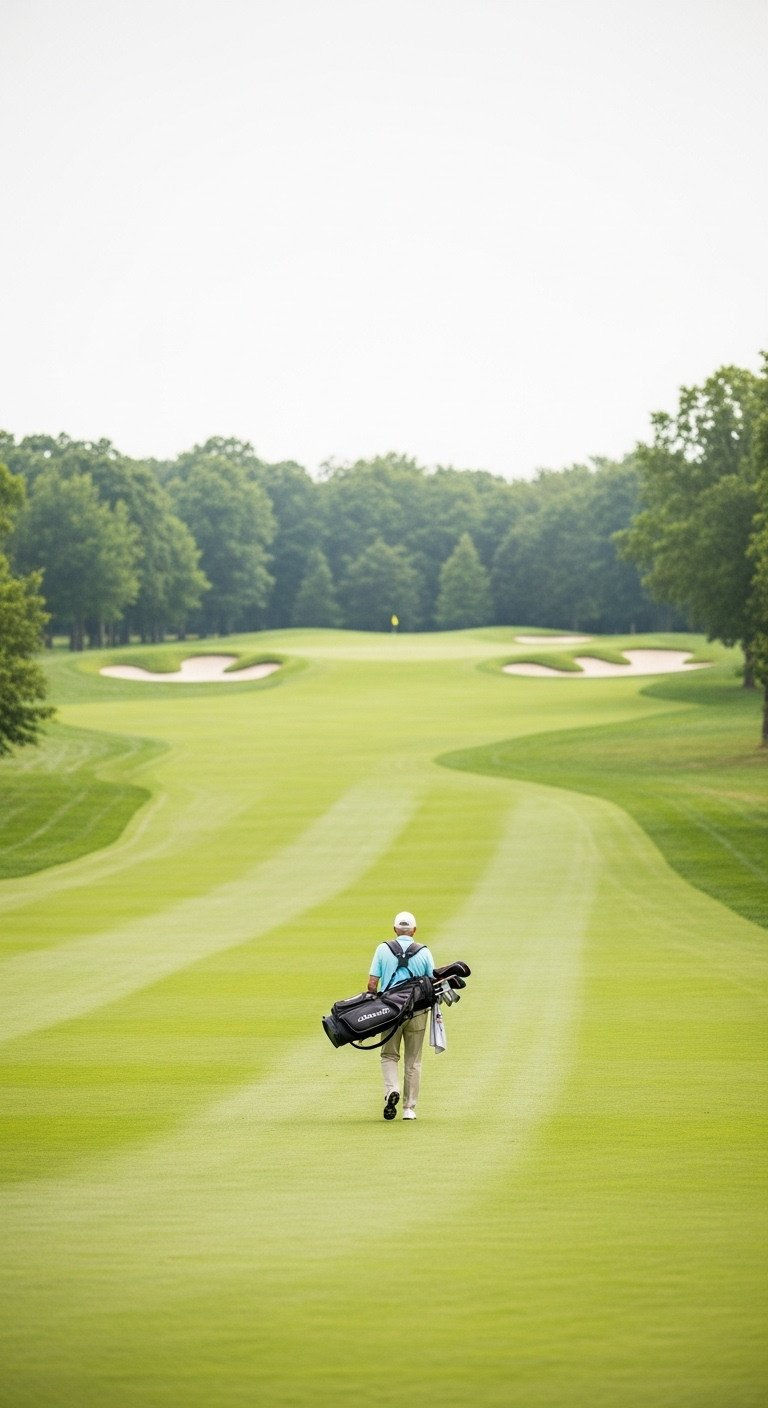
Telephoto Compression: This is an optical effect where using a long lens (like a 70-200mm) makes distant background elements appear closer and larger than they really are. This professional technique creates a dramatic, layered look and makes the golf course feel massive.
Preparation & Gear Needed:
- Telephoto Zoom Lens (70-200mm is standard, 200mm+ is even better)
- Radio Transmitters/Walkie-Talkies (to communicate with the senior who will be far away)
- Tripod or Monopod (to stabilize the long lens and ensure critical focus)
- Long, straight section of fairway or cart path
Execution Steps:
- Set Distance: Position the senior at least 50-70 feet away from the camera, on a long, straight section of the fairway.
- Zoom In: Zoom your lens to the longest focal length (200mm or more) and frame the senior relatively small in the frame, using the fairway lines as leading lines.
- Shoot Wide Open: Use a wide aperture (f/4.0 or lower) to isolate the subject, but rely on the compression to bring the distant background into apparent focus.
- Action: Ask the senior to walk naturally (or walk and talk) down the fairway. Use continuous autofocus (AF-C) to track them precisely.
Lesson Learned: Telephoto compression is also the ideal way to crop out unwanted people or maintenance equipment, making a busy course look clean and isolated.
9. Mastering Fill Flash to Beat Midday Sun Glare
Save this technical lighting hack for tricky shoots!
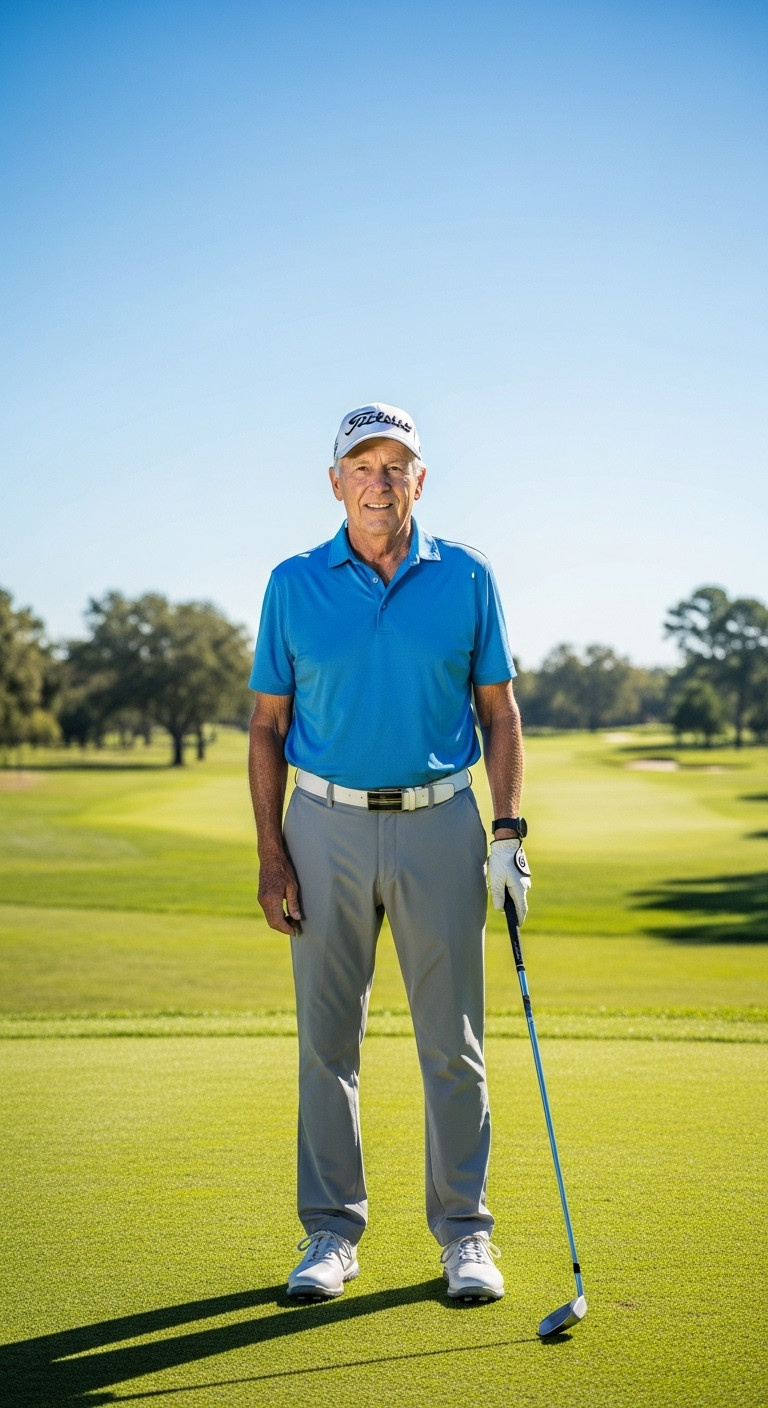
When a Golden Hour shoot isn’t possible, you’ll likely face the harsh midday sun, which creates dark shadows under the eyes and nose. Fill flash is the professional solution: using a speedlight to “fill in” those shadows for even, flattering light.
Preparation & Gear Needed:
- Off-Camera Speedlight or Strobe (with high-speed sync capability if possible)
- Wireless Flash Trigger (to fire the flash remotely)
- Flash Diffuser/Softbox (to soften the light and prevent harshness)
- Light Stand (to position the flash correctly)
Execution Steps:
- Expose for Background: Set your camera exposure to properly capture the background (the bright sky and green grass) without blowing out the highlights. This will make the senior look underexposed and shadowed.
- Power Up Flash: Position the off-camera flash (with the diffuser attached) slightly above and to the side of the senior, facing them.
- Balance Power: Set the flash power to about -1 or -2 stops below the ambient light exposure. The flash should fill in the shadows, not overpower the sun.
- Shoot: The flash will subtly lift the deep shadows under the eyes, nose, and chin, creating professional, even lighting despite the high sun.
Pro-Tip: If you don’t have a flash, use a large white reflector angled up at the senior’s face to bounce the sun’s light back into the shadows. This is safer but requires an assistant.
10. Creative and Unique Use of the Sand Bunker
Save this unique location idea!
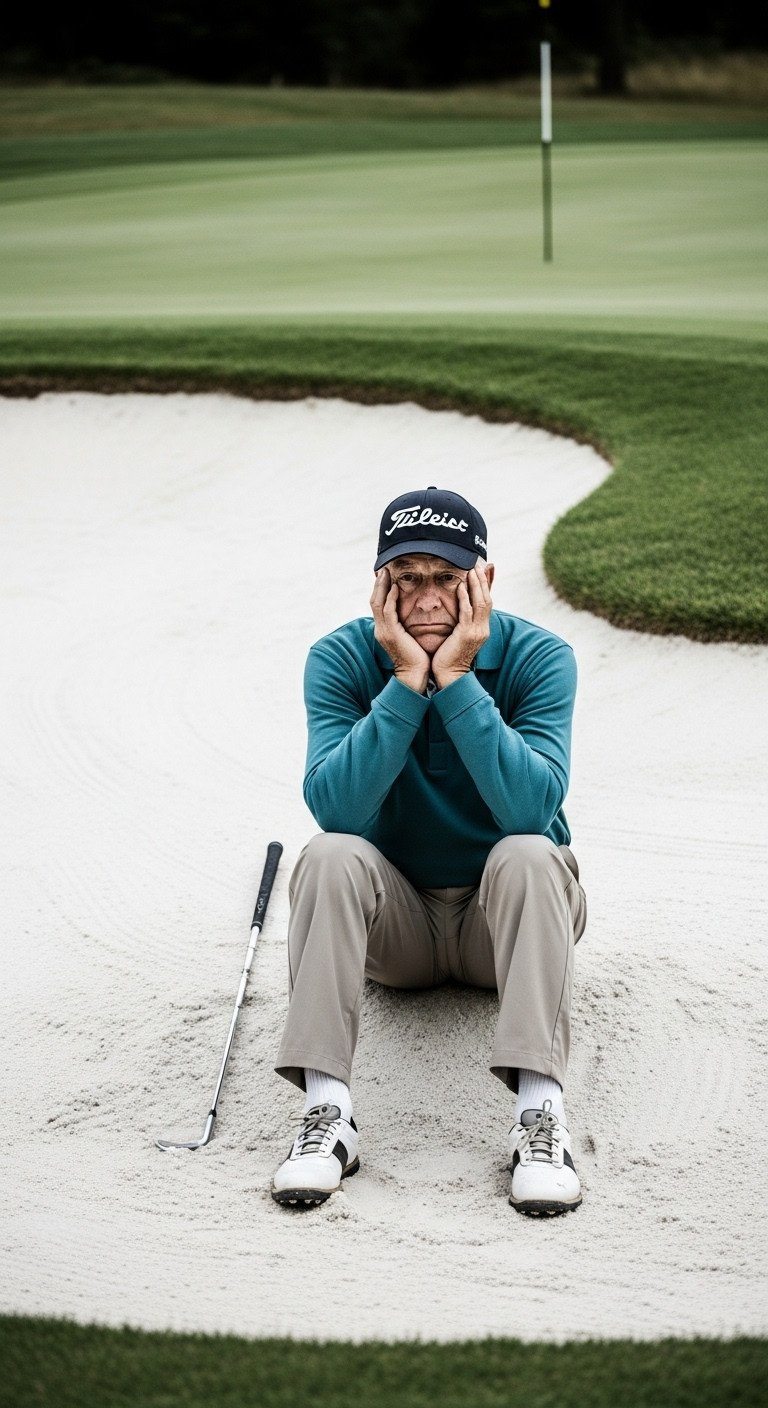
The sand bunker offers a unique, high-contrast location for a memorable and creative shot. The clean white sand and sharp edges of the bunker provide a fantastic texture and natural framing for a more thoughtful or even funny golf senior picture.
Preparation & Gear Needed:
- Cleanest Sand Wedge
- Small, non-marking towel (to protect clothing from dirt)
- Course Management Notification (warn them you’ll be in the bunker, but don’t damage the rake work)
- Broom or Rake (to clean up footprints immediately afterward)
Execution Steps:
- Find Clean Sand: Use a bunker with light, clean sand and an interesting shape. Rake the area immediately around the senior, leaving only intentional footprints or patterns.
- Position: Ask the senior to sit inside the bunker, near the lip, looking out toward the fairway. The depth of the bunker creates natural framing.
- Posing: Try two variations: a thoughtful, serious pose (resting elbows on knees) or a silly, dejected pose (covering face, pretending to cry over a bad shot).
- Clean Up: CRITICALLY IMPORTANT: Rake the bunker thoroughly after the shot is complete to respect course etiquette.
Lesson Learned: Do not use the greenside bunker of a hole currently in play; use a practice bunker or a non-essential bunker to avoid disrupting golfers and course maintenance.
11. The Ultimate College Commitment Shot
Save this shot for your college announcement!
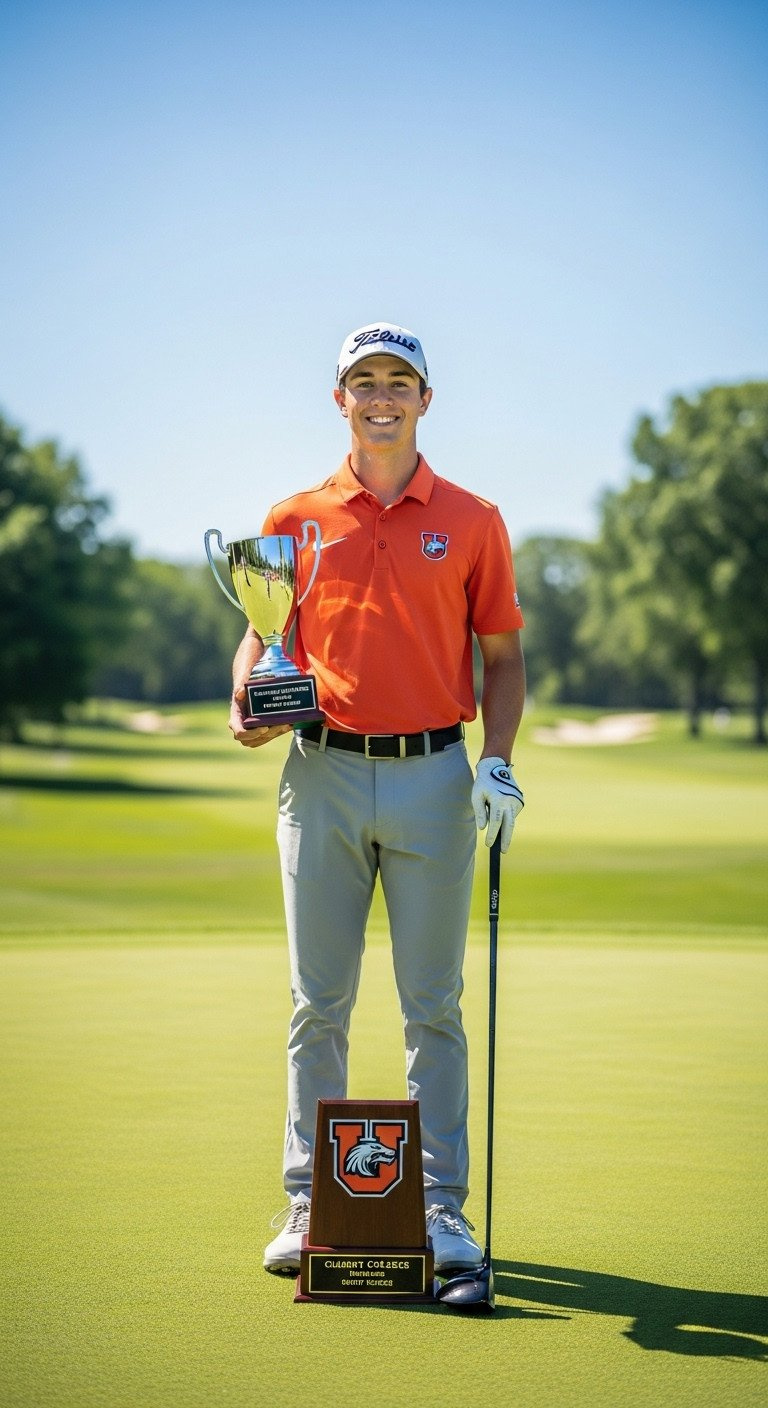
For the athlete moving on to play in college, a college commitment shot is the perfect way to document this huge milestone. This photo bridges the gap between high school achievements and future aspirations.
Preparation & Gear Needed:
- College Apparel (Hat, polo, sweatshirt—ensure logos are prominent)
- Major Trophies, Plaques, or Awards (Polished and dust-free)
- Graduation Cap and Gown (Optional, for a more formal touch)
- Customized Golf Balls (With the college logo, if available)
Execution Steps:
- Gather Symbols: Combine elements of the past (trophy, high school club) with the future (college apparel, custom balls).
- Pose Strategy: Use a strong, upright pose. Hold the trophy/award prominently in one hand and a driver or putter in the other, or set the props up around the senior’s feet.
- Direct Focus: Direct the senior’s eyes toward the camera for a confident, celebratory look, or have them look proudly at the trophy.
- Framing: If using a graduation cap, place it on a clean golf ball or clubhead on the ground near the senior’s feet for an artistic framing element.
Pro-Tip: If using a high-end metal trophy, be aware of reflections. Position the senior so the trophy reflects clean sky or grass, not the photographer or equipment.
Key Takeaways: Your Quick Golf Senior Photo Shot List
Feeling inspired? Here is a quick, scannable checklist of the most important takeaways to ensure your golf senior pictures are a success.
- Top 7 Essential Golf Senior Picture Takeaways:
- Timing is Everything: Book your shoot during the Golden Hour (the 60 minutes before sunset) for the softest, most flattering light, avoiding deep shadows.
- Go Fast for Action: Set your camera shutter speed to 1/1250th of a second or faster to guarantee freezing the golf swing without motion blur.
- Clean Your Props: Spend time cleaning and polishing all clubs and awards beforehand. Matte spray the driver head if glare is an issue.
- Master Bokeh: Use a wide aperture (f/1.8 to f/4) and create at least 20 feet of distance between the subject and background for a creamy, professional blur.
- Secure Permission: Always obtain written authorization and confirm non-peak times with course management before setting foot on the property.
- Use Fill Light: When shooting mid-day, use a powerful reflector or fill flash to lift harsh shadows from the senior’s eyes and face.
- Vary the Poses: Create a shot list that includes Static (clubhouse), Action (swing), Prop-Focused (trophies/uniform), and Unique Location (bunker, bridge) shots for a comprehensive portfolio.
People Also Ask About Golf Senior Photography Logistics
How much does a professional senior golf photoshoot typically cost?
The cost for a professional senior golf photoshoot typically ranges from $300 to $800, depending on the photographer’s experience, geographic location, and package inclusions. Specialized sports photographers who use off-camera lighting and high-speed gear may charge towards the higher end, often including a set number of professionally edited digital files and high-end prints.
What should a boy or girl wear for golf senior pictures?
The best apparel is a mix of three outfits: 1) The official high school golf uniform or team gear (essential for documentation), 2) Formal golf attire (collared polo, crisp slacks/skirt) for classic portraits, and 3) A casual, lifestyle look (jeans, plain shirt) that reflects their personality when not on the course. Choose colors that contrast slightly with the deep green of the grass.
Do I need a permit or special permission to take pictures on a golf course?
Yes, absolutely. Nearly all private and high-end public courses require advance permission, often accompanied by a small fee or liability waiver. Always contact the Pro Shop or Course Management at least two weeks before your planned shoot date to confirm rules, availability, and specific areas where photography is permitted.
Where on the golf course makes the best background besides the green?
The best backgrounds are the large, manicured fairway areas and clean tee boxes, which provide expansive, uncluttered green space and strong leading lines. Avoid parking lots, maintenance sheds, or areas where the turf is thin or damaged. Bridges, rustic water hazards, and specific architectural details of the clubhouse are also excellent, unique backgrounds.
What aperture setting should I use to get a blurry background (bokeh)?
To achieve a creamy, blurred background (bokeh), use the widest aperture setting available on your lens, typically f/1.8, f/2.0, or f/2.8. This shallow depth of field isolates the senior and emphasizes the subject. Ensure the senior is placed far away from the background elements (20+ feet) to maximize the blurring effect.
Final Thoughts
Planning and executing the perfect golf senior portrait session involves marrying artistic vision with technical precision. By applying these 11 secrets—from the precise timing of Golden Hour to the technical mastery required to freeze a perfect swing—you move beyond generic images and create high-quality keepsakes that genuinely celebrate the senior’s journey and dedication to the sport. Your senior pictures should tell a powerful story of achievement and potential, and now you have the professional blueprint to ensure they do just that.
Which of these 11 professional secrets are you most excited to try in your next 2025 senior shoot, and what is the one unique prop you absolutely plan to include? Let us know in the comments below!
Last update on 2025-11-15 / Affiliate links / Images from Amazon Product Advertising API

