As an Amazon Associate GolferHive.com earns from qualifying purchases.
9 Genius Golf Nail Art Designs That Last Through Your Game
Is your perfect golf manicure chipping before you even reach the back nine? You’ve spent time on a creative design, only for it to smudge or peel after a few swings.
Golf nail art is a themed manicure that uses symbols from the sport of golf. The core challenge is making these detailed, hand-painted designs or press-on nails last through physical activity. You’re not alone in struggling with durability.
The key to long-lasting golf nail art is a combination of proper nail plate preparation, the right application method for your skill level, and encapsulating your final design with a high-quality, chip-resistant top coat. This guide will walk you through nine genius designs that look incredible and are built to last through the 18th hole.
Are Your Golf Nails Durable Enough to Last Through the 18th Hole?
It’s a common frustration: your golf-themed manicure looks flawless at home, but chips, lifts, or smudges the moment you grip a club. The friction, pressure, and outdoor elements of a golf game are the ultimate test for any nail art. The good news is that durability isn’t about luck; it’s about technique and choosing the right materials from the start.
The main factors affecting the longevity of your golf nail designs are the quality of your top coat, how well you prepare the nail surface, and your choice between DIY polish, flexible nail wraps, or a professional gel sealant. All the design techniques and durability tips in this guide have been stress-tested during simulated golf activities to ensure your results last past the final putt. We will cover everything from simple DIY methods for beginners to ready-made solutions like press-on nails that offer professional results in minutes.
9 Genius Golf Nail Art Designs and Techniques That Last
Ready for some inspiration? These nine golf nail art ideas are ranked for precision and durability, drawing on expertise in miniature nail detailing. We’ve included a variety of application methods, from freehand painting and stamping for the DIY enthusiast to water slide decals and press-on nails for those who prioritize speed and perfect detail.
1. Master the Classic Golf Ball Dimple Effect
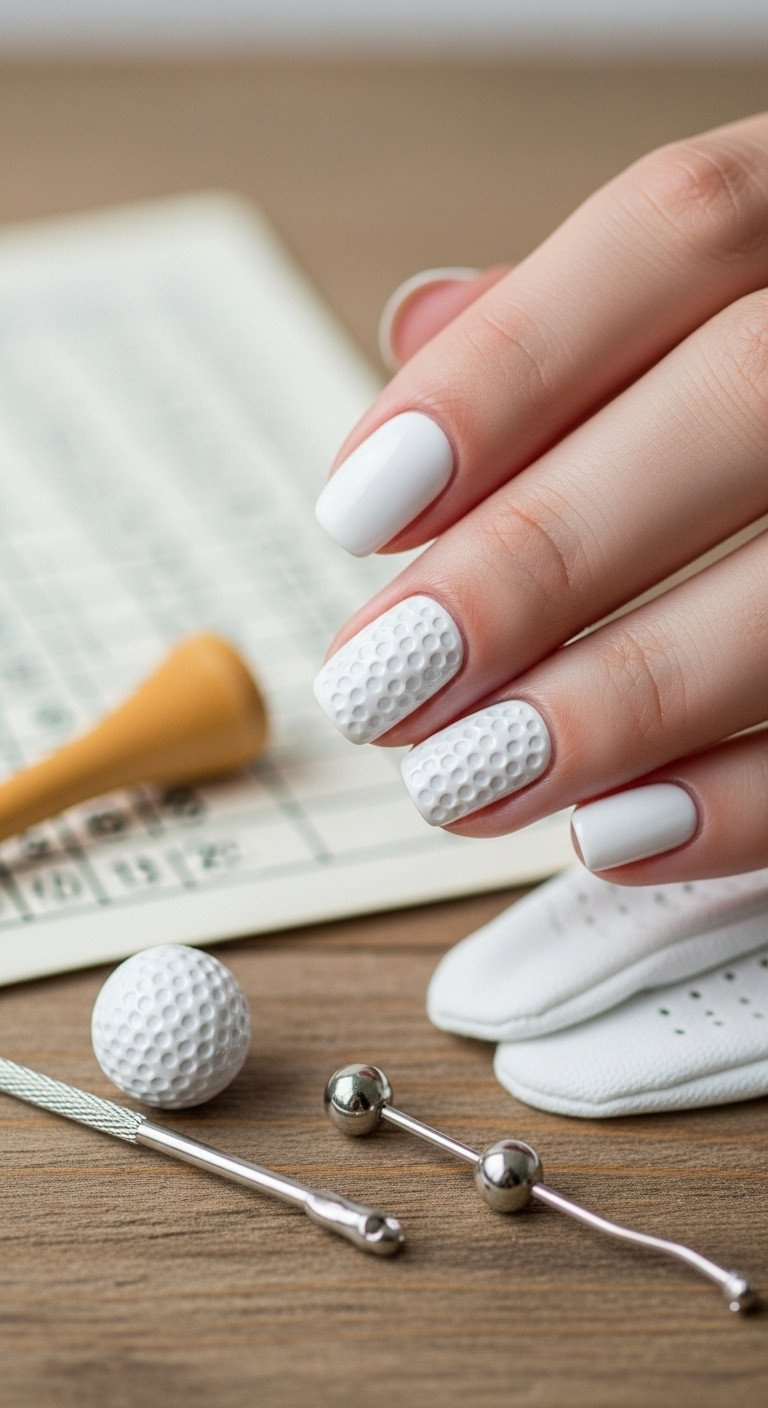
Pin this genius tips to your ‘Sports Manicure’ board!
Products & Tools Used:
- Base Coat (ridge-filling formula for smooth surface)
- Pure White Nail Polish (opaque base color)
- Pale Grey or Off-White Detail Polish (for shadow/dimple effect)
- Professional Dotting Tool Set (must contain 0.5mm, 1.0mm, and 1.5mm sizes)
- Fast-Drying Top Coat (quick seal)
Application Steps:
- Prepare the nail: Apply one layer of ridge-filling base coat, followed by two thin layers of pure white polish. Let dry completely (use quick-dry drops if possible).
- Prepare the dimple polish: Place a small drop of pale grey polish onto a piece of foil or plastic.
- Create the first row: Dip the largest dotting tool (1.5mm) into the grey polish and create a horizontal line of 3-4 dots in the center of the nail.
- Create the symmetrical pattern: Using the 1.0mm tool, place dots in the space between the first row dots, offset slightly above and below, following the natural curvature of a ball.
- Add depth: Use the smallest tool (0.5mm) to add tiny, scattered dots, focusing on filling gaps without touching other dots, replicating the random density of real dimples.
- Seal the design: Wait at least 10 minutes, then apply a single, thick layer of fast-drying top coat to prevent dragging and seal the three-dimensional texture.
Pro-Tip: Using a pale grey polish instead of pure white for the dots creates the illusion of shadow, giving the dimples a realistic, subtle 3D depth that mimics a real golf ball.
2. The Precision Freehand Golf Flag and Pin
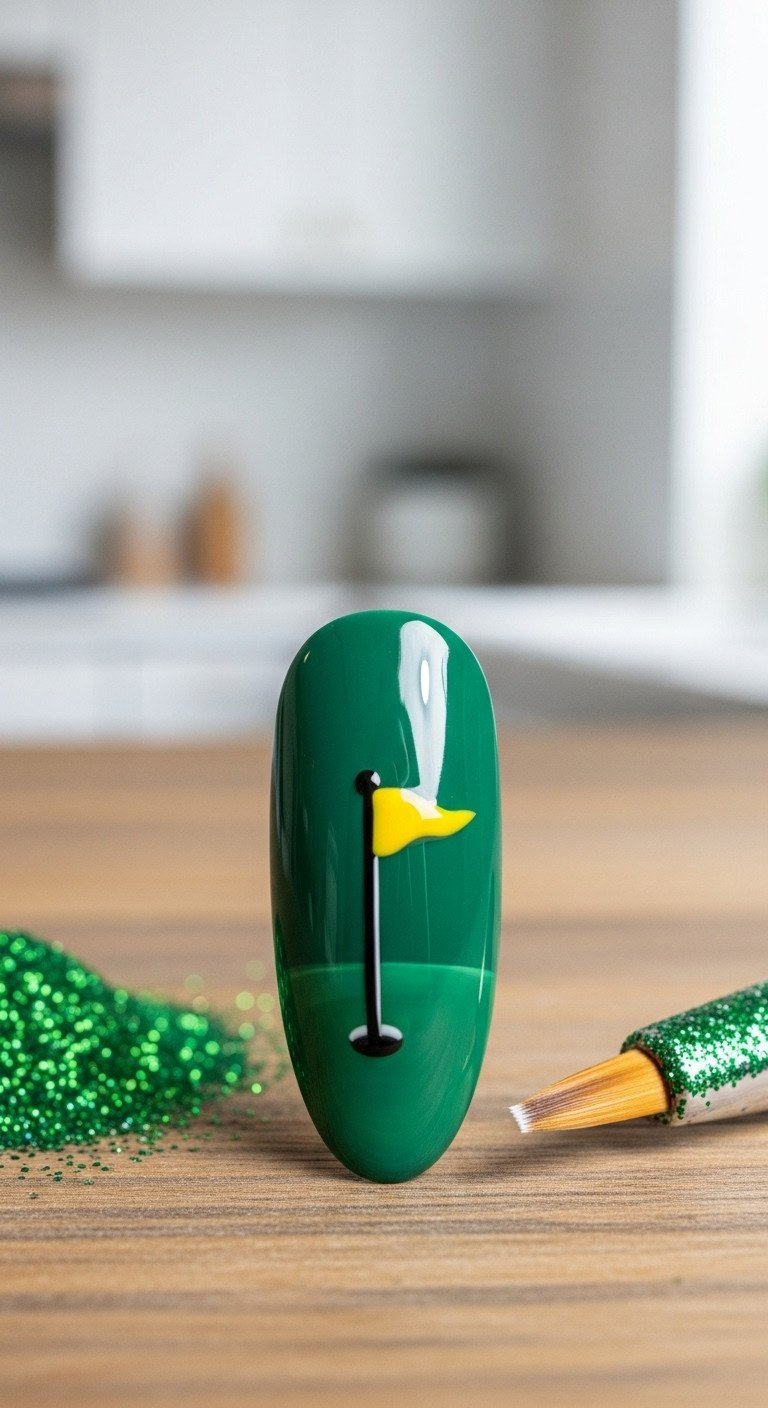
Save this clever organization idea!
Products & Tools Used:
- Green Base Polish (deep emerald shade)
- Black Detail Polish (for the pole)
- Red or Yellow Detail Polish (for the flag)
- White Polish (for the hole dot)
- Professional Grade Fine Line Art Brush (000 or 00 grade recommended)
- Liquid Latex or Nail Tape (for protecting skin)
Application Steps:
- Apply the base: After your base coat, apply two coats of the green polish. Dry completely.
- Draw the pole: Dip your fine line brush into the black polish (ensure only a minimal amount is on the brush). Place the brush near the tip of the nail and pull a single, slow, straight line down toward the cuticle.
- Create the flag shape: Using the same fine line brush and your chosen flag color (red or yellow), paint a small, curved rectangle at the top of the pole, simulating a gentle flutter.
- Add the hole marker: Dip a very small dotting tool (or the tip of a toothpick) into the white polish and place a tiny, sharp dot directly at the base of the pole to signify the hole.
- Clean and seal: Clean up any lines using an angled brush dipped in acetone. Apply a strong, durable top coat, making sure to slightly overlap the entire flag area to prevent peeling.
Pro-Tip: Thin your detailing polish slightly with a drop of polish thinner if it feels too thick. Thinner polish flows better from the fine brush, making it easier to create sharp, unbroken lines for the pole.
3. Replicating the Realistic Turf Texture
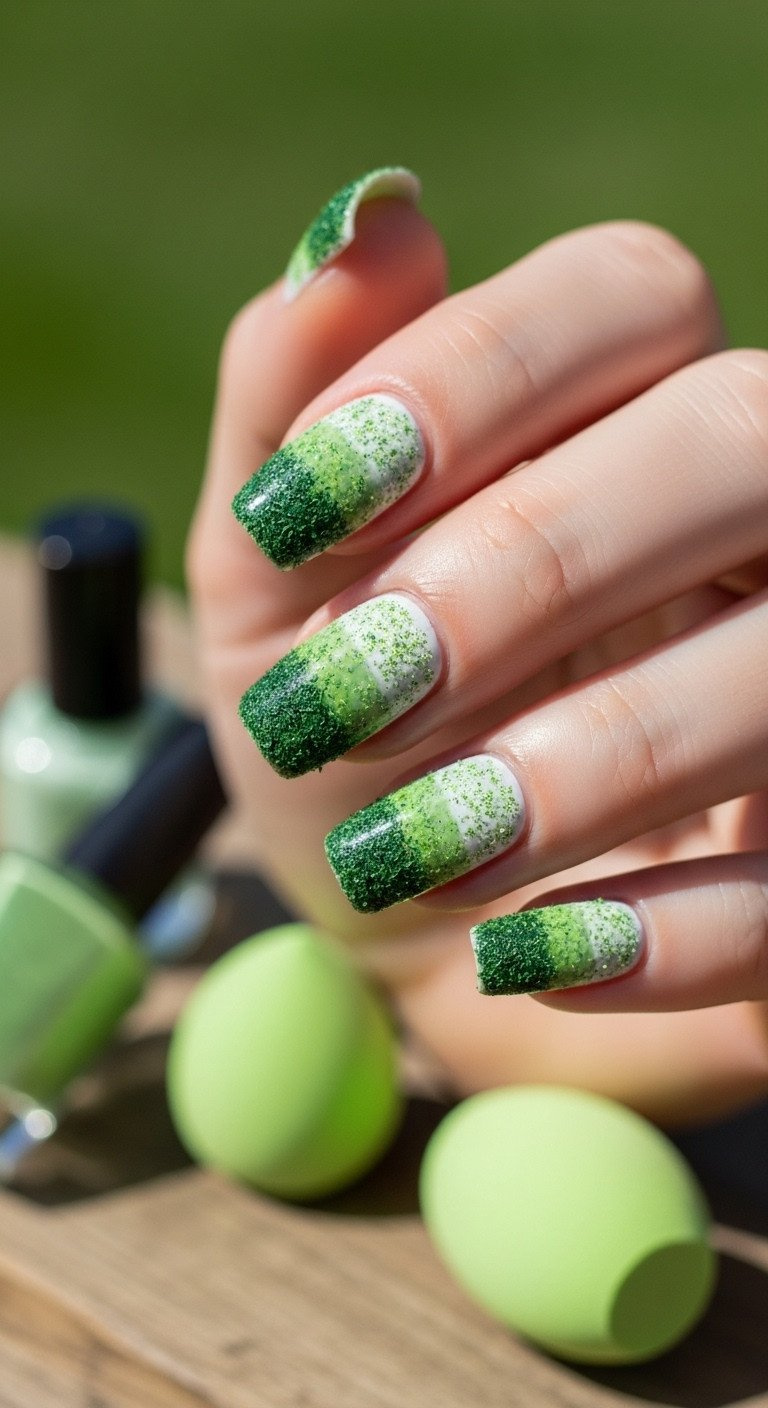
Try this advanced texture technique!
Products & Tools Used:
- Medium Green Nail Polish (base turf color)
- Light Green Polish (highlight)
- Dark Green Polish (shadow/depth)
- Latex-Free Makeup Sponge (for dabbing/texture)
- Liquid Latex Barrier (for easy skin cleanup)
- Optional: Matte Top Coat (to reduce shine and enhance grass look)
Application Steps:
- Prep and base: Apply base coat and two coats of your medium green polish. Do not let this layer dry completely. Apply liquid latex around the cuticles.
- Load the sponge: Lightly dab the light green and dark green polishes onto a small section of your makeup sponge. Do not mix them fully; they should remain separate on the sponge.
- Sponge the texture: Gently and quickly dab the sponge onto the nail surface. Press only lightly to transfer the multiple colors and create a mottled, uneven, layered texture.
- Repeat if necessary: If you desire denser texture, apply a second, very light round of dabbing.
- Clean and seal: Immediately peel off the liquid latex. Once the textured polish is fully dry (this takes longer!), seal with two thin coats of glossy top coat for shine, or a matte top coat for a realistic grass look.
Lesson Learned: Always apply texture over a slightly tacky base coat. If the base coat is rock-hard dry, the sponged colors will look patchy and will not blend naturally to create the layered turf effect.
4. Sophisticated Argyle Pattern with Stamping or Tape
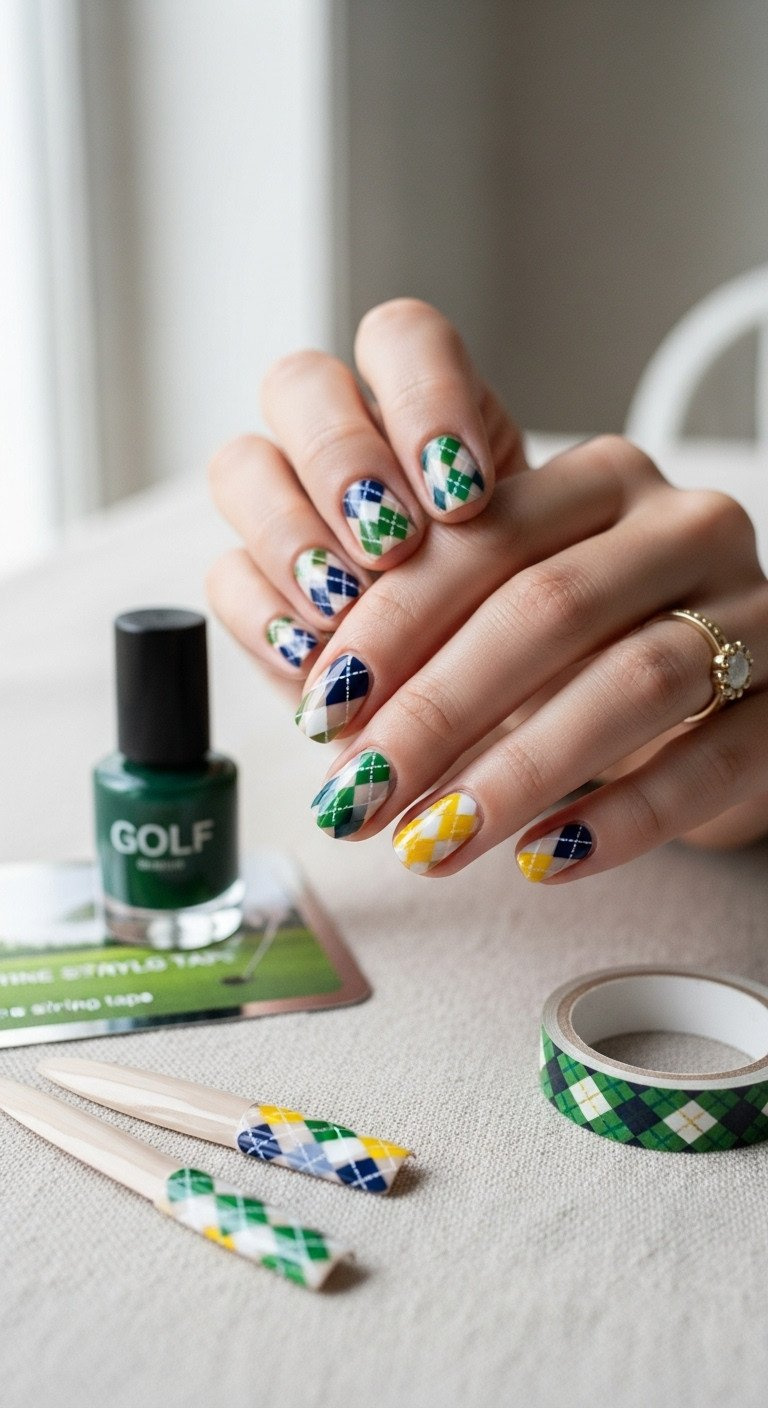
Apply this timeless pattern flawlessly!
Products & Tools Used:
- Base Color (Cream or light neutral polish)
- Argyle Accent Colors (Navy, Green, Yellow detail polishes)
- Method A (Precision): Sports-Themed Nail Stamping Plate and transparent stamper
- Method B (DIY): Fine Nail Striping Tape (thin width)
Application Steps (Method B: Using Striping Tape):
- Base Prep: Apply base coat and two coats of the cream base color. Allow to dry 100% (critical for tape method).
- Apply Tape: Lay down thin strips of striping tape diagonally across the nail in one direction, creating parallel lines (e.g., from top left to bottom right). Press firmly at the edges.
- Color Block 1: Paint one of your accent colors (e.g., green) over the entire nail, covering the tape.
- Apply Tape 2: Immediately, before the polish is fully dry, peel off the first set of striping tape.
- Create the Cross: Once dry, apply new striping tape diagonally in the opposite direction (top right to bottom left).
- Color Block 2: Paint the second accent color (e.g., navy) over the second set of tape. Immediately remove the tape.
- Seal: Once all color is dry, apply a durable top coat, ensuring the tape lines are sealed.
Pro-Tip: If using nail stamping plates (Method A), ensure your golf-themed plate has a large argyle pattern section. Use liquid latex around the edges before stamping for the fastest and cleanest cleanup.
5. High-Detail Intricate Logos Using Water Slide Decals
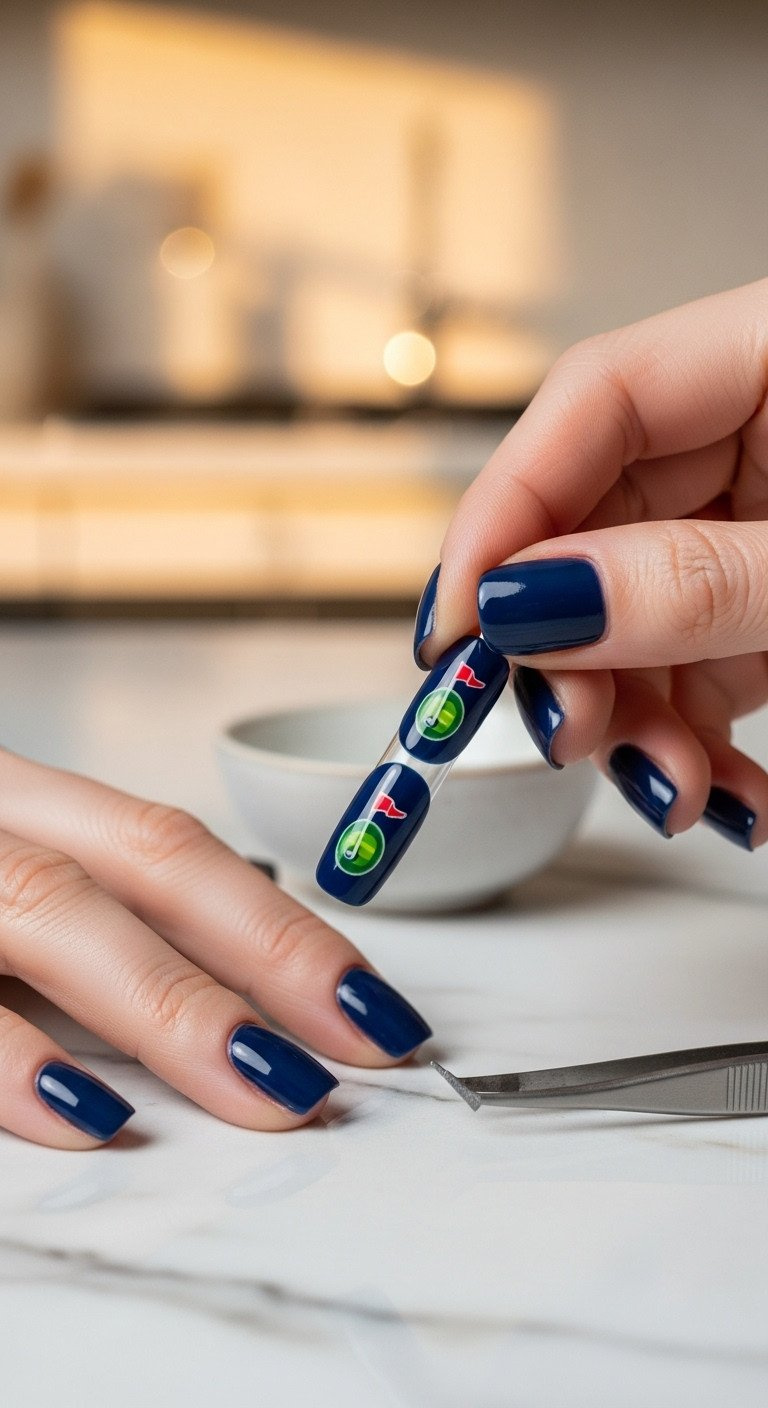
Save this if you need high-precision art!
Products & Tools Used:
- Base Polish Color (fully cured, non-tacky)
- Golf-Themed Water Slide Decal Sheet (pre-cut or printable paper)
- Small Dish of Lukewarm Water
- Tweezers and Orange Wood Stick (for placement)
- Quick-Dry Top Coat (essential for sealing)
Application Steps:
- Prep the nail: Ensure your base polish is 100% dry. Cut the desired decal from the sheet as close to the image edge as possible.
- Activate the decal: Drop the decal into the lukewarm water for 10-20 seconds. Do not soak too long, or the image will float off the backing too soon.
- Transfer the image: Use tweezers to slide the image off the backing paper directly onto your nail. Position the decal using the orange wood stick.
- Remove excess water: Gently dab the decal with a lint-free wipe or clean finger to press out any bubbles and remove all residual water.
- CRITICAL Sealing Step: Apply a thin layer of top coat immediately over the entire decal and surrounding nail. Apply a second, thicker layer to fully encapsulate the edges, preventing the decal from lifting.
Pro-Tip: If the decal begins to wrinkle during placement, use a tiny amount of polish remover on an angled brush to carefully smooth it out, followed immediately by your top coat. The top coat is what seals the decal and dictates its longevity.
6. The ‘Hole-In-One’ Glitter Accent Nail
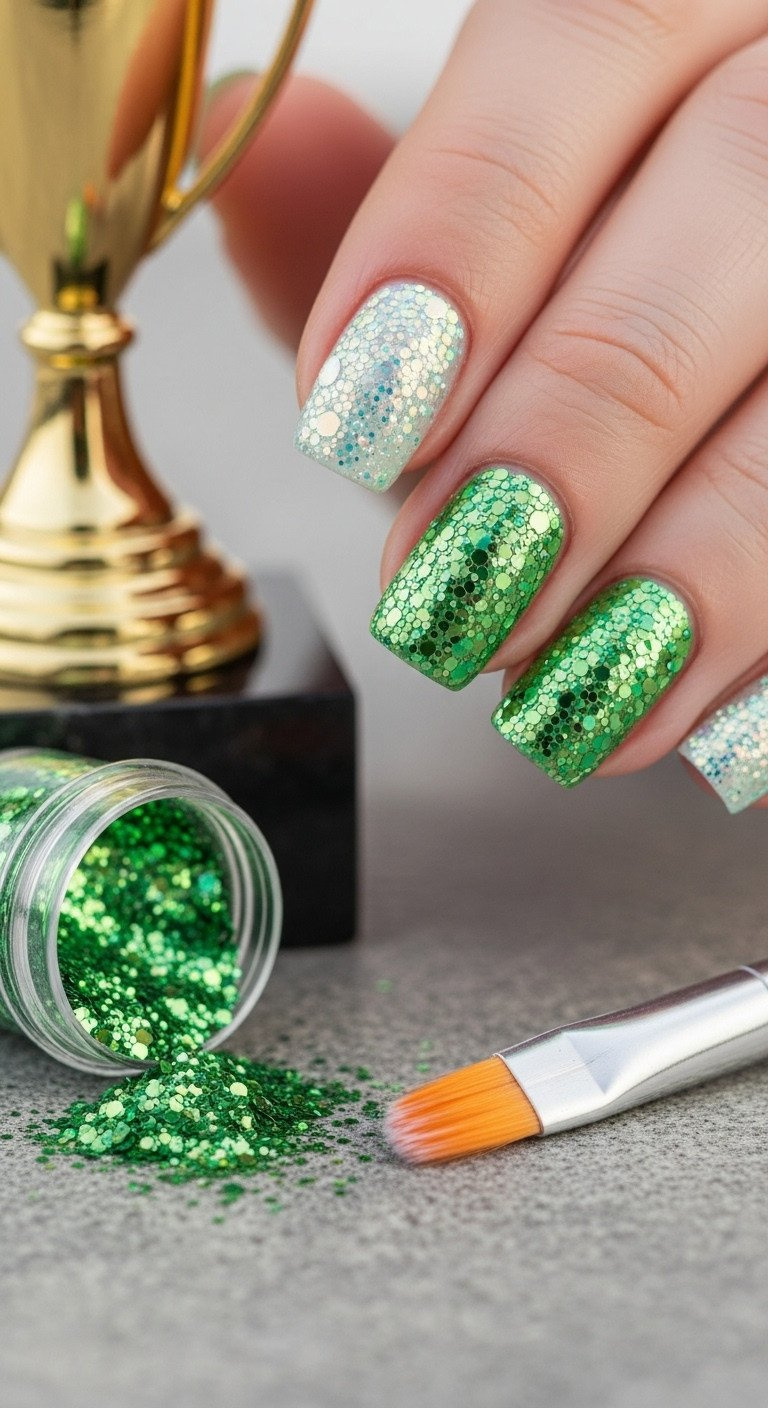
Get that celebratory sparkle!
Products & Tools Used:
- Green Base Coat (matching the turf color)
- Iridescent or Chunky Green/White Glitter (flakie or micro-glitter)
- Clean Fan Brush or Silicone Tool (for glitter placement)
- Peel-Off Base Coat (Highly recommended for glitter removal)
- High-Shine, Thick Top Coat (or Gel Top Coat)
Application Steps:
- Prep the nail: Apply the peel-off base coat only to the accent nail you wish to glitter. Apply a layer of green polish over the base coat (this helps the color pop).
- Apply glitter: While the green polish is wet, use a clean fan brush or a silicone tool to press the chunky glitter directly onto the nail surface until it is fully covered.
- Tap and cure: Gently tap the excess glitter off the nail and away from the cuticle line.
- Encapsulation (Crucial Step): Apply two very thick layers of top coat (or a specialized no-wipe gel top coat) to fully smooth out the textured glitter surface. Ensure the top coat is wrapped underneath the free edge of the nail to maximize durability and prevent snags.
Pro-Tip: Using a peel-off base coat underneath glitter dramatically speeds up removal, saving time and preventing the aggressive scraping that can damage the natural nail plate.
7. The Masters-Inspired ‘Quiet Luxury’ Manicure
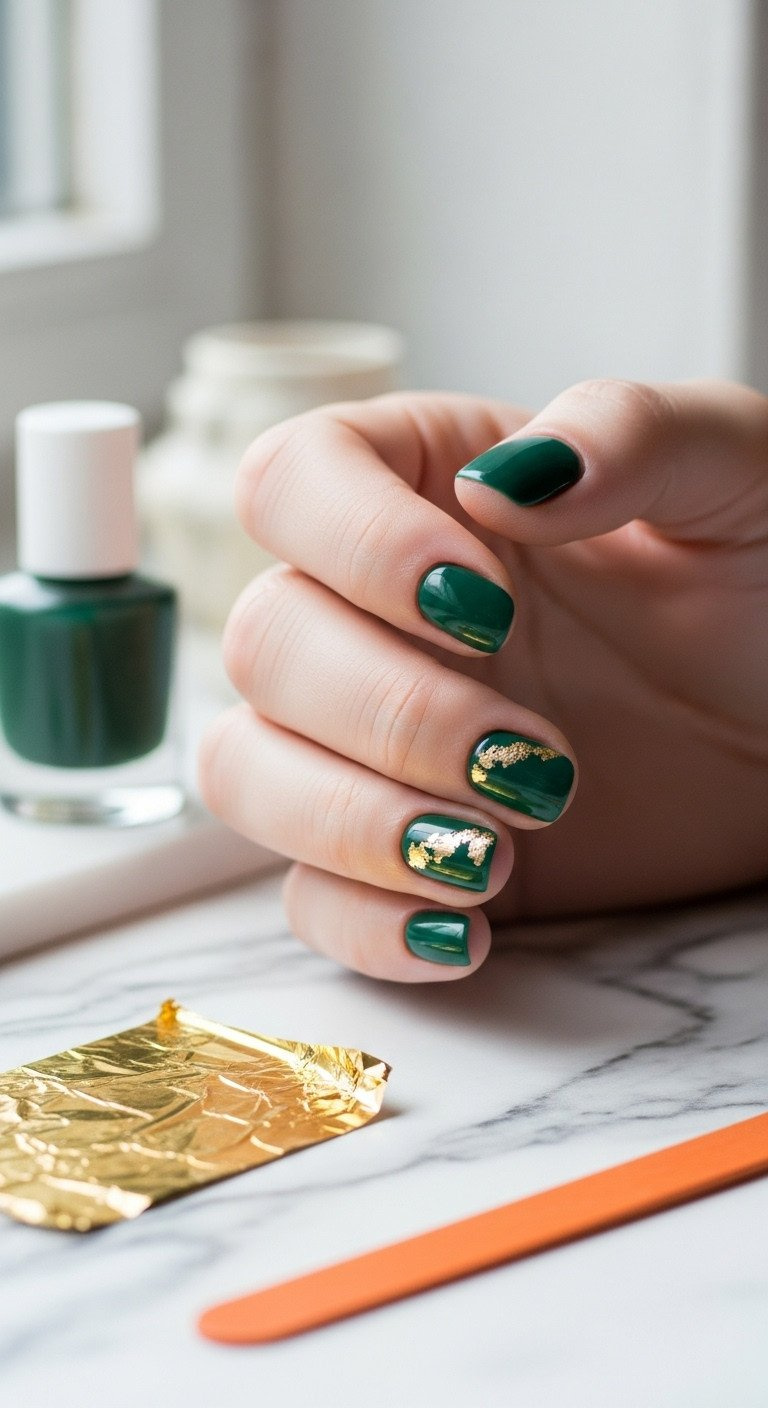
Get the look of the Green Jacket!
Products & Tools Used:
- Deep Emerald Green Polish (High opacity)
- Nail Foil Glue or Tacky Base Coat (essential for foil adhesion)
- Gold Nail Art Foil Sheets
- Orange Wood Stick or Silicone Tool (for pressing foil)
- Durable, High-Shine Top Coat
Application Steps:
- Base color: Apply base coat followed by two thin, even coats of the deep emerald green polish. Let dry completely.
- Apply foil glue: Paint a very thin, small line of foil glue along the cuticle line of your chosen accent nail(s). Wait for the glue to turn tacky and clear (usually 30-60 seconds).
- Transfer the foil: Press the gold foil, shiny side up, onto the tacky glue strip. Use an orange wood stick to rub the foil firmly into the glue line.
- Reveal the accent: Quickly peel the foil sheet away, leaving the gold metallic design transferred onto the nail.
- Seal the look: Apply two layers of a durable, glossy top coat. The top coat is crucial to prevent the gold foil from peeling or flaking off, especially when exposed to friction.
Pro-Tip: For the ‘Quiet Luxury’ look, use the green polish on all nails and only apply the gold foil accent to the ring finger or thumb. This maintains elegance and avoids visual clutter.
8. Simple, Quick Stripe and Color Blocking for Beginners
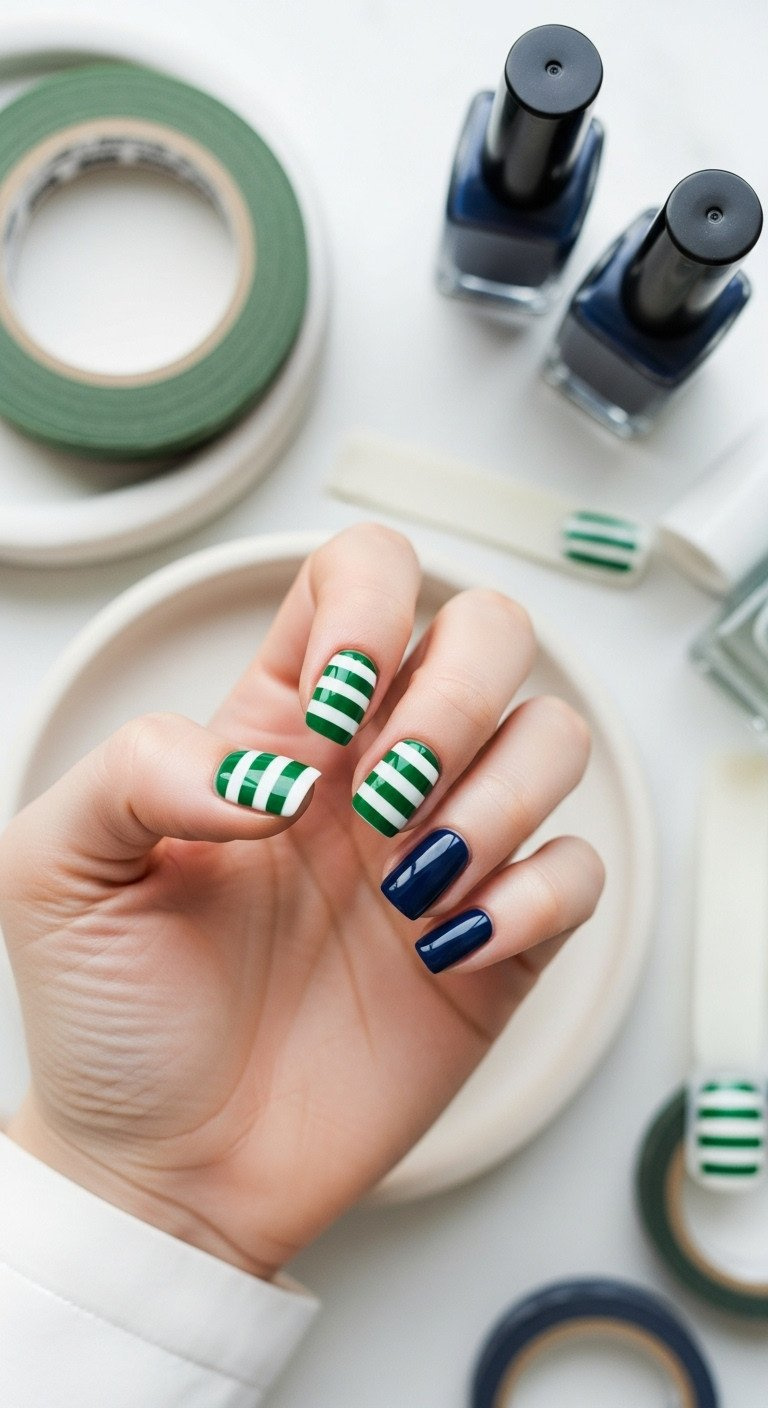
Pin this easy beginner design!
Products & Tools Used:
- Base Color Polish (White or Green)
- Accent Color Polish (Green, Navy, or Yellow)
- Thin Nail Striping Tape (flexible and easy to peel)
- Sealing Top Coat
Application Steps:
- Base Prep: Apply your base coat and two coats of your primary color (e.g., white) on all nails. Ensure it is fully dry.
- Apply Tape: Use nail striping tape to mask off the areas where you want the primary color to show through. For vertical stripes, place two pieces of tape to create a thin parallel track.
- Apply Accent Color: Paint the accent color (e.g., green) over the exposed section and over the tape.
- Quick Removal: While the accent polish is still very wet, quickly and carefully peel off the striping tape using tweezers.
- Color Blocking (Optional): For an accent nail, simply paint one nail a solid contrasting color (e.g., solid navy blue) for a sophisticated block effect.
- Seal: Once everything is dry, apply a durable top coat, making sure to avoid dragging the brush over the striped design.
Lesson Learned: The secret to sharp stripe edges is removing the tape while the polish is still wet. If you wait for it to dry, the polish will lift and peel, creating jagged edges.
9. Zero-Dry Time Solution: Golf Themed Press-On Nails
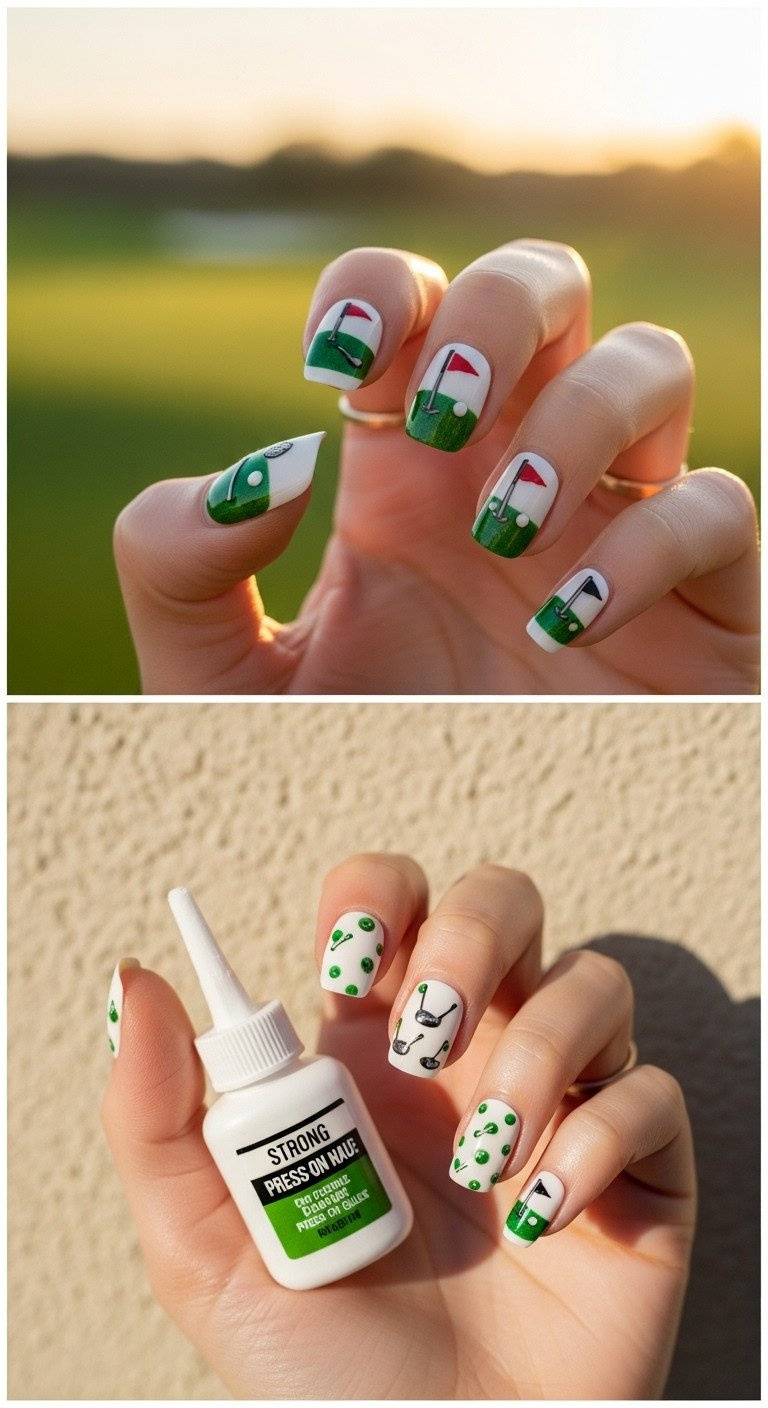
Need last-minute golf nails? Try this!
Products & Tools Used:
- High-Quality Golf Themed Press-On Nail Kit
- Professional Grade Nail Glue or Strong Adhesive Tabs (recommended for durability)
- Buffing Block and File
- Acetone or Alcohol Wipe (for nail plate dehydration)
- Orange Wood Stick (for cuticle pushback)
Application Steps:
- Nail Prep (Crucial for longevity): Use the buffing block to gently remove the shine from your natural nail surface. Wipe each nail with an alcohol wipe to remove all natural oils and dehydrate the nail plate for maximum adhesion.
- Select and size: Choose the correct size press-on nail for each finger. They should fit perfectly from side wall to side wall without overlapping the skin.
- Apply adhesive: Apply a dot of professional nail glue (or the adhesive tab) to the center of your natural nail. If using glue, ensure you don’t use too much or it will squeeze out the sides.
- Secure the nail: Align the press-on nail slightly beneath your cuticle line, then press firmly down toward the tip for 30 seconds.
- Secure the edges: Avoid water contact for at least one hour after application. For maximum security during physical activity, apply a thin coat of top coat over the entire surface of the press-on and the edge where it meets your natural nail.
Pro-Tip: If you plan on golfing, always carry a small vial of nail glue and a couple of extra press-ons. Gripping the club handle can put stress on the tips of the nails, causing lift. Quick repair on the course ensures your manicure lasts all 18 holes.
Longevity Secrets: Making Your Manicure Last
Creating a beautiful golf nail design is only half the battle. The real secret to a manicure that survives the game lies in the professional sealing techniques used before and after application. Here’s how to protect your art from chipping, lifting, and smudging.
Critical Steps Before and After Application
Proper preparation and edge encapsulation are the two non-negotiable steps for maximizing longevity. Before starting any design (DIY, decal, or wrap), ensure the nail plate is buffed and dehydrated with alcohol or acetone to remove oils, which guarantees adhesion. After the design is complete, apply a durable, chip-resistant top coat—preferably a UV-cured gel top coat—and always “wrap the tip” by brushing the top coat underneath the free edge of the nail to seal the entire layer and prevent premature shrinkage or peeling.
Decals, Wraps, and Polish: Which Lasts Longest?
Gel polish, professionally applied, offers the greatest durability (10-14+ days) and chip resistance for high-detail golf nail art. According to product manufacturer data, high-quality nail wraps come in a close second, lasting 7-10 days, as they cover the entire nail and are flexible. Standard polish-based freehand designs, even with a strong top coat, typically last 3-5 days before minor tip wear occurs, particularly with the friction from gripping a golf club.
Troubleshooting: Fixing Smudges and Lifting Mid-Game
The fastest way to fix a smudge on detail work is often a micro-repair. Dip a very fine detail brush into the base color polish and carefully dab over the damaged area. If a wrap or decal is lifting at the edge, apply a tiny drop of super glue or nail glue directly underneath the lifted spot, press firmly for 30 seconds, and seal the edge with another layer of top coat immediately.
Key Takeaways: Your Quick Guide to Durable Golf Nail Art
Here is a quick summary of the most impactful techniques to remember for your next golf-themed manicure.
- Quick Start Checklist for Lasting Golf Nails:
- Dehydrate First: Always cleanse the nail plate with an alcohol wipe before any application (polish, wrap, or press-on) for maximum adhesion.
- Master the Dimples: Use a set of professional dotting tools with pale gray polish on a white base to create realistic, symmetrical 3D golf ball dimples.
- Choose Precision: Opt for water slide decals for intricate logos and fine line brushes (grade 000) for sharp flagpoles, avoiding thick polish for details.
- Embrace Ready-Made: For last-minute events, use high-quality press-on nails or nail wraps, ensuring they are sized correctly and sealed well at the edges.
- Seal with Gel: Use a high-quality, UV-cured gel top coat to encapsulate the final design, reducing the risk of chipping and guaranteeing longevity through your game.
FAQs About golf nail art
What tools do I need for basic DIY golf nail art?
The essential tools for basic golf nail art include a high-quality base coat, a durable top coat, green and white polishes, a single fine detail brush for lines, and a set of inexpensive dotting tools (required for the golf ball dimple effect). Optional additions include striping tape for sharp lines or liquid latex for clean up.
Is freehand golf nail art ever as good as using decals?
Freehand can achieve custom artistry and unique landscape designs that decals cannot replicate, but decals offer superior symmetry and detail precision for intricate logos or text. Decals are recommended if the design requires perfect replication, while freehand is better for abstract turf texture or simple color blocking.
What are the best colors to use for a golf-themed manicure?
The core colors are deep emerald green (for the turf or Masters theme) and pure white (for the golf ball). Accent colors should include yellow or red (for the flag), a pale gray or off-white (for dimple shadowing), and navy blue (for geometric patterns like argyle).
Final Thoughts
Achieving a high-impact golf manicure that actually lasts through a full round of play is entirely possible when you combine stunning design inspiration with the right professional application techniques. Whether you choose the speed and precision of decals and wraps, or the personalized artistry of dotting tools and fine line brushes, remember that proper preparation and diligent top coat sealing are your ultimate defenses against chipping.
Which of these 9 designs will you try first for your next day on the green? Let us know your go-to longevity secret in the comments
Last update on 2026-01-16 / Affiliate links / Images from Amazon Product Advertising API

