
As an Amazon Associate GolferHive.com earns from qualifying purchases.
Golf Drills for Hip Rotation: 7 Proven Ways to Clear Hips
Are you tired of hitting weak, chunked iron shots that kill your scorecard? Struggling with stalled hips at impact is the most frustrating hurdle for amateur players today. You desperately need effective golf drills for hip rotation to unlock your true power.
Proper hip rotation requires a deep pelvic pivot where you load pressure into your trail heel rather than sliding laterally. This dynamic hip clearing prevents early extension, maintains your spine angle, and delivers the clubhead with maximum rotational torque and flush contact.
Drawing from biomechanical 3D motion capture golf data and proven swing fault correction protocols, we know exactly how to fix this. In this guide, you will discover seven tour-tested corrective drills designed for rapid improvement. Master these targeted techniques to build a consistent, powerful kinetic sequence for 2026.
Contents
show
How Do You Fix Hip Sway in Backswing and Master Golf Drills for Hip Rotation?
To fix hip sway in the backswing, you must master golf drills for hip rotation that focus on deep pelvic pivot rather than lateral sliding. A highly efficient kinematic sequence requires proper hip turn depth to prevent the dreaded hip slide and early extension fault. By mastering dynamic hip clearing, a golfer achieves an open hip angle impact with optimal rotational clubhead speed.
Many players struggle with blocked shots caused by a restricted backswing hip turn and stalled hips at impact. Based on a Titleist Performance Institute (TPI) level 1 pelvic rotation screen, rotational sequencing is undeniably the key to longevity and power. Proper hip rotation prevents early extension and sets up a powerful downswing. It is crucial to scientifically distinguish between hip slide vs hip turn golf movements.
Understanding the biomechanical necessity of internal hip rotation will completely change your ball striking. Using PGA certified instructor drills and evidence based golf biomechanics, we will rewire your flawed movement patterns into a fluid, athletic motion. Now that we understand the biomechanical principles, let’s explore the specific physical protocols required to eliminate these faults.
7 Proven Golf Drills for Hip Rotation to Clear Your Hips
Clearing the hips consistently requires step-by-step hip turn drills for beginner golfers and seasoned veterans alike. To permanently cure your golf swing hip slide, you need actionable physical exercises to practice at home or the range. These daily 5 minute golf hip rotation mobility routine movements translate biomechanical pelvic tilt directly into a flushed impact position.
By utilizing proven swing fault correction protocols alongside TrackMan kinematic sequence analysis, these are not just parlor tricks but tour-validated training methods. These golf drills to fix early extension hip thrust connect alignment sticks and impact bags directly to your core mechanics, proving that hip rotation generates clubhead speed. We will guide you through exact equipment setups and proprioceptive feels to eliminate the guesswork of solo practice.
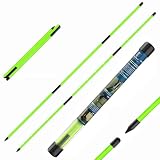
1. Aligning Stick Across Waist for the Belt Loop Drill

Save this belt loop alignment drill to your Golf Improvement board to stop swaying for good!
The alignment stick belt loop drill for hip rotation provides immediate visual feedback for your pelvic rotation degrees. This ensures proper hip turn depth and prevents catastrophic lateral weight shift during your takeaway.
Equipment Needed
- 1 standard fiberglass golf alignment stick (44-48 inches)
- Golf pants or shorts with standard belt loops
- A mid-iron (7 or 8 iron) to hold across your shoulders
Drill Steps
- Thread the alignment stick horizontally through your front belt loops so it protrudes equally on both sides.
- Assume your standard 7-iron golf posture, gripping a club across your shoulders with your arms crossed.
- Hinging hips into backswing, rotate your torso while watching the alignment stick; it should angle downward toward the golf ball at a 45 degree hip turn.
- Initiating the downswing, fire your lead hip backward so the stick clears rapidly to the left, mimicking an explosive hip drive.
Pro-Tip: In clinical golf physical therapy assessments, we look for the alignment stick to maintain a steady angle without dipping or rising drastically, which indicates excellent pelvic anterior posterior tilt control.
2. Maintaining the Tush Line with the Butt-to-Wall Drill

Pin this brilliant at-home wall drill to practice your pivot while watching TV!
Utilizing the wall drill to maintain tush line and hip depth establishes strict spine angle maintenance. A consistent trail hip depth guarantees that your pelvic clearing allows a shallow swing plane during the crucial transition phase.
Equipment Needed
- A flat, unobstructed interior wall or tall chair back
- A golf posture corrector aid or an indoor short practice club
- Athletic shoes with good grip (to prevent slipping on hardwood)
Drill Steps
- Stand without a club, placing your heels about 3 to 4 inches away from a flat wall.
- Hinge from your hips into your standard golf posture until both glutes lightly touch the wall.
- Rotating around spine axis, make a slow backswing, feeling your right glute (for right-handers) press firmly into the wall while the left glute pulls away.
- Shifting weight laterally to transition, bump your weight slightly forward and vigorously press your left glute into the wall as you simulate impact.
Pro-Tip: If you struggle with a trail hip internal rotation deficit, you might find your glute pushing away from the wall. Force yourself to scrape the wall during the entire lumbar-pelvic movement to remap the kinetic feeling.

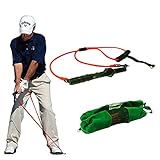
3. Disassociating Upper and Lower Body with Resistance Bands

Save this banded mobility drill to unlock explosive clubhead speed!
Practicing banded hip drills vs bodyweight rotation forces intense glute medius activation. When pelvic disassociation creates rotational torque, your thoracic spine rotation separates flawlessly from your lower body, maximizing the X-factor stretch.
Equipment Needed
- 1 heavy-duty loop resistance band (medium to heavy tension)
- A sturdy anchor point (door anchor, gym rack, or heavy table leg)
- A clear 5×5 foot practice area
Drill Steps
- Anchor the resistance band at waist height and loop the other end securely around your lead hip (left hip for right-handed golfers).
- Step laterally away from the anchor point until you feel significant tension pulling your hips closed (toward the anchor).
- Stabilizing pelvic angle, cross your arms over your chest and forcefully rotate your lead hip open against the band’s resistance.
- Rehearsing slow motion turn, hold the open impact position for 3 seconds, feeling the deep burn in your glutes and core, then slowly return to start.
Pro-Tip: Elite ball strikers utilize the stretch shortening cycle oblique abdominal connection. By pulling against the band, you are literally training your brain to initiate the downswing with the lower body first.
$1.05 offBestseller No. 3
4. Flaring Lead Toe Outward for the Open Stance Drill

Pin this simple setup tweak to instantly free up your hip rotation today!
The open stance drill to encourage full hip rotation directly combats anatomical restrictions. By keeping the flared lead toe outward at roughly 45 degrees, you can instantly solve a restricted backswing hip turn and bypass tight joint capsules.
Equipment Needed
- Your standard 7-iron or a weighted golf swing tempo trainer
- A grassy practice area or driving range mat
- Golf shoes with stable soft spikes
Drill Steps
- Take your normal address position with your tempo trainer, aligning your feet parallel to your target line.
- Flaring lead toe outward, externally rotate your front foot 30 to 45 degrees toward the target, leaving your trail foot square.
- Drop your lead foot back about two inches into a slightly open stance to give your pelvis room to clear.
- Opening pelvis through impact, take aggressive practice swings; you will immediately feel how much faster and easier your hips face the target at the finish.
Pro-Tip: If you suffer from femoroacetabular impingement golf swing pain (pinching in the front of the hip), this flared setup is mandatory. It opens the joint capsule, allowing acetabular femoral joint rotation without bone-on-bone collision.
5. Loading into Trail Heel with the Foam Roller Step Drill

Save this anti-sway drill to start loading your trail hip for massive power!
Perfecting your weight shift + hip rotation by consciously loading into the trail heel is the ultimate cure for a golf swing hip slide. Harnessing ground reaction forces alongside trail hip extension prevents swaying and builds immense rotational power.
Equipment Needed
- 1 firm half-foam roller (flat side down) or a rolled-up towel
- Your favorite driver or mid-iron
- A flat practice surface
Drill Steps
- Place the flat side of the half-foam roller on the ground just outside your trail foot (right foot for right-handers).
- Setup so the outside edge of your trail shoe is firmly wedged against the curved edge of the foam roller.
- Loading into trail heel, begin your backswing by rotating your trail hip pocket straight backward toward the person standing behind you.
- Pushing off ground forces, feel how the foam roller physically blocks your hip from sliding laterally, forcing a pure, deep torso turn.
Pro-Tip: The key to this drill is preventing a trail hip internal rotation deficit. Your trail leg should slightly straighten (but not lock out) as you turn back, which naturally pulls the pelvis into a deep rotation.

6. Posting into Lead Leg using the Chair Drill

Pin the famous chair drill to stop spinning out and start striking your irons pure!
The chair drill for hip turn in golf swing teaches the critical sensation of posting into the lead leg. A stable trail hip pushing off initiates this movement, ensuring the lead hip + impact clearance occurs without spinning out of posture.
Equipment Needed
- A sturdy, lightweight folding chair or tall stool
- A short iron (8 or 9 iron)
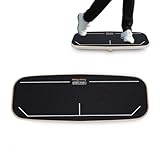
- A golf balance board trainer (optional for advanced stability testing)
Drill Steps
- Position a folding chair so the backrest is about two inches outside your lead hip (left hip for right-handers) at address.
- Execute a slow-motion backswing, ensuring your hips don’t sway away from the chair.
- Posting into lead leg, transition into the downswing by bumping your lead hip directly into the backrest of the chair.
- Extending lead hip upward, aggressively clear your left hip backward while keeping contact with the chair, ensuring your weight has fully transferred.
Pro-Tip: If you suffer from a flying lead hip fault, you will likely knock the chair over. Closed chain lower extremity kinematics dictate that your lead leg must straighten and push backward as you strike the ball to create true rotational speed.
7. Opening Pelvis Through Impact with the Impact Bag Drill

Save the ultimate impact bag drill to compress the golf ball like a tour pro!
Executing a slow motion hip clearing drill for iron contact allows you to intimately connect with the feeling of opening the pelvis through impact. The classic impact bag drill trains precise clubface control harmonized with an optimal impact position + open hips structure.
Equipment Needed
- 1 heavy-duty golf impact smash bag (filled with old towels or clothes, NOT sand)
- An old mid-iron (7 or 8 iron) you don’t mind striking a bag with
- A safe outdoor space or indoor hitting net area
Drill Steps
- Place the fully stuffed impact bag in the exact position a golf ball would sit in your stance.
- Assume your standard setup, resting the clubface gently against the back of the bag.
- Rehearsing slow motion turn, take the club back to waist height and slowly bring it down into the bag.
- Opening pelvis through impact, freeze the moment the club hits the bag—your belt buckle must be facing the target, hips 45 degrees open, and hands aggressively forward of the clubhead.
Pro-Tip: The goal isn’t to hit the bag hard; it’s to hit it with a flushed impact position. If you experience lumbar facet joint impingement prevention issues, this slow-motion isometric hold builds core strength without the violence of a full-speed swing.

Key Takeaways: Your Quick Guide to Golf Drills for Hip Rotation
Consistently executing a golf drills for hip rotation overview solidifies proper hip rotation into muscle memory. The main points of this guide synthesize dynamic hip clearing and proper hip turn depth to completely eliminate early extension and refine your kinematic sequence. Review these highly scannable takeaways to reinforce your biomechanical cues before your next range session.
Key Takeaways:
- Stop the Sway with Trail Hip Depth: Loading deep into your trail heel rather than sliding laterally is the foundation of proper hip rotation, ensuring you maintain your spine angle and generate a powerful coil.
- Disassociate to Generate Speed: Using banded resistance to master pelvic disassociation creates rotational torque, proving that the hips must fire independently of the shoulders to start the downswing.
- Use Physical Boundaries for Feedback: Implementing the Butt-to-Wall or Chair drill provides immediate tactile feedback, actively working to cure a golf swing hip slide and prevent destructive early extension.
- Flare Your Front Foot for Instant Mobility: If you struggle with tight hips, flaring lead toe outward at setup instantly increases your range of motion, allowing an unrestricted hip turn through impact.
- Post Up to Transfer Power: A powerful swing requires posting into the lead leg; failing to clear the lead hip backward causes you to hang back on your trail side and chunk the golf ball.
- Impact Means Open Hips: Tour professionals utilize tour pro swing data hip rotation proving their hips are 35-45 degrees open at impact. Use the impact bag drill to groove this open hip angle impact dynamically.
FAQs About golf drills for hip rotation
Understanding the nuances of how to turn your hips in the golf swing clarifies exactly what drills help with hip rotation in golf. We have compiled the most common questions regarding hip slide vs turn, lumbar spine protection, and downswing transition mechanics to ensure your knowledge is as comprehensive as your practice routine.
How to turn your hips in the golf swing?
To turn your hips properly, rotate your pelvis around your spine’s axis by pushing your trail hip straight back during the backswing, rather than sliding laterally.
Think of your hips operating inside a barrel. As you pivot, your pelvic turn must stay centered, loading pressure into the inside of your trail heel. This hip turn depth creates the necessary space for your arms to drop into the slot during the downswing, effectively helping you shallow the golf club downswing.
Why do golfers slide instead of turn hips?
Golfers slide because they mistakenly equate lateral weight shift with power, or they possess tight hip flexors that prevent authentic internal rotation.
When a golfer attempts to generate speed without proper mobility, the body instinctively slides laterally to manufacture momentum. Unfortunately, a hip slide forces steep downswing delivery and ultimately leads to chunked shots. Utilizing the foam roller step drill helps rewire this flawed lumbar-pelvic movement into a pure rotational coil.
How to stop early extension with hip rotation?
You stop early extension by keeping your glutes pushed back against an imaginary wall throughout the downswing, aggressively clearing your lead hip backward rather than thrusting forward.
Early extension (goat humping) occurs when the hips stall and push toward the golf ball to make room for the hands. By focusing on dynamic hip clearing and practicing the Butt-to-Wall drill, you learn to maintain your spine angle maintenance, ensuring your hips rotate out of the way to achieve a flushed impact position.
What is the belt loop drill for hip rotation?
The belt loop drill involves threading a fiberglass alignment stick through your front belt loops to provide instant visual feedback on your pelvic tilt and rotational angles.
By executing practice swings with the stick attached, you can visually confirm if you are achieving a 45 degree hip turn. If the stick stays level or tilts upward, you have lost your posture. It serves as one of the best alignment stick belt loop drill for hip rotation methods to quickly correct a reverse hip tilt.
How much should hips rotate in golf backswing?
According to biomechanical data, the hips should rotate approximately 45 degrees in the backswing, roughly half the rotation of your 90-degree shoulder turn.
This creates the critical X-factor stretch between the upper and lower body. If you suffer from a restricted hip turn, you lose this coiled energy. Titleist Performance Institute certified instructors emphasize that achieving this 45-degree pelvic rotation degrees is mandatory for maximizing your rotational clubhead speed without straining your lower back.
How do you clear your hips in the downswing?
Clear your hips by using ground forces to push your lead foot into the turf, straightening the lead leg slightly, and pulling your left hip pocket aggressively backward behind you.
It is a pulling motion, not a pushing motion. Lead hip internal rotation enables follow through, allowing the pelvis to open up completely. If you practice posting into the lead leg, you create a brake system that snaps the clubhead through the impact zone, effortlessly increasing your distance.
Can tight hips ruin your golf swing?
Yes, tight hips force the body to compensate by sliding laterally, losing posture, or severely restricting backswing depth, all of which destroy swing consistency and power.
When you lack internal mobility, you are prone to the femoroacetabular impingement golf swing pinch. Incorporating a daily 5 minute golf hip rotation mobility routine and utilizing setup hacks like flaring lead toe outward can immediately relieve tension and promote a fluid body pivot mechanics sequence.
What is the butt to wall drill for golf?
The butt to wall drill requires you to assume your golf posture with your glutes touching a wall, rehearsing your swing to ensure your trail glute stays on the wall going back, and your lead glute presses into it coming through.
It is the premier exercise to stop early extension hip thrust. By maintaining physical contact with the wall, you train your brain to understand what true trail hip depth feels like, preventing your pelvis from thrusting toward the golf ball.
How does flaring the front foot help hip turn?
Flaring the front foot 30 to 45 degrees outward pre-opens the hip joint capsule, artificially increasing your range of motion and allowing the pelvis to clear without restriction.
This is a highly effective setup adjustment for older players or those with desk-bound stiffness. By flaring lead toe outward, you mitigate the torque placed on the lead knee and lower back, ensuring an unrestricted hip turn and a much easier path to a full release and follow through finish.
Do hips start the downswing in golf?
Yes, elite kinematic sequencing mandates that the downswing is initiated by the lower body—specifically, a subtle lateral weight bump followed immediately by aggressive hip rotation.
This sequence allows the upper body and arms to trail behind, storing lag. When stalled hips at impact occur, the hands must flip the clubhead to catch up, resulting in weak strikes. Training to disassociate upper and lower body ensures your hips confidently lead the kinetic chain every time.
Final Thoughts on Golf Drills for Hip Rotation
Mastering these golf drills for hip rotation is the ultimate shortcut to eliminating the most destructive swing faults in the game. Whether you have been battling a chronic hip slide, struggling with early extension, or simply lacking the rotational clubhead speed you know you’re capable of, rewiring your pivot will transform your ball striking. Remember, the golf swing is built from the ground up. By utilizing alignment sticks, impact bags, and even the wall in your living room, you are relying on proven swing fault correction protocols to physically force your body into the correct kinematic sequence.
It is vital to understand that changing a deeply ingrained lumbar-pelvic movement takes time and patience. Your body may resist the feeling of true trail hip depth at first, interpreting a pure pelvic turn as foreign compared to a comfortable lateral sway. Stick with the two-part action steps detailed in this guide. Practice them in slow motion at home before taking them to the driving range at full speed. When you finally experience that effortless, flushed impact position with open hips at impact, you will realize the hard work was completely worth it.
Which of these 7 drills are you going to implement in your practice routine this week? Are you going to start with the Belt Loop drill, or tackle early extension with the Butt-to-Wall drill? Let us know your progress in the comments below!
Last update on 2026-11-12 / Affiliate links / Images from Amazon Product Advertising API
