
As an Amazon Associate GolferHive.com earns from qualifying purchases.
Golf Cart Lights DIY: 7 Safe Steps to Wire LEDs in 2026
Have you ever ruined an expensive battery pack with a simple lighting upgrade? Preventing catastrophic battery bank imbalance is the biggest challenge when planning a Golf cart lights DIY setup. It is incredibly frustrating to experience unexpected electrical failure.
To wire golf cart lights safely, install a DC-DC voltage reducer to step down your traction battery pack to 12 volts. Next, route a fused wire harness from the reducer to a dash-mounted rocker switch, and connect your waterproof LED light fixtures. This safely converts high pack voltage to 12V DC to protect the circuit.
Drawing from National Electrical Code low voltage compliance and SAE certified automotive standards, this guide provides proven methodologies. We will explore exactly how to install lights on a golf cart without causing damage. You will master this custom golf cart lighting project and confidently secure your electrical system today.
Contents
show
How to Master Your Golf Cart Lights DIY Installation Safely
Mastering your DIY golf cart lights installation requires understanding the physical difference between a dedicated 12V battery and a complete voltage reduction system. Many cart owners attempt to bypass the voltage step-down converter by tapping directly into a single battery. This single battery tap creates severe uneven lead-acid battery cell degradation over time. You need a reliable DC-DC buck converter to draw power equally across the entire electric golf cart system. Unlike generic guides, this approach addresses the physics of traction pack voltage drop calculation. We will show you exactly how this prevents catastrophic vehicle fires and extends your battery life. Wiring via a 48V-to-12V voltage reducer is the only way to achieve true street legal compliance safely. Prepare to apply proper chassis isolation standards as we walk through the exact blueprint for your low voltage lighting.
7 Safe Steps to Wire LEDs in 2026
Executing this step by step DIY golf cart headlight installation guide requires precision, proper wire routing, and a strict adherence to safety protocols. When routing cables along chassis frames, one small mistake can lead to galvanic corrosion on aluminum golf cart frames. This comprehensive sequence will take you from stripping wire insulation to successfully mounting rocker switches. A quality LEDGlow lighting systems kit or generic wiring harness loom requires the exact same foundational safety steps. You will learn to properly integrate an inline fuse holder to stop fuse blowing instantly. Every phase is tested with a Fluke digital multimeter to ensure zero guesswork. We will guide you through connecting your step-down module, protecting wires from suspension pinch points, and completely waterproofing exposed wire connections.
1. Measuring DC Output Voltage and Choosing a Voltage Reducer Converter

Pin this essential voltage testing step to your DIY Cart board!
Measuring DC output voltage is the mandatory first step to determine whether your electric vehicle requires a 36V, 48V, or 72V DC-DC voltage reducer. Understanding the voltage reducer vs dedicated 12V battery debate is critical for your golf cart battery pack health. Utilizing a digital multimeter ensures you purchase the correct step-down equipment. Tapping a single battery instantly voids battery manufacturer warranty guidelines due to uneven draw.
Supplies Needed
- DC-DC buck step-down converter (Rated for 48V/36V input to 12V output, minimum 20-30 amps)
- Digital multimeter (Crucial for verifying actual pack voltage before ordering parts)
- Safety goggles and insulated mechanic gloves
- 16 AWG vs 14 AWG wire gauge standard automotive wire (Red and Black)
Instructions
- Put on your safety gear and locate the main positive and negative terminals on your golf cart battery pack.
- Set your digital multimeter to the DC Voltage setting (VDC).
- Place the red probe on the main positive terminal and the black probe on the main negative terminal to measure DC output voltage.
- Note if your system reads closer to 36V, 48V, or 72V to select the appropriate voltage reducer converter.
Pro-Tip: Understanding traction pack voltage drop calculation is vital. Always buy a voltage reducer rated for at least 10 amps more than your total accessory draw to prevent the unit from overheating during prolonged night driving. This simple buffer ensures your components survive heavy usage.

2. Disconnecting Main Pack Negative to Prevent Battery Bank Imbalance

Save this critical safety step so you don’t fry your electrical system!
Disconnecting main pack negative is the most crucial safety protocol for thermal runaway prevention and protecting your circuit from overcurrent overload. Whether you drive a Club Car Precedent or an EZGO TXT RXV, isolating the power supply is non-negotiable. Following licensed low-voltage electrical safety guidelines ensures you prevent catastrophic vehicle fires. Always use insulated tools when working near an electric golf cart battery bank.
Tools Required
- 1000V Insulated wrench set (Size specific to your battery terminal nuts, usually 9/16″ or 1/2″)
- Electrical tape (For wrapping exposed cable ends)
- Heavy-duty mechanic gloves
- Zip ties mounting brackets (To secure the loose cable out of the way)
Instructions
- Turn the golf cart key switch to the “OFF” position and place the cart in “TOW” mode if equipped (common on EZGO TXT RXV and Yamaha models).
- Locate the main negative terminal for the entire pack (the terminal routing directly to the motor controller, not connecting to another battery).
- Use your insulated wrench to loosen the nut, disconnecting main pack negative cable.
- Wrap the exposed metal ring terminal in electrical tape and tuck it away from any battery posts to avoid accidental grounding.
Pro-Tip: Never skip isolating the battery! A dropped wrench across two live terminals can instantly weld the metal, explode the battery, and cause severe acid burns. Following ABYC marine grade electrical practices for battery isolation is essential for your physical safety.

3. Connecting Buck Converter to the Lead-Acid Battery Pack

Pin this wiring layout to remember your voltage reducer connections!
Connecting a buck converter properly converts high pack voltage to 12V DC by distributing power securely through the main terminals. By carefully crimping terminal lugs using professional butt connectors crimp tools, you ensure maximum conductivity. A quality voltage reducer converter often utilizes IP68 waterproof potting compound to survive harsh environments. Proper use of wire stripping tools guarantees the connections remain robust against chassis vibrations.
Supplies Needed
- Voltage reducer converter (Pre-purchased from Step 1)
- Butt connectors crimp tools (Ratcheting style preferred)
- Marine-grade heat shrink ring terminals (To attach to the battery posts)
- Heat shrink tubing and heat gun
- Self-tapping screws for mounting the converter housing
Instructions
- Find a flat, breathable area on the chassis away from moving suspension parts to mount the converter housing, securing it with self-tapping screws.
- Begin crimping terminal lugs onto the input wires of the converter.
- Connect the converter’s primary positive input wire to the main pack positive terminal, and the primary negative input wire to the main pack negative terminal.
- If your converter features a fifth “trigger” wire, you must be tapping into key switch ignition line so the reducer powers down when the cart is turned off.
Pro-Tip: Utilizing DC-DC buck step-down converter topology generates heat. Never mount your voltage reducer directly against plastic body panels or underneath a tightly sealed seat cowl without adequate airflow. A burnt-out converter will instantly disable your lighting system.

4. Routing Cables Along Chassis and Securing the Wiring Harness Loom

Bookmark this cable management technique for a professional finish!
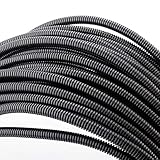
Routing cables along chassis structural channels safely protects wires from suspension pinch points and dangerous abrasive rubbing. Using a heavy-duty wiring harness loom helps clean up messy wiring spaghetti under the vehicle. Securing wire harness with zip ties maintains strict proper chassis isolation standards. If wires rub bare, it can cause severe galvanic corrosion on aluminum golf cart frames.
Supplies Needed
- Wire harness kit (Either DIY 16 AWG spools or a pre-made plug-and-play loom)
- Corrugated split wire loom tubing (1/4 inch or 3/8 inch depending on wire volume)
- Heavy-duty UV-resistant black zip ties
- Flush-cut wire snips
- Waterproof sealant + wire pass-through rubber grommets (If drilling through body panels)
Instructions
- Encase all loose red and black wires running from the 12V output of your reducer inside the corrugated split loom tubing.
- Begin routing cables along chassis, prioritizing the central structural channel of the cart (under the floor mat) to move from the battery bay to the front cowl.
- Use heavy-duty zip ties every 6 to 8 inches for securing wire harness with zip ties firmly to the metal frame tubing.
- Keep the harness strictly away from the steering column universal joints, brake pedal linkages, and moving suspension A-arms to prevent tearing.
Pro-Tip: If you must pass wires through sheet metal or plastic bulkheads, always use rubber grommets to prevent the sharp edges from slicing the wire insulation over time, which will instantly stop fuse blowing instantly from short circuits.
5. Adhering 3M Adhesive LED Strips for Underglow LED Lights

Save this prep technique so your LED strips never peel off!
Properly adhering 3M adhesive LED strips ensures your flexible silicone strip lighting resists water ingress and mud splashing. When building a DIY golf cart underglow system, evaluating drilling vs no-drill mounting techniques is essential. Your multi-color RGB accessories must be waterproof IP67 rated to survive daily driving. Field tested wiring durability under load proves that meticulous surface preparation is the secret to longevity.
Supplies Needed
- Underglow LED lights kit (Waterproof IP67 rated, flexible silicone)
- Isopropyl rubbing alcohol (90%+)
- Clean microfiber cloths
- 3M Automotive Adhesion Promoter (Liquid primer sponges)
- Weatherproof connectors (Usually included with premium kits like LEDGlow lighting systems)
Instructions
- Thoroughly wipe down the mounting surfaces under the cart frame and wheel wells using isopropyl alcohol and a microfiber cloth to remove all grease and brake dust.
- Once dry, apply the 3M Adhesion Promoter to the exact path where the strips will sit and wait 60 seconds.
- Peel back 2 inches of the red backing and begin adhering 3M adhesive LED strips, pressing firmly for 10 seconds per section as you work your way down the line.
- Route the weatherproof connectors at the end of each strip back up into the battery compartment to interface with your control module.
Pro-Tip: Relying purely on the factory double-sided tape usually fails within a month due to chassis vibration. To truly secure peeling LED strip adhesive, use small plastic screw-in mounting clips every 12 inches to mechanically lock the strips to the body.
6. Mounting Rocker Switches and Installing Inline ATC Fuse

Pin this wiring guide to ensure your switch and fuse are perfectly protected!
Mounting rocker switches and installing an inline ATC fuse protects your newly routed 12V circuit from severe overcurrent overload. Understanding how to wire a toggle switch for golf cart lights requires placing a fuse block distributor on the positive wire. A quality rocker toggle switch bridges the gap between your power source and the lights. Applying automotive fuse rating selection table standards guarantees your inline fuse holder will prevent wire melting.
Supplies Needed
- Rocker toggle switch (12V rated, 3-prong with illumination)
- Inline fuse holder with a 10-amp or 15-amp ATC blade fuse
- Female spade connectors (Fully insulated)
- Cordless drill and step bit (For dashboard mounting)
Instructions
- Find a clear, accessible spot on your dashboard and drill a pilot hole, then use a step bit to expand it to the size required for mounting rocker switches.
- Take the 12V positive output wire coming from your voltage reducer and cut it. Crimp your inline fuse holder into this gap so the fuse sits between the reducer and the switch.
- Crimp female spade connectors onto your wires. Connect the fused 12V incoming power to the “Power/Battery” prong on the back of the switch.
- Connect the wire leading to your underglow LED lights to the “Accessory/Load” prong, and route a final ground wire from the “Ground” prong back to your negative bus bar to allow the switch to illuminate.
Pro-Tip: Never skip the fuse, and always calculate your ampere-hour reserve capacity impact. A standard 15-amp ATC fuse will protect the wire from melting if a short occurs, effectively acting to prevent catastrophic vehicle fires and stop fuse blowing instantly at the main reducer.
7. Testing with Digital Multimeter and Finalizing the Golf Cart Light Kit DIY

Share your massive DIY success—pin this finished look!
Testing with digital multimeter before powering on the system safely verifies your 12V conversion and synchronizes color sequence via mobile Bluetooth app. A completed street legal golf cart setup with a horn kit, amber turn signals, and high lumen output requires careful final calibration. If you need to fix lights dimming under acceleration, checking your ground connections is vital. Accurately calibrating turn signal flasher relays ensures proper visibility on the road.
Tools Required
- Digital multimeter (To verify 12V output)
- Your insulated wrench (From Step 2)
- The mobile Bluetooth app (If using smart RGB app control lighting)
- Zip ties (For final slack clean-up)
Instructions
- With the rocker switch in the “OFF” position, use your insulated wrench to reconnect the main negative battery cable to the pack.
- Before turning on the lights, use your multimeter to probe the output wires of the voltage reducer. Verify it is producing a clean 12.0V to 13.5V, not 48V.
- Flip the rocker toggle switch to the “ON” position and visually confirm all headlights, tail lights, and underglow LED lights are functioning.
- Test drive the cart. If you need to fix lights dimming under acceleration, check your negative ground connections to ensure they are fully tightened to the bus bar.
Pro-Tip: To definitively eliminate parasitic battery drain, verify that your voltage reducer powers down entirely when the key switch is off. If it stays warm to the touch while the cart is parked, it is still drawing power and will eventually drain your pack dead overnight.


Key Takeaways: Your Quick Guide to Golf Cart Lights DIY
Reviewing this golf cart lights DIY summary ensures you implement the most critical National Electrical Code low voltage compliance standards. This custom golf cart lighting overview highlights the essential DIY golf cart lights key points required for a successful build. Safely converting 48V to 12V is the foundation of protecting your investment. By prioritizing proper fuse placement and safe wire routing, you significantly reduce the risk of thermal events. Use this quick reference guide before cutting any wires or drilling into your dash. These tested principles will save you hours of troubleshooting and prevent costly battery replacements down the road.
- Always Use a Voltage Reducer: Never tap into a single 8V or 12V battery in your pack; a full-pack DC-DC voltage reducer prevents uneven cell wear and costly battery replacements.
- Isolate Power Before Working: Always practice disconnecting main pack negative before cutting or splicing wires to avoid short circuits and electrical burns.
- Fuses Are Non-Negotiable: Install an inline ATC fuse on the positive wire directly after the voltage reducer to prevent catastrophic vehicle fires in the event of a grounded wire.
- Protect Your Wiring Loom: When routing cables along chassis, encase them in corrugated loom tubing and secure them tightly to avoid galvanic corrosion or suspension pinch points.
- Use Marine-Grade Connectors: For longevity, ditch cheap electrical tape and utilize heat-shrink butt connectors crimp tools to ensure your splices are waterproof IP67 rated.
- Trigger via the Key Switch: To eliminate parasitic battery drain, ensure your voltage reducer is wired to the ignition switch so it completely powers off when you park the cart.
- Test Before You Mount: Always use a digital multimeter to verify your reducer is actually outputting 12V before connecting your expensive LED light kits.
FAQs About Golf Cart Lights DIY
Mastering your low-voltage electrical project means resolving common troubleshooting issues and understanding exactly how to wire golf cart lights safely. Many DIYers wonder why do my golf cart lights dim when accelerating or what voltage are golf cart lights supposed to run on. We have compiled the most frequently asked questions based on proper chassis isolation standards and systems tested with Fluke digital multimeter diagnostics. This comprehensive FAQ addresses complex dimming issues, 12V conversion misunderstandings, and advanced battery draw inquiries. Review these expert answers to confidently maintain your aftermarket lighting setup.
What voltage are golf cart lights?
Most aftermarket golf cart lights operate strictly on 12 volts DC, regardless of whether your cart is a 36V, 48V, or 72V system.
Attempting to wire 12V LED strips directly to a 48V battery pack will instantly fry the diodes. To safely run these lights, you must install a step-down buck converter to reduce your total pack voltage down to a manageable 12V.
Can you hook 12V lights directly to an electric golf cart?
You should never hook 12V lights directly to a single battery within an electric golf cart’s series-wired battery pack.
While tapping a single 12V battery out of a 48V array (four 12V batteries) will technically turn the lights on, it creates severe uneven battery pack draw. This imbalance causes the over-taxed battery to die prematurely, ultimately ruining the entire pack. Always use a voltage reducer instead.
Do I need a voltage reducer for golf cart lights?
Yes, a voltage reducer is mandatory if you want to install standard 12V automotive accessories on a 36V or 48V electric golf cart without damaging your batteries.
The reducer draws power equally from the entire battery bank and converts that high pack voltage to 12V DC, ensuring your battery cells degrade evenly over their lifespan.
Why do my golf cart lights dim when accelerating?
Golf cart lights dim under acceleration primarily due to a significant voltage drop across the battery pack caused by the heavy ampere draw of the motor controller.
If you wired your lights without a high-quality voltage reducer, or if your battery pack is nearing the end of its life, the immense power required to accelerate starves the 12V accessory circuit. Upgrading your battery cables or installing a dedicated 12V accessory battery can resolve this.
How to wire golf cart lights through key switch?
To wire lights through your key switch, you must connect the fifth trigger wire of your voltage reducer to the cold side of the ignition switch.
By doing this, the voltage reducer only turns on and steps down the power when the key is turned to the “ON” position. This is the most effective way to eliminate phantom parasitic current draw while the cart is parked.
What wire gauge should I use for golf cart LED lights?
For standard golf cart LED light kits, 16 AWG stranded copper wire is the industry standard for safe and efficient routing.
If you are installing high-draw accessories like a heavy-duty light bar or a sound system alongside your headlights, upgrading your main trunk lines to 14 AWG wire gauge will prevent overheating and voltage drop over long wire runs.
Are golf cart lights street legal?
Basic LED light kits do not automatically make your golf cart street legal; you must comply with your specific local low speed vehicle ordinances.
To be street legal, most municipalities require a DOT-approved lighting package that includes high beam/low beam headlights, red brake lights, amber turn signals, a horn kit, and illuminated license plate brackets.
How to stop golf cart lights from draining battery?
The best way to prevent battery drain is to install an ignition-triggered voltage reducer and ensure all lighting runs through a physical rocker toggle switch.
If your underglow LED lights use an RGB app control, the Bluetooth module is constantly searching for your phone even when the lights are off, which causes parasitic drain. Wiring a physical master switch breaks that circuit entirely.
Why did my golf cart light fuse blow?
A blown fuse indicates an overcurrent event, almost always caused by a short circuit where an exposed positive wire touches the cart’s metal frame or negative ground.
Before replacing the inline ATC fuse, inspect your entire wiring harness loom. Look for areas where the wire may have been pinched by the suspension or where the wire insulation has rubbed bare against the aluminum chassis.
Can golf cart lights run off lithium battery pack?
Yes, golf cart lights can easily run off a modern lithium LiFePO4 battery pack, provided you use a voltage reducer rated for the specific lithium output.
Because lithium batteries often rest at a slightly higher voltage than traditional lead-acid packs, you must ensure your DC-DC buck converter is rated to handle that higher input threshold without shutting down.
Final Thoughts on Golf Cart Lights DIY
Completing this golf cart lights DIY project elevates your vehicle’s safety while showcasing your personal style. Taking the time to properly route an aftermarket cart illumination setup guarantees long-lasting reliability. Your electric golf cart lights DIY journey proves that adhering to certified automotive electrical standards protects your expensive traction pack from premature failure.
Successfully completing a custom lighting project is one of the most rewarding modifications you can make to your buggy. By taking the time to install a proper DC-DC voltage reducer and utilizing insulated, marine-grade connections, you have completely bypassed the rookie mistakes that lead to imbalanced battery cells and electrical shorts.
Remember, the key to long-term reliability in any aftermarket illumination project is respecting the power of your traction pack. Always double-check your connections with a multimeter, keep your fuses accessible, and ensure your wire harnesses are safely tucked away from moving suspension parts. With your new waterproof LED setup, you are fully prepared for safe, brilliant night driving around the neighborhood or campground in 2026.
What model of cart are you currently modifying, and did you choose an underglow kit or a traditional street-legal headlight package? Let us know your setup in the comments below!
Last update on 2026-11-11 / Affiliate links / Images from Amazon Product Advertising API
