As an Amazon Associate GolferHive.com earns from qualifying purchases.
13 Stunning Golf Cart Decorating Ideas for Christmas Parades
That exciting time of year is rolling around again—the local Christmas parade is announced, and you’ve signed up your golf cart. The ambition is high: you envision a rolling masterpiece that delights families and wows the judges. But as you stare at your plain golf cart, turning that vision into a festive reality can feel like a huge challenge. Where do you even begin to transform this everyday vehicle into a show-stopping parade float?
You’re not just aiming to string up a few lights; you want to create something memorable, a creative golf cart parade float that becomes a highlight of the community event. The pressure is on to find unique ideas that are both impressive and achievable. You’re likely wondering how to securely attach decorations, power a dazzling light display without draining the battery, and choose a theme that stands out from the sea of red and green. Getting it wrong could mean decorations falling off mid-route or a design that looks less like a winter wonderland and more like a tangled mess.
Decorating a golf cart for a Christmas parade involves choosing a creative theme, gathering weatherproof supplies like battery-operated lights and zip ties, and ensuring all decorations are securely attached without obstructing the driver’s view. This guide is your complete playbook for success. We will walk you through 13 stunning, easy-to-follow golf cart decorating ideas, from classic sleighs to whimsical gingerbread houses, that will inspire your award-winning design for the 2025 holiday season.
Planning a Christmas Parade Masterpiece? How to Turn Your Golf Cart into a Showstopper
To turn your golf cart into a showstopper, you must start with a solid plan that covers power, safety, and a reliable attachment method for all your decorations. A little preparation ensures your creative vision comes to life smoothly and safely, allowing your float to shine throughout the entire parade. In my experience, spending 30 minutes on prep can save hours of frustration later. This foundational step is what separates a good float from a great one.
But before you get lost in the fun of choosing a theme, let’s cover the practical side. How will you power those twinkling lights, and what’s the secret to making sure nothing falls off when you turn a corner?
Essential Prep: Power, Safety, and Attachment Tips for a Flawless Float
Before decorating your golf cart, you must create a plan for safety, power, and attachments. Your first step should be to check the specific parade guidelines for any restrictions. For power, the safest and easiest option is using battery-operated LED lights to protect your cart’s main battery. Finally, gather a toolkit of heavy-duty zip ties, bungee cords, and outdoor-rated tape to ensure every decoration stays securely in place.
- Safety First: The most important rule is to ensure the driver has a completely unobstructed view. Before you attach a single decoration, sit in the driver’s seat and map out your “no-go” zones. Secure every item firmly; a falling prop can be a hazard. It’s also wise to check your local parade’s official rules regarding lights, music, and dimensions.
- Powering Your Lights: While you can use a power inverter connected to your cart’s battery system, the simplest and most reliable method is to use battery-operated LED lights. They are bright, come in various colors, and eliminate any risk of draining your primary battery mid-parade. Tuck the battery packs into discreet, weather-protected spots.
- The Attachment Toolkit: Your success hinges on how well you secure your decor. Here’s what I’ve learned works best:
- Zip Ties: Essential for attaching garlands, lights, and props to the roof supports and frame.
- Bungee Cords: Perfect for securing larger or heavier items, like cardboard cutouts or props in the back seat.
- Heavy-Duty Tape: Use outdoor-rated or duct tape for securing fabric or wrapping paper edges in places where zip ties won’t work.
- Removable Hooks: Adhesive hooks are great for hanging lighter ornaments without damaging the cart’s finish.
13 Stunning Golf Cart Decorating Ideas for Your Christmas Parade Debut
The best golf cart decorating ideas for a Christmas parade blend creativity with a clear, recognizable theme. Whether you choose a traditional concept like Santa’s Sleigh or something whimsical like a Gingerbread House, a strong theme guides your choice of materials and makes assembly much easier. In this list, you’ll find 13 distinct, actionable ideas perfect for any skill level, ensuring you can create a truly stunning float that captures the holiday spirit.
Now, let’s dive into the creative concepts that will make your golf cart the talk of the town this December.
1. The Classic Christmas Sleigh
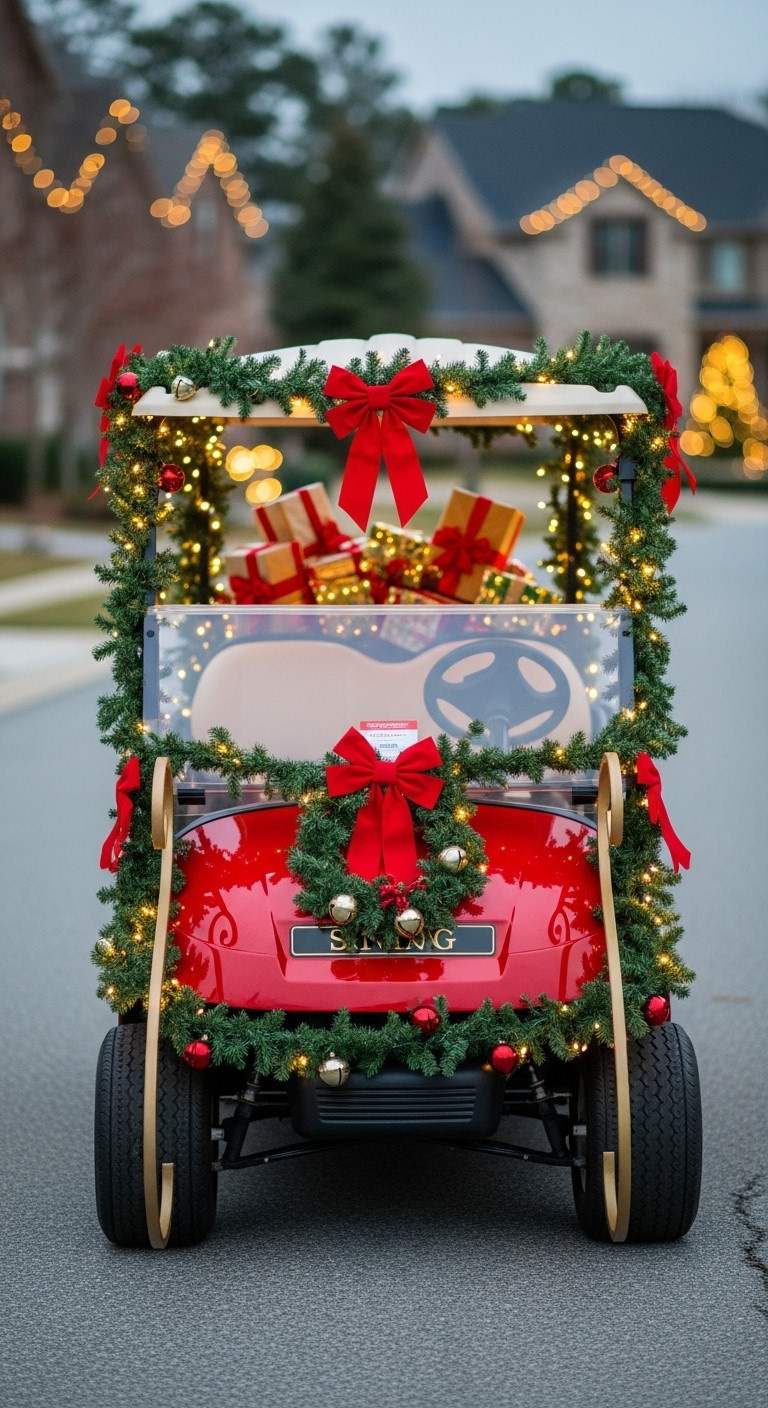
Pin this classic Christmas parade idea!
To create a classic Christmas sleigh theme, focus on a traditional color palette of red and green, using garlands, bows, and a wreath to transform your golf cart’s shape. This timeless idea is a crowd-pleaser and relatively easy to assemble, making it perfect for a festive and elegant look.
- Materials Needed:
- Red and green fabric or tinsel garlands
- Several sets of battery-operated warm white LED string lights
- Large pre-made red velvet bows (weatherproof)
- Wreath for the front of the cart
- Zip ties and green floral wire
- Santa hat for the driver
- Step-by-Step Directions:
- Start by wrapping the roof supports and frame of the golf cart with green garlands, securing them tightly with zip ties or floral wire.
- Weave the string lights through the garlands, ensuring the battery packs are tucked away in a secure, dry spot.
- Drape red fabric over the seats or body to enhance the sleigh look.
- Attach a large wreath to the very front of the cart using heavy-duty zip ties.
- Place large, weatherproof red bows at key points, like the corners of the roof, for a polished look.
Pro-Tip: Use green zip ties or floral wire on the garlands for a seamless look that makes the attachments virtually invisible.
2. Winter Wonderland on Wheels
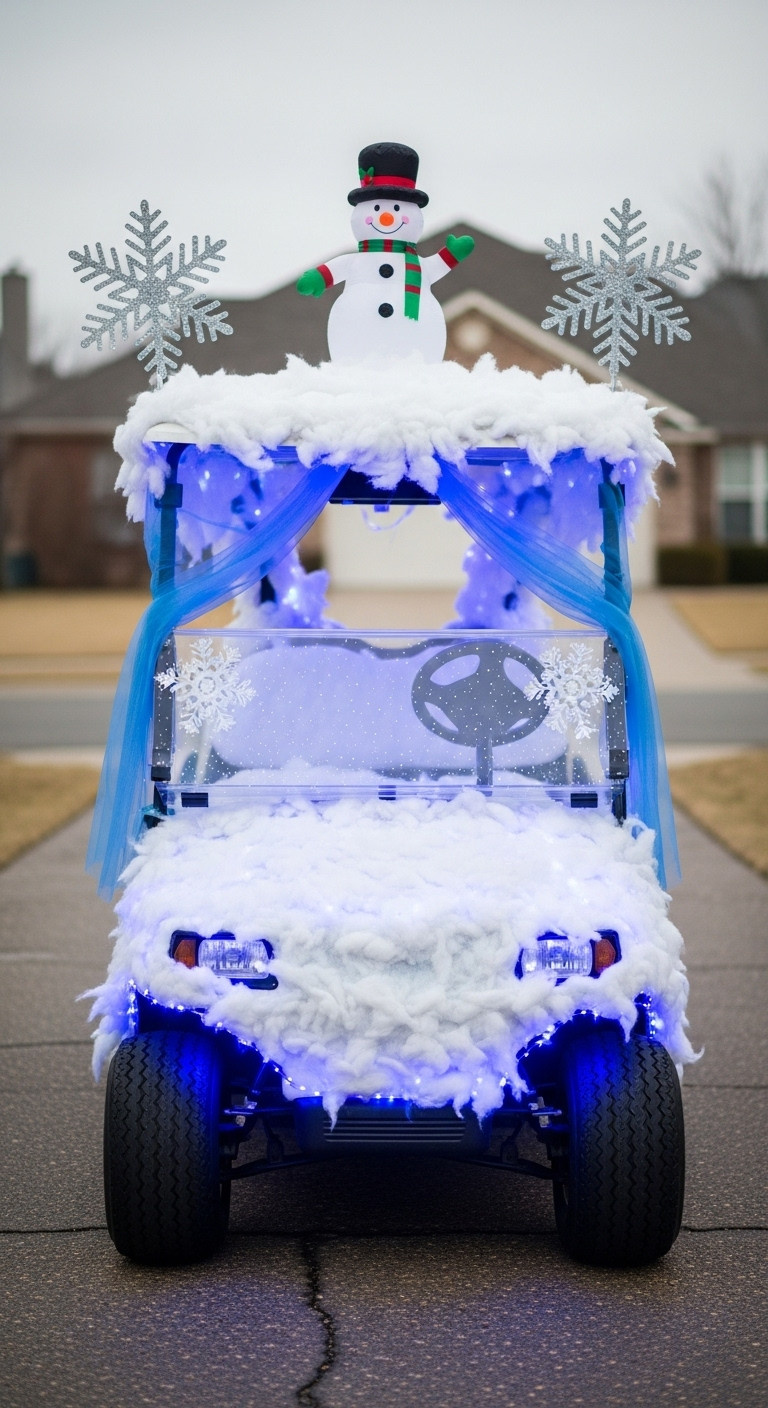
Pin this magical Winter Wonderland idea!
Creating a Winter Wonderland on wheels involves using a cool color palette of white, silver, and blue, with materials like cotton batting and glittery snowflakes to simulate a magical, icy scene. This theme is all about texture and light, creating an elegant and enchanting float.
- Materials Needed:
- Rolls of white cotton batting or fluffy white fabric
- Spray adhesive and/or safety pins
- Cool white and blue battery-operated LED fairy lights
- Silver tinsel garlands
- Large, shatterproof snowflake ornaments in silver and blue
- Clear fishing line
- Step-by-Step Directions:
- Drape the roof and body panels of the cart with the white fabric or batting, securing it with spray adhesive or safety pins underneath.
- Wrap the roof supports with silver tinsel garlands.
- Intertwine both the cool white and blue LED lights throughout the batting and tinsel to create an icy glow.
- Hang the snowflake ornaments from the roof at varying lengths using clear fishing line for a floating effect.
- For an extra touch, lightly spray the “snow” with silver glitter spray.
Lesson Learned: Avoid using real spray snow on the cart’s paint as it can be difficult to clean off. Cotton batting gives a better, fuller effect and is easy to remove.
3. Santa’s Mobile Workshop
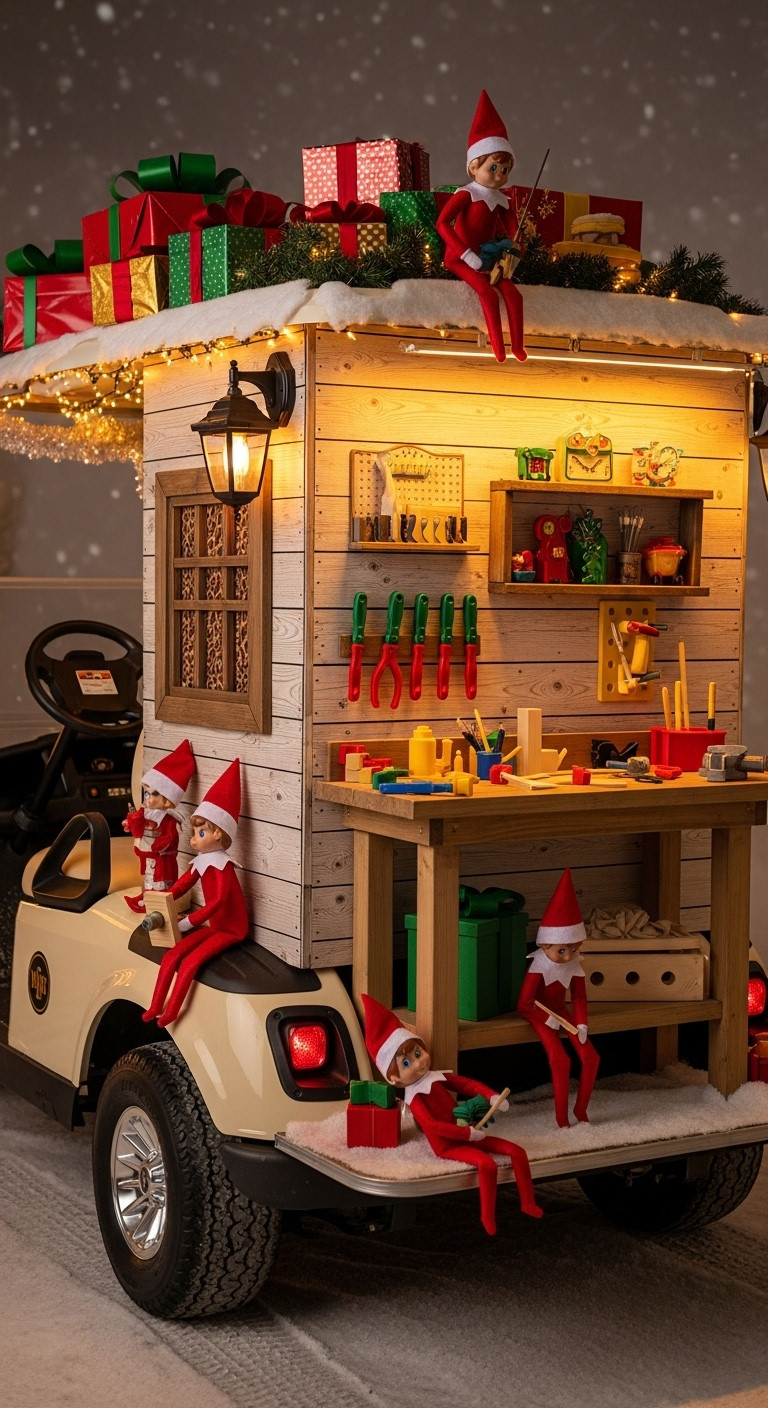
Pin this creative Santa’s Workshop idea!
To design a Santa’s Mobile Workshop float, use wood-grain textures, toy props, and posable elf figurines to create a playful scene of elves hard at work. This detailed theme brings the magic of the North Pole to life and offers many opportunities for creative storytelling.
- Materials Needed:
- Wood grain-patterned wrapping paper or vinyl wrap
- Cardboard for creating signs like “Santa’s Workshop” and “Elves at Work”
- Assorted toy props (plastic tools, wooden trains, dolls)
- Several posable elf figurines
- Empty boxes wrapped as gifts
- Multi-colored C9-style battery-operated string lights
- Hot glue gun and zip ties
- Step-by-Step Directions:
- Cover the main body of the golf cart with the wood grain paper to create the look of a workshop.
- String the multi-colored lights along the roofline.
- Create a “workbench” scene on the back of the cart or in the cargo bed, gluing down toy tools and unfinished-looking toys.
- Position the elf figurines around the cart, making them look busy—one driving, one on the roof, others at the workbench.
- Pile the wrapped gifts in the back seat or on the floor to complete the scene.
Pro-Tip: Use a hot glue gun to secure lightweight props, but use zip ties for anything heavier to ensure it stays put while the cart is moving.
4. The Life-Sized Gingerbread House
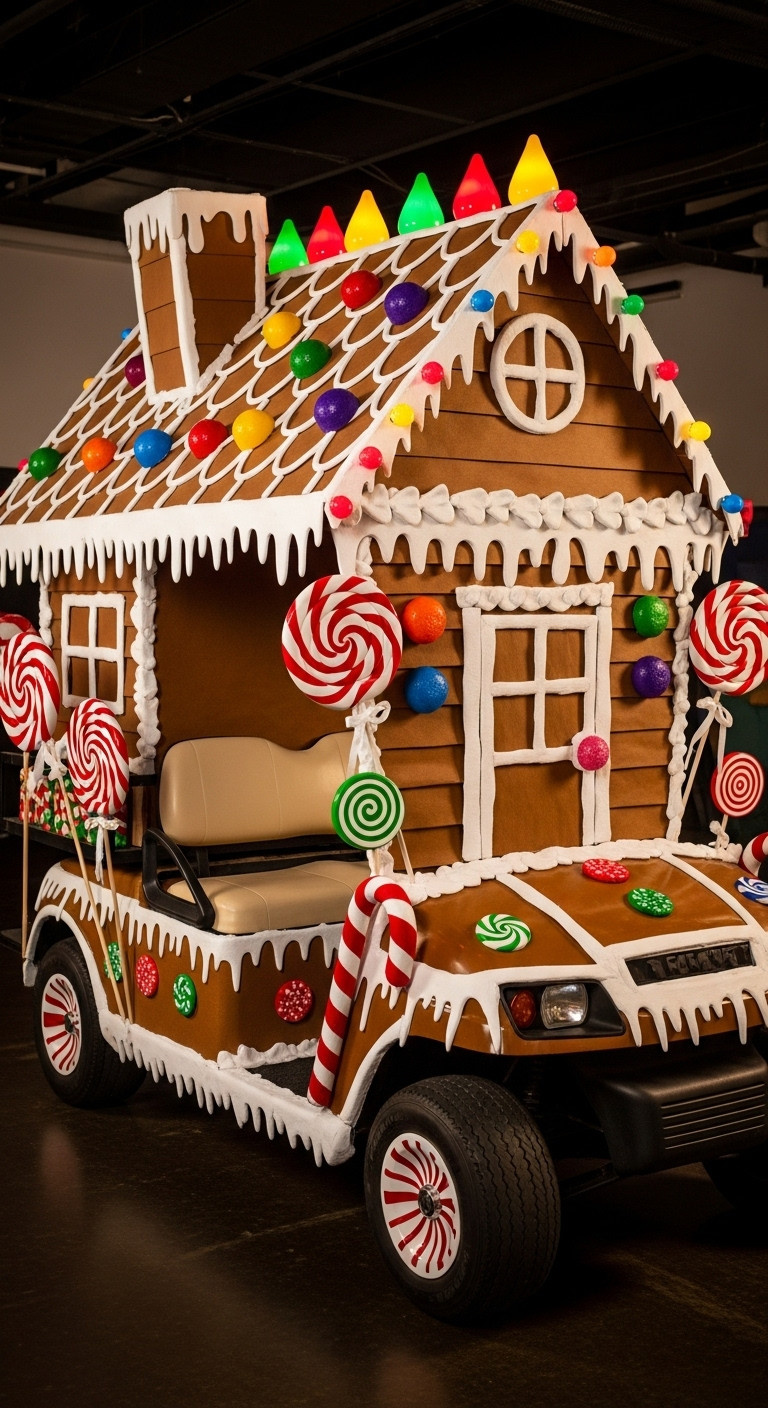
Pin this sweet Gingerbread House idea!
Transform your golf cart into a life-sized gingerbread house by using brown paper for the walls, white tape for “icing,” and colorful ornaments for “candy.” This whimsical and delicious-looking theme is a guaranteed favorite, especially with children.
- Materials Needed:
- Large rolls of brown contractor’s paper or cardboard
- White duct tape or wide white ribbon for “icing”
- Colorful, shatterproof ball ornaments for “gumdrops”
- Pool noodles (red and white) to make candy canes
- Paper plates decorated as peppermints
- Hot glue gun and double-sided carpet tape
- Step-by-Step Directions:
- Cover the body of the golf cart with the brown paper, securing it with tape.
- Use the white duct tape or ribbon to create scalloped “icing” patterns along the edges of the roof and body.
- Hot glue the colorful ball ornaments onto the brown paper “walls” to look like gumdrops.
- Create giant candy canes by wrapping white pool noodles with red tape, then attach them to the roof supports.
- Decorate paper plates to look like peppermint candies and attach them to the wheels.
Pro-Tip: For a 3D icing effect, use white rope or even piped sealant (allow to dry completely) on cardboard cutouts before attaching them to the cart.
5. The Giant Christmas Present
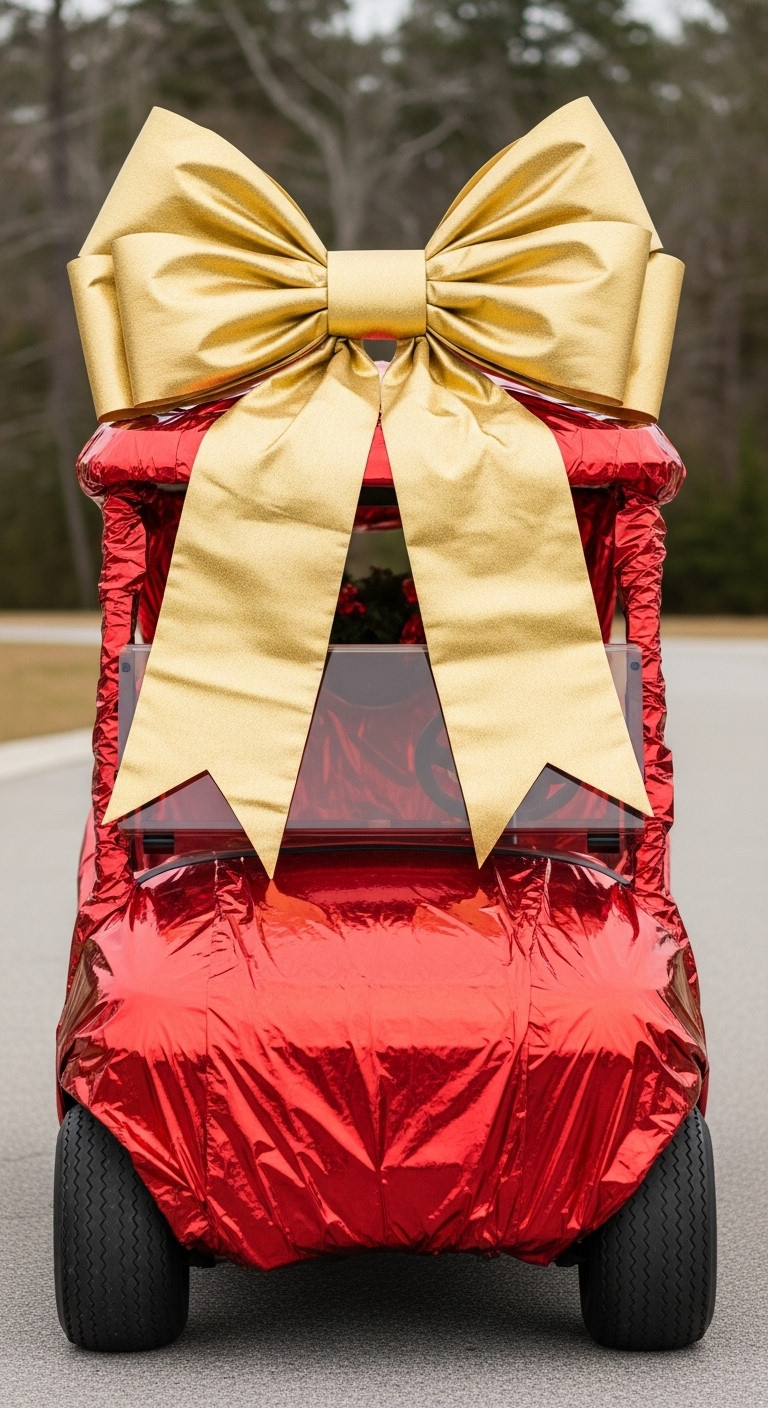
Pin this simple and stunning gift box idea!
The giant Christmas present is a simple yet high-impact idea where you wrap the entire golf cart in festive paper and top it with an oversized bow. This is one of the easiest golf cart decorating ideas to execute, requiring minimal materials for a clean and impressive result.
- Materials Needed:
- Several rolls of durable, weatherproof wrapping paper
- A giant car bow kit (typically used for gifting cars)
- Heavy-duty double-sided tape or spray adhesive
- Clear packing tape
- Step-by-Step Directions:
- Start with a clean, dry golf cart.
- Carefully wrap the large, flat sections of the golf cart body (like the front cowl and side panels) with the wrapping paper, just as you would a gift. Use heavy-duty tape to secure the edges underneath.
- For curved or tricky areas, cut smaller pieces and overlap them neatly. Use clear packing tape to secure seams.
- Assemble the giant car bow according to its instructions.
- Securely mount the bow to the center of the golf cart’s roof using its built-in attachments or additional zip ties for security.
Lesson Learned: Not all wrapping paper is created equal. Choose a thicker, vinyl or foil-based paper as it will resist tearing and moisture better than standard paper during the parade.
6. The North Pole Express Train
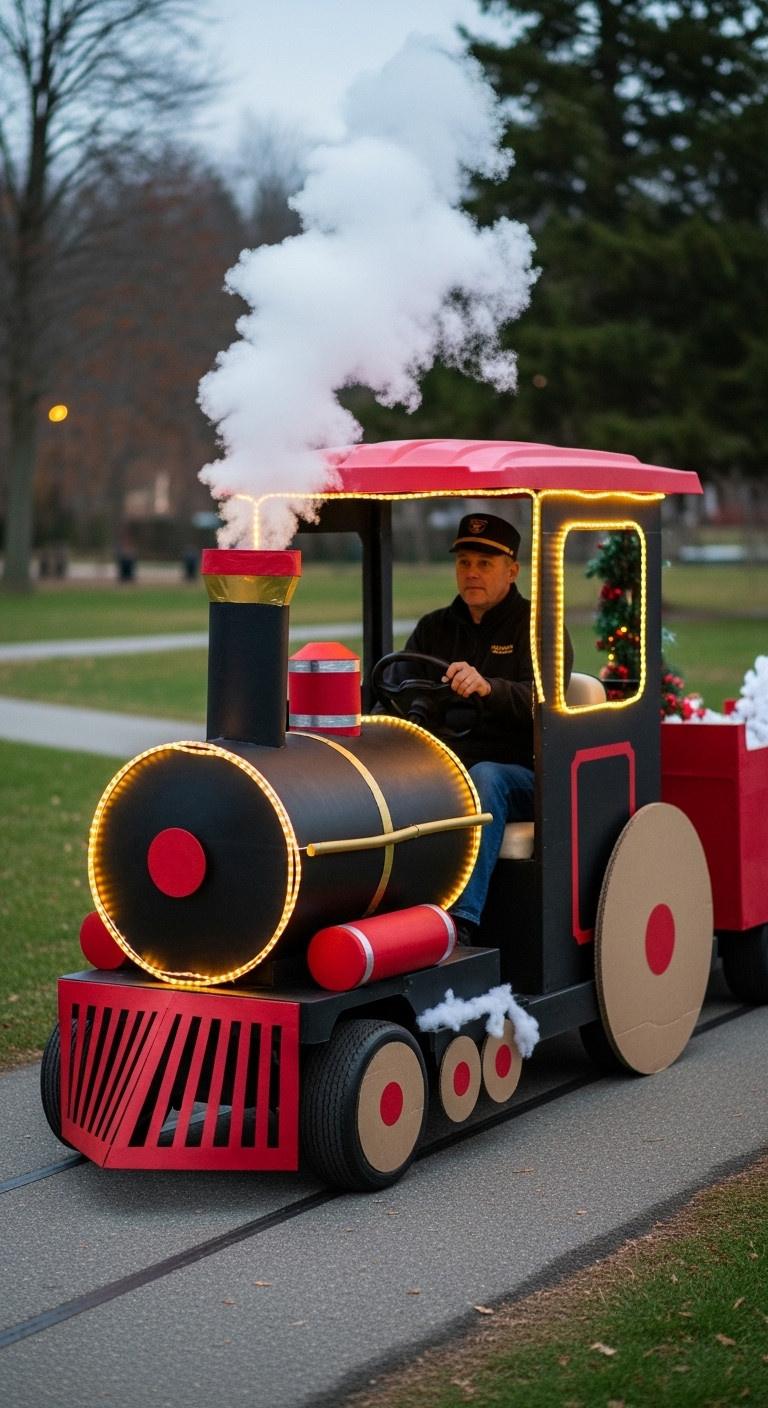
Pin this amazing Polar Express train idea!
To create a North Pole Express train, use cardboard or coroplast to craft key train features like large wheels and a smokestack, transforming your cart’s silhouette. This imaginative theme, inspired by a beloved Christmas story, is perfect for those who enjoy a bit of structural DIY.
- Materials Needed:
- Large sheets of black and red cardboard or coroplast
- Yellow paint or tape for accents
- A large coffee can or similar cylinder for the smokestack
- Cotton batting for steam/smoke
- Battery-operated yellow string lights
- Conductor’s hat
- Zip ties and a hot glue gun
- Step-by-Step Directions:
- Cut out four large circles from the black cardboard for the wheels. Add smaller red circles in the center for detail.
- Attach the wheels to the sides of the golf cart using heavy-duty zip ties threaded through small holes in the cardboard.
- Create a “cow-catcher” for the front using triangular pieces of cardboard.
- Paint the coffee can black and attach it to the front of the roof as a smokestack. Loosely stuff it with cotton batting to create a “steam” effect.
- Line the edges of the cart with yellow lights and have the driver wear a conductor’s hat.
Pro-Tip: Use coroplast (corrugated plastic) instead of cardboard for a more durable and weather-resistant construction that will hold up even in damp conditions.
7. Rudolph’s Reindeer Sleigh
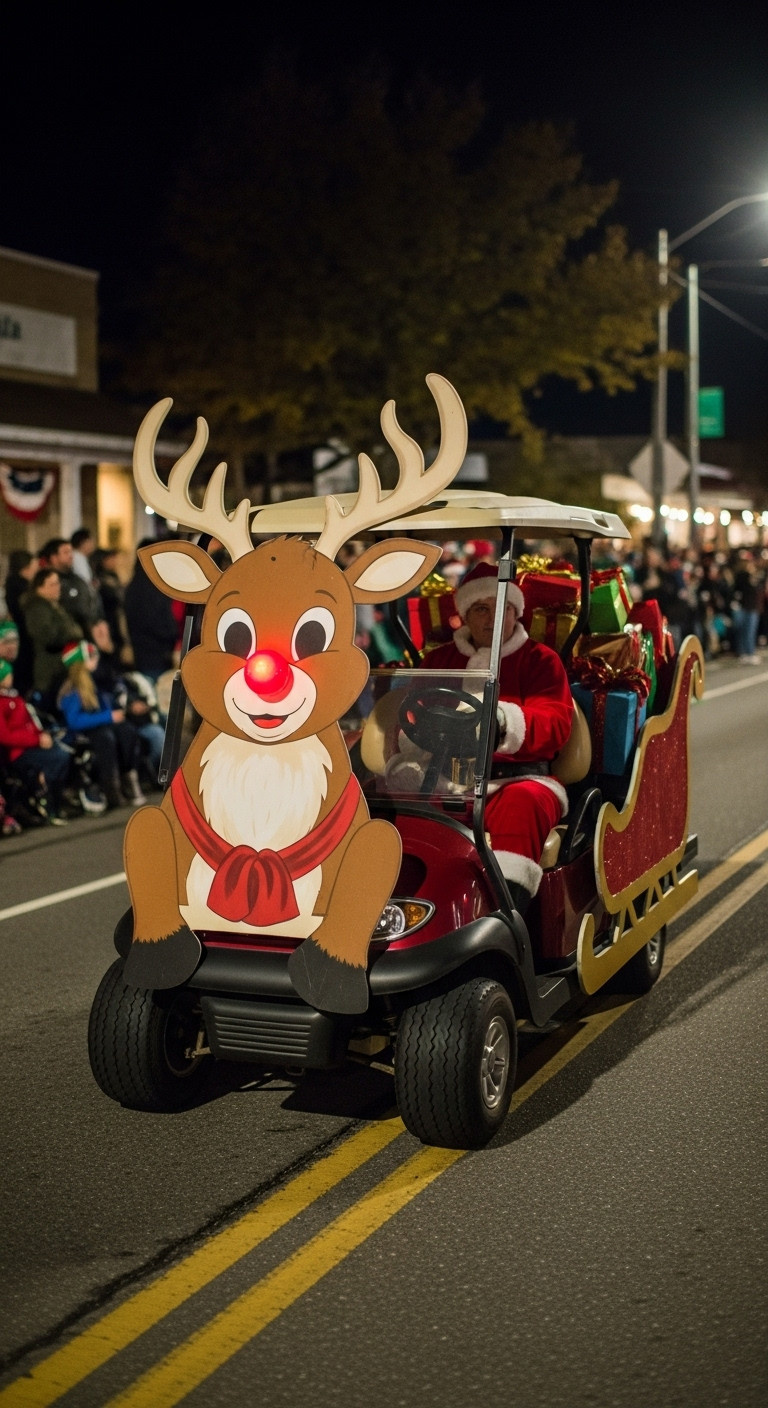
Pin this adorable reindeer sleigh idea!
This theme brings the classic Santa sleigh to the next level by building and attaching reindeer cutouts to the front of the cart, led by Rudolph with a glowing nose. The key to this design is creating the illusion that the reindeer are actually pulling the golf cart “sleigh.”
- Materials Needed:
- Large sheets of brown coroplast or plywood for reindeer bodies
- White paint for details and antlers
- A battery-operated red blinking light for Rudolph’s nose
- Jingle bell straps or garlands
- A Santa suit for the driver
- Empty boxes wrapped as presents
- Step-by-Step Directions:
- Draw and cut out at least two reindeer shapes from the coroplast. Paint on antlers and facial details.
- Designate one as Rudolph and carefully cut a small hole for the red blinking light, then secure the light from behind.
- Construct a simple wooden or PVC frame that extends from the front of the cart to mount the reindeer, making it look like they are pulling the “sleigh.”
- Drape the jingle bell straps over the reindeer’s necks.
- Fill the back seats and cargo area of the cart with the wrapped presents. The driver in a Santa suit completes the illusion.
Lesson Learned: Attaching cutouts directly to the cart can be tricky. Building a simple, removable frame that attaches securely to the cart’s front bumper is a much more stable and effective method.
8. Festive Candy Cane Lane
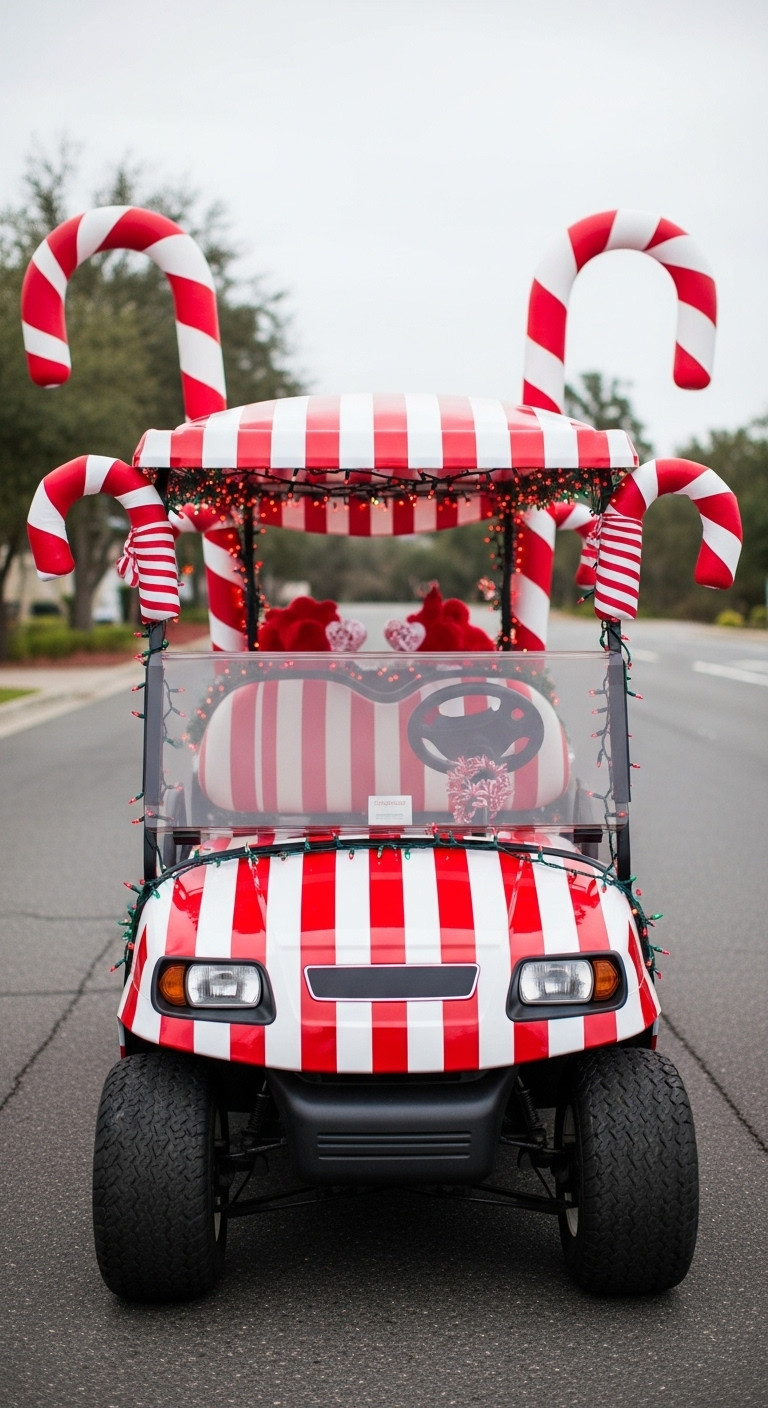
Pin this bright and cheerful Candy Cane idea!
A Candy Cane Lane theme uses a bold red and white striped pattern across the entire cart, accented with giant DIY candy canes made from pool noodles. This graphic and cheerful design is visually striking and creates an incredibly festive atmosphere.
- Materials Needed:
- Red and white striped fabric or plastic tablecloths
- Red and white battery-operated string lights
- White pool noodles
- Red electrical or duct tape
- Small candy cane ornaments
- Staple gun or heavy-duty tape
- Step-by-Step Directions:
- Wrap the body and seats of the golf cart with the red and white striped fabric, securing it tightly.
- Twist the red and white string lights together and wrap them around the roof supports.
- Create giant candy canes by wrapping red tape in a spiral around the white pool noodles. Gently bend the top to create the hook shape.
- Secure these giant candy canes to the four corners of the golf cart’s roof supports using white zip ties.
- Hang the smaller candy cane ornaments from the roof edge.
Pro-Tip: To get a clean bend in your pool noodle candy canes without kinking them, gently heat the area with a hairdryer before carefully shaping it into a hook.
9. A Serene Nativity Scene
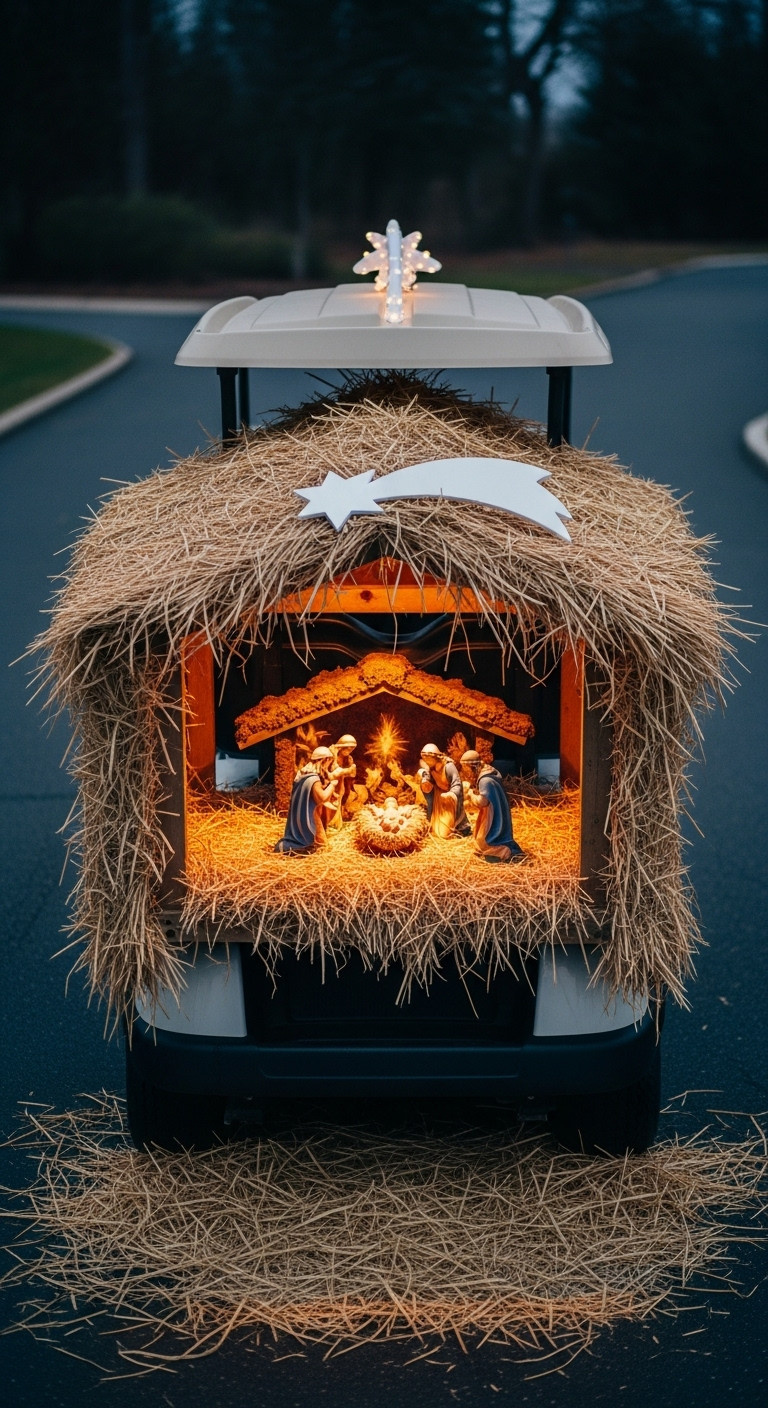
Pin this beautiful and traditional Nativity Scene idea.
To create a serene nativity scene, transform your golf cart’s cargo area into a humble stable using burlap and straw, featuring a small nativity set as the focal point. This theme focuses on the traditional Christian meaning of Christmas and creates a peaceful, reverent display.
- Materials Needed:
- A small, outdoor-safe nativity figurine set
- Burlap fabric or brown sheets to create a stable look
- A small bale of straw or bags of raffia
- A cardboard or coroplast cutout of a star
- Gold glitter spray
- Battery-operated warm, golden fairy lights
- Step-by-Step Directions:
- Clear the back seat or cargo area of the golf cart to serve as the stage.
- Drape the burlap fabric around the sides and back of the cart to create the walls of the stable.
- Spread a layer of straw on the floor of the “stage” area.
- Carefully arrange the nativity figurines in the center of the scene.
- Spray the star cutout with gold glitter and attach it to the front of the roof.
- Drape the golden lights gently around the scene to illuminate it softly, avoiding direct spotlights on the figures.
Pro-Tip: To keep the figurines secure, use museum wax or strong double-sided tape on their bases. This will hold them in place without causing damage.
10. Elf on the Shelf Mischief
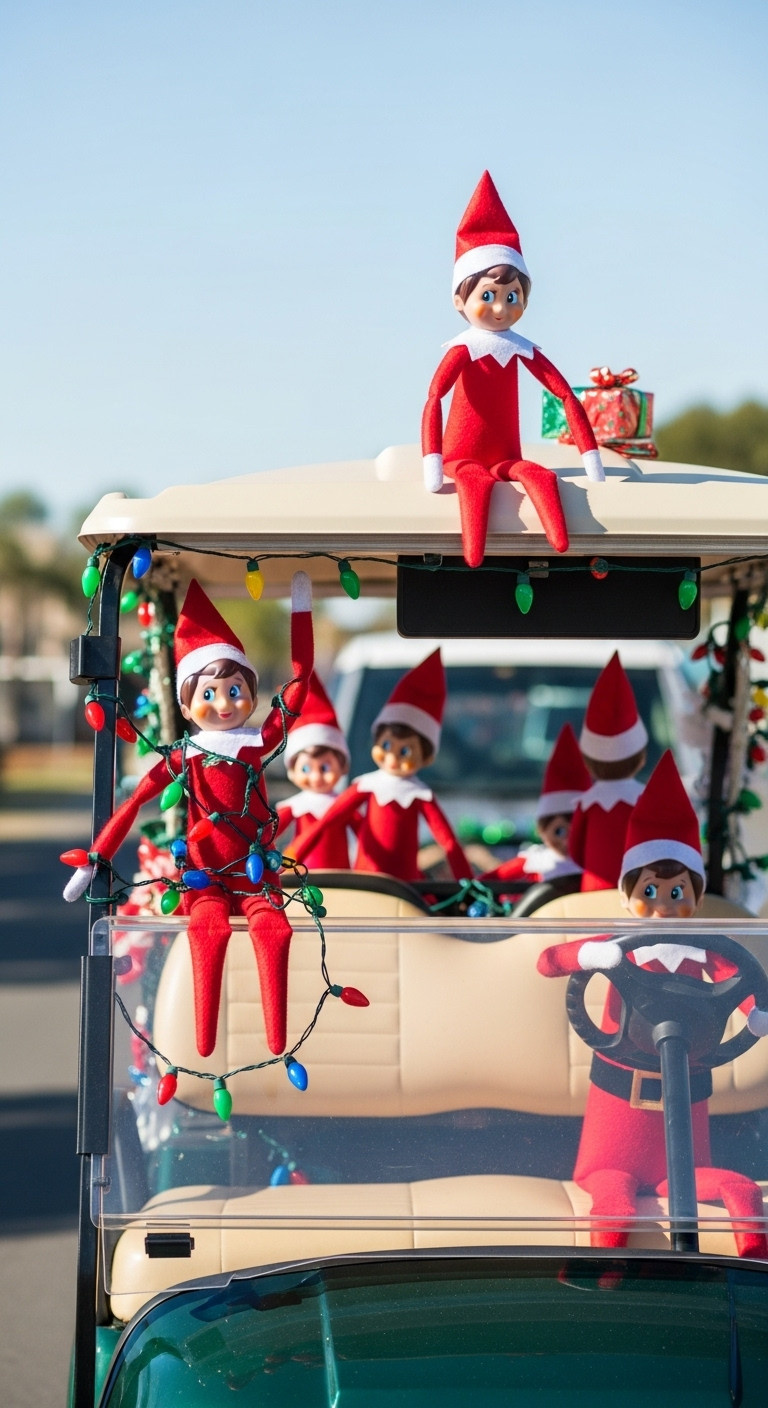
Pin this fun Elf on the Shelf parade idea!
This humorous theme involves staging several Elf on the Shelf dolls in mischievous poses all over your golf cart, as if they’ve been caught making a mess. It’s a fun, recognizable, and kid-friendly idea that is sure to get a lot of smiles from the crowd.
- Materials Needed:
- Several large, posable Elf on the Shelf style dolls
- Props for the elves to interact with (e.g., a string of lights, a roll of toilet paper, chocolate syrup bottle)
- Clear fishing line and safety pins
- General Christmas decorations like tinsel and ornaments
- Step-by-Step Directions:
- Decorate the cart with basic Christmas tinsel and lights to set a festive scene.
- Decide on a few mischievous scenarios for your elves.
- Pose the first elf in the driver’s seat, using fishing line to tie its hands to the steering wheel.
- Stage another elf tangled up in a string of lights on the roof.
- Position a third elf as if it’s TP-ing the cart or making a mess with a prop. Use safety pins and fishing line to secure the elves and props in their dynamic poses.
- Add a sign that says “Elves Gone Wild!” for extra humor.
Lesson Learned: The key to this theme is making the elves look like they were “caught in the act.” Use wire inside the elves’ limbs if they aren’t posable enough to hold their shape during the parade.
11. An Enchanted ‘Frozen’ Kingdom
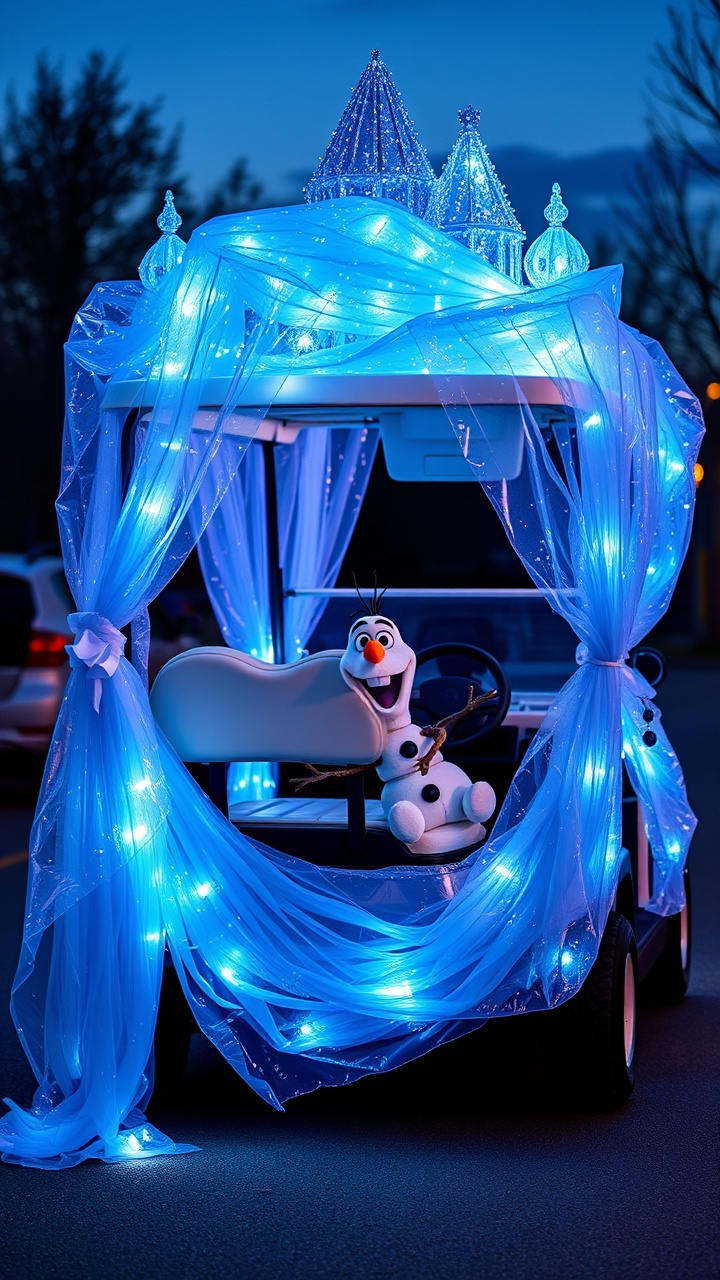
Pin this magical ‘Frozen’ themed idea!
To create a ‘Frozen’ Kingdom, use iridescent cellophane, sheer fabrics in icy blues and whites, and cool-toned LED lights to mimic the look of an ice palace. This popular movie theme is a guaranteed hit with families and creates a truly enchanting, magical float.
- Materials Needed:
- Sheer white and light blue gossamer fabric
- Rolls of iridescent cellophane film
- Battery-operated cool white and blue LED lights
- Silver spray paint and glitter
- Cardboard cutouts of snowflakes and ice crystals
- An Olaf plush or inflatable
- Step-by-Step Directions:
- Drape the sheer white and blue fabrics over the entire cart, letting it flow to create an ethereal effect.
- Cut jagged “ice” shapes from the cellophane and attach them over the fabric to add a shimmering, icy texture.
- Spray paint the snowflake and ice crystal cutouts with silver paint and coat with glitter. Hang them from the roof.
- Weave the cool-toned lights throughout the layers of fabric.
- Place Olaf in the passenger seat, waving to the crowd, to complete the theme.
Pro-Tip: For a stunning ice crystal effect, crumple up the iridescent cellophane before attaching it. This will catch and refract the light in hundreds of different directions.
12. A Warm Tropical Christmas
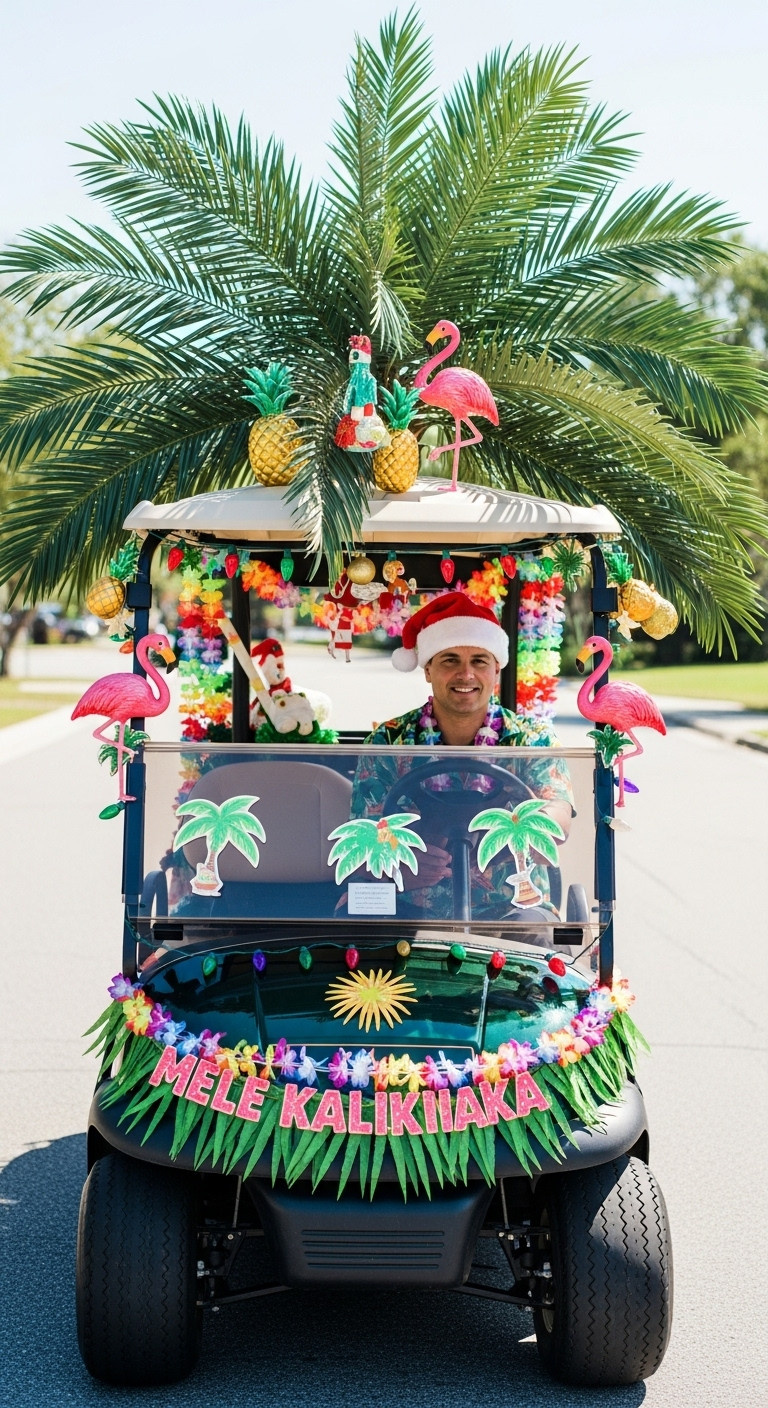
Pin this sunny Tropical Christmas idea!
A Tropical Christmas theme, perfect for warmer climates, combines traditional Christmas elements with beachy decor like palm fronds, leis, and flamingos. This unique and fun “Mele Kalikimaka” concept is a playful twist on holiday traditions.
- Materials Needed:
- Artificial palm fronds
- Colorful flower leis
- Pineapple and flamingo-shaped ornaments or small lawn decorations
- A string of multi-colored Christmas lights
- A Santa hat and a Hawaiian shirt
- Grass skirt table skirting
- Step-by-Step Directions:
- Attach the grass skirt skirting around the base of the golf cart.
- Use zip ties to attach the artificial palm fronds to the roof supports to create a canopy.
- Drape the leis all over the cart—on the steering wheel, mirrors, and seats.
- Hang the pineapple and flamingo ornaments from the palm fronds and roof.
- Weave the multi-colored Christmas lights throughout the tropical foliage. The driver’s Santa hat and Hawaiian shirt tie it all together.
Pro-Tip: Play some festive tropical Christmas music, like “Mele Kalikimaka,” from a portable speaker on the cart (if parade rules allow) to fully immerse the crowd in your theme.
13. The Eco-Friendly Upcycled Christmas
Pin this clever and sustainable decorating idea!
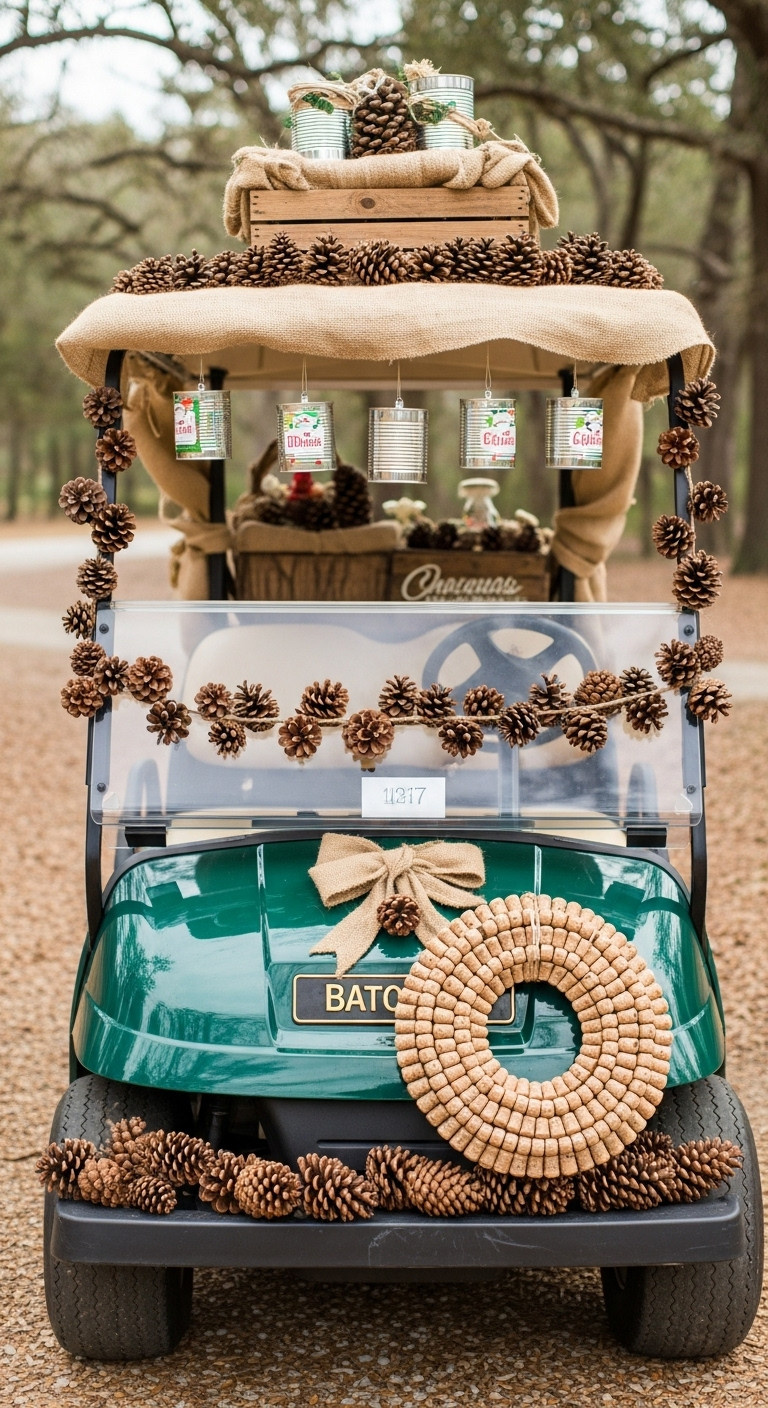
This eco-friendly theme focuses on using recycled, upcycled, and natural materials to create a rustic and sustainable Christmas float. It’s a wonderful way to showcase creativity while sending a positive message about environmental consciousness during the holidays.
- Materials Needed:
- Natural elements: pinecones, twigs, holly branches
- Recycled materials: tin cans, plastic bottles, wine corks, old CDs
- Burlap fabric or old coffee sacks
- Twine and brown paper
- Non-toxic paint
- Solar-powered fairy lights
- Step-by-Step Directions:
- Create garlands by stringing painted tin can lids or old CDs onto twine.
- Make ornaments by painting pinecones or cutting festive shapes from plastic bottles.
- Wrap the body of the cart in burlap fabric for a rustic base.
- Create a wreath for the front of the cart by gluing wine corks to a cardboard ring.
- Use solar-powered lights, ensuring the solar panel is placed on the roof where it can get light before the parade starts.
- Add a small sign that says “Have a Green Christmas!” to share your message.
Pro-Tip: This theme is all about creativity. Look for materials with interesting textures and shapes. For example, the bottoms of green plastic soda bottles can be cut and painted to look like poinsettias.
Key Takeaways: Your Quick Guide to a Winning Christmas Parade Golf Cart
- Plan Your Theme: Choose one of the 13 ideas or mix and match to create your own unique vision. A clear theme makes decorating easier and more impactful.
- Prioritize Power & Safety: Use battery-operated LED lights to avoid draining your cart’s battery. Always ensure your decorations are secure and don’t block your view for a safe ride.
- Master the Attachments: A good kit of zip ties, floral wire, and weatherproof tape is your best friend for a float that lasts the entire parade route without any mishaps.
- Think in 3D: Add dimension with large props like giant candy canes made from pool noodles or character cutouts on coroplast to make your cart stand out from a distance.
- Have Fun! The most important part of this entire process is to enjoy your creativity and share your holiday spirit with your community.
People Also Ask About Golf Cart Decorating Ideas for Christmas Parades
How do you attach Christmas lights to a golf cart?
The best way to attach Christmas lights is by using plastic zip ties or clips. Wrap the light strings around the roof supports, front cowl, and frame. For a clean look, match the zip tie color to your cart. Use battery-operated LED lights to prevent draining the main cart battery and for added safety.
What can I use for a golf cart parade float?
You can use a wide variety of materials for a golf cart parade float, including fabric, tinsel, wrapping paper, and cardboard or coroplast for custom shapes. For lighting, use battery-powered LEDs. For attachment, rely on zip ties, bungee cords, and strong, removable tape. The key is to choose weatherproof materials that will hold up for the duration of the event.
How do you make a golf cart look like a sleigh?
To make a golf cart look like a sleigh, focus on color and shape. Drape the cart in red fabric, wrap the supports in green garland, and add classic decorations like wreaths and bows. For a more advanced design, attach reindeer cutouts to a frame on the front of the cart and fill the back with wrapped presents to complete the iconic scene.
Final Thoughts
Transforming your golf cart for a Christmas parade is a fantastic way to spread holiday cheer and create lasting memories with family and friends. With these 13 creative ideas and practical prep tips, you have everything you need to design a float that’s not only stunning but also safe and secure for the big day. We hope this guide has sparked your imagination and given you the confidence to build an amazing entry for your parade debut in 2025.
Which theme are you most excited to try this year? Let us know in the comments below
Last update on 2025-12-06 / Affiliate links / Images from Amazon Product Advertising API

