
As an Amazon Associate GolferHive.com earns from qualifying purchases.
7 DIY Golf Cart Christmas Parade Decorating Ideas (2026)
A decorated cart can turn a neighborhood parade into a moving holiday scene. But loose props, dimmed lights, or blocked views can spoil the fun. These golf cart Christmas parade decorating ideas pair festive themes with practical safety checks.
To decorate a golf cart for a Christmas parade, choose a lightweight theme, attach weather-resistant decorations securely, and use suitable battery-powered or 12-volt LED lights. Keep the windshield, mirrors, wheels, pedals, and driver’s view clear. Test the lights and attachment points before the parade, and follow local organizer and vehicle safety rules.
A parade-ready golf cart is a recreational vehicle dressed with seasonal decorations, lighting, and securely mounted props. This guide covers seven DIY themes, from Santa’s sleigh to a wrapped present, plus supplies, assembly steps, and power considerations. Use the checks throughout to build a display that looks festive and stays practical on parade day.
Contents
show
Golf Cart Christmas Parade Decorating Ideas: How Can You Create a Festive, Safe Display?
Start with a lightweight theme, then plan where each decoration will attach and how its lights will get power. A holiday golf cart parade display can use waterproof LED light strands, garland, a wreath, ribbons, or themed panels. The key is to secure each item without scratching the cart or blocking the windshield, mirrors, headlights, wheels, pedals, or controls.
Before gathering materials, measure your cart and check its owner’s manual and parade organizer guidance. Cart models differ, so do not assume a roof, frame, or rear platform can support a particular load. Choose battery-powered lights for a simple setup, or use a cart-powered option only when its compatibility and installation requirements are clear. The seven ideas below show how to connect creative holiday themes with mounting, power, and visibility checks.
7 DIY Golf Cart Christmas Parade Decorating Ideas for a Winning Display
A polished holiday light display does not need to cover every surface. Start with one theme that fits your cart, route, available supplies, and setup time. Then choose lightweight, weather-resistant materials and plan how each piece will attach before you decorate.
For any build, protect painted areas with suitable padding and use secure attachment points. Keep ribbons, garland, cords, and props away from wheels, pedals, moving parts, lights, mirrors, and the driver’s view. Check product instructions for weather suitability, and confirm power requirements against the cart manual. A simple display can be just as memorable as an elaborate one when its colors, focal pieces, and lighting work together.
1. Build Santa’s Sleigh With a Lightweight Cardboard Frame

Pin this sleigh makeover to your holiday parade inspiration board.
A sleigh façade gives your golf cart an instantly recognizable shape without requiring a full custom body. Lightweight cardboard or corrugated plastic can form the front and sides, while Santa and Mrs. Claus figures complete the scene. Keep the build low and modular where possible: large panels and overhead decorations can catch wind, add weight, or interfere with the driver’s view. Measure your specific cart rather than relying on a generic template, and check the manual for model-specific limits.
Supplies Needed
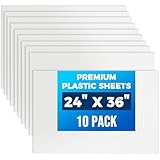
- Lightweight corrugated plastic or cardboard panels, measured to fit without covering the windshield.
- Red weather-resistant fabric or paint suited to the panel material.
- Soft-edge foam padding to protect paint at contact points.
- Reusable, durable zip ties and adjustable bungee cords.
- Battery-operated waterproof LED light strands and a covered battery pack.
- Lightweight Santa and Mrs. Claus figures; optional presents secured on the rear platform.
Instructions
- Measure the front and sides of the cart. Mark a template that leaves the lights, mirrors, and driver’s view clear.
- Cut and decorate the panels, smoothing the edges and keeping the structure lightweight.
- Add foam where panels meet the cart. Secure the panels only to suitable frame points with zip ties or bungees.
- Attach figures and presents so they cannot shift or enter the driver’s area.
- Outline the sleigh with lights, secure the battery pack, and test visibility, steering, and mounting before driving.
Pro tip: Consider roof wind load and weight distribution before building overhead. A low, modular display is easier to inspect and remove.
2. Assemble a Gingerbread House Golf Cart Facade

Save this sweet gingerbread build for your next neighborhood procession.
A gingerbread house façade turns flat side panels into a colorful holiday scene. Use lightweight panels for the brown base, white trim for icing, and foam shapes for candy details. Attaching accents to panels rather than directly to painted bodywork helps keep the cart’s finish protected and makes the decorations easier to remove. Keep candy shapes low-profile so they are less likely to catch wind, and test adhesives on a small sample before using them on the finished panels.
Supplies Needed
- Lightweight corrugated plastic panels sized for the cart’s side areas.
- Brown weather-resistant covering and white flexible trim.
- Lightweight foam candy shapes and outdoor-rated adhesive compatible with the panel.
- Foam padding and reusable zip ties.
- Waterproof battery-operated LED lights for the roof and panel outlines.
Instructions
- Measure each panel area and make templates that avoid doors, wheels, mirrors, and controls.
- Cover the panels with gingerbread-brown material and add white trim.
- Attach foam candy accents to the panels, not directly to painted bodywork.
- Pad contact points and secure the panels to suitable cart frame locations.
- Add lights, check for loose pieces, and confirm the driver’s view is clear.
Pro tip: Cold or damp conditions can affect adhesion. Test the adhesive on a sample, and use a secondary mechanical attachment for pieces that must stay secure.

3. Create a Winter Wonderland With Faux Snow and Cool-White LEDs

Pin this cool-white winter display for a calm, luminous parade look.
A winter wonderland theme combines faux snow, snowflake accents, evergreen garland, and cool-white LEDs. Keep fabric low on the cart and attach garland only at suitable frame points. Do not cover the windshield, lights, mirrors, or ventilation areas. Battery-operated string lights may simplify a small display because they avoid connecting to the cart’s electrical system. Even so, secure the battery pack and check the light and battery instructions for the expected weather.
Supplies Needed
- Outdoor-suitable faux-snow fabric cut to fit low-profile cart surfaces.
- Lightweight snowflake ornaments and shatterproof silver ornaments.
- Waterproof cool-white battery-operated LED strands.
- Soft ties or clips for garland on the windshield frame.
- Weather-resistant fasteners and foam pads to protect the cart finish.
Instructions
- Clean and dry the areas where removable clips will be placed.
- Drape faux snow low over the hood base, keeping the windshield and lights uncovered.
- Attach snowflakes to panels and garland to suitable frame locations.
- Wrap LEDs around the roof frame and connect them to a secured battery pack.
- Check visibility, wheel clearance, and decoration stability before the parade.
Pro tip: Use materials and lighting suited to the expected weather. Remove anything that could flap into the windshield or wheels.
4. Decorate a Candy Cane Express With Stripes and a Parade Banner

Save this candy-cane color scheme for an easy, high-contrast cart makeover.
A candy cane express is a simple option when you want a clear theme without building large panels. Red-and-white ribbons add color to the side pillars, while a lightweight wreath creates a focal point at the front grille. A banner can add another decorative surface, but keep it away from the wheels and driver’s area. Removable ties and clips can protect paint better than strong adhesive applied directly to bodywork. Before the parade, check every piece for movement in the wind.
Supplies Needed
- Weather-resistant red-and-white striped ribbon, cut into manageable lengths.
- Lightweight artificial wreath and broad outdoor ribbon bow.
- Blank reflective holiday banner sized for a side panel.
- Reusable zip ties, soft clips, and paint-protective foam pads.
- Waterproof LED strands for the roof frame.
Instructions
- Clean the cart and map attachment points before decorating.
- Secure the wreath to a suitable front grille location without blocking lights.
- Wrap ribbon around side pillars and fasten each loose end to prevent flapping.
- Attach the banner to a stable side panel, away from wheels and controls.
- Add lights, test every attachment, and confirm the driver’s view is clear.
Pro tip: An artificial wreath may be lighter and shed less than a real one. Consider weight, durability, and parade conditions before choosing.
5. Set Up a North Pole Workshop With Presents and a Speaker

Pin this workshop idea for a fun family-friendly parade entry.
A North Pole workshop display can use lightweight presents, small figures, garland, and lights to tell a festive story. Keep the gifts low and balanced on the rear platform, and check the owner’s manual for cargo guidance rather than assuming the platform can carry any load. A portable speaker can add music if the parade organizer allows it. Secure the speaker in a protected location, and make sure it does not interfere with driving or passengers.
Supplies Needed
- Lightweight empty gift boxes or foam prop presents, wrapped with weather-resistant paper.
- Small workshop figures with secure bases.
- Evergreen garland and battery-operated warm-white LED lights.
- Reusable tie-down straps or bungees for the rear platform.
- Compact portable speaker, if allowed by parade organizers.
Instructions
- Check the cart’s owner manual for cargo limits and identify a stable rear platform area.
- Wrap lightweight boxes and secure them low so they cannot shift or fall.
- Add figures and garland without covering lights or interfering with passengers.
- Mount the speaker securely without obstructing controls or visibility.
- Test lights and audio before the parade, following organizer rules for music and volume.
Pro tip: Keep decorative cargo low and balanced. Do not assume the rear platform can safely carry heavy props or a generator.

6. Add Reindeer Antlers, a Red Nose, and Underbody Glow Lights

Save this reindeer theme for a playful evening parade transformation.
Soft antlers and a removable red nose create a recognizable reindeer design. Underbody glow lights can add nighttime color, but installation needs more care than battery-powered accents. Keep lights and wiring clear of wheels, suspension, moving parts, and any other areas identified by the cart’s guidance. Confirm that a 12-volt kit is compatible before connecting it; consult the owner’s manual or a qualified technician if the installation is unclear.
Supplies Needed
- Soft, lightweight reindeer antlers with secure, non-scratching attachment straps.
- Removable red nose suitable for the cart’s front, clear of headlights.
- Weather-resistant underbody LED kit compatible with the vehicle, if properly installed.
- Battery-powered alternative lights for a no-wiring option.
- Foam pads, clips, and cable-management fasteners suited to the mounting surface.
Instructions
- Confirm parade rules and identify safe attachment points away from the driver’s view.
- Fit antlers securely to the roof frame without adding an unstable overhead structure.
- Attach the nose without covering headlights, grille openings, or required equipment.
- For underbody LEDs, use a compatible installation method and route wiring away from wheels and moving parts.
- Test lights and steering clearance, then inspect all connections before driving.
Pro tip: Underbody glow is optional. Choose battery-powered lights if you cannot confirm a safe, compatible 12-volt installation.

7. Wrap the Cart Like a Present With Bows and Reflective Trim

Pin this present-wrapped cart for a bold look with simple materials.
A present theme uses removable fabric or lightweight panels, wide ribbon, and a large bow to transform the cart’s exterior. Measure decorative areas carefully so the wrap never covers windows, mirrors, lights, controls, or moving parts. Full coverage may be harder to secure and remove, so side-panel ribbons and one focal bow offer a simpler alternative. Reflective trim can add a visible accent, but it must not cover required lights or vehicle markings.
Supplies Needed
- Removable weather-resistant fabric or lightweight panels sized to the cart body.
- Wide festive ribbon and a lightweight oversized bow.
- Reflective trim that does not cover lights or required vehicle markings.
- Paint-protective foam pads, soft clips, and reusable zip ties.
- Optional battery-operated LED strands for the roof frame.
Instructions
- Measure decorative areas and leave windows, lights, mirrors, and controls uncovered.
- Drape fabric or attach lightweight panels without wrapping moving parts.
- Cross ribbon over stable decorative surfaces and fasten loose ends securely.
- Attach the bow to a suitable frame point with a padded, secure tie.
- Add reflective accents and optional lights, then test access, visibility, and attachment stability.
Pro tip: Full coverage can hide important features or create loose fabric in wind. A partial-wrap design is often easier to secure and remove.
Key Takeaways: Your Quick Guide to Golf Cart Christmas Parade Decorating Ideas
A festive cart starts with a theme, but a parade-ready display also depends on materials, mounting, lighting, and a clear driver’s view. Whether you choose Santa’s sleigh or a winter wonderland, plan the build around your specific cart and the organizer’s rules. Use this quick review before you assemble holiday decorations:
- Choose a theme before shopping. Match the design to your cart’s size, supplies, route, and setup time.
- Use lightweight, weather-suitable materials. Waterproof LEDs, shatterproof ornaments, and padded clips can support a practical holiday display.
- Secure each decoration. Use suitable ties or bungees, then check that props, ribbons, garland, and banners cannot shift.
- Plan the power source. Compare battery-operated lights with a compatible cart-powered setup; do not assume a battery connection or inverter is suitable.
- Protect visibility and operation. Keep the windshield, mirrors, headlights, wheels, pedals, and controls clear.
- Check the manual and parade rules. Confirm guidance for loads, electrical accessories, audio, and route requirements.
- Make the display easy to inspect and remove. Modular decorations simplify pre-drive checks, cleanup, and reuse.
FAQs About Golf Cart Christmas Parade Decorating Ideas
How do you power Christmas lights on a golf cart?
Battery-operated lights are a simple option for small displays because they do not require a connection to the cart’s electrical system. For 12-volt lights, confirm compatibility with the cart and follow its owner’s manual or consult a qualified technician. Secure battery packs and protect connections as the manufacturer directs.
How do you attach lights to a golf cart safely?
Attach lights to suitable, stable frame areas and keep them clear of the driver’s view, wheels, pedals, and moving parts. Use outdoor-rated lights, protect the cart finish from abrasive fasteners, and follow the light maker’s instructions. Test the display while the cart is stationary before driving.
Can you use regular Christmas lights on a golf cart?
Use lights only when the manufacturer’s instructions allow the intended outdoor and vehicle use. Household plug-in lights may need a power source that is unsuitable for the cart and can introduce cord or weather concerns. Outdoor-rated LED strands or battery-operated lights may be easier to manage.
What supplies do you need for a holiday cart parade?
Most DIY displays need a theme, lightweight decorations, weather-suitable fasteners, lights, and a suitable power source. Depending on the design, supplies may include garland, shatterproof ornaments, faux snow, ribbon, a wreath, zip ties, foam pads, and a battery pack. Check cart dimensions and parade rules before buying materials.
How do you secure decorations so they do not fall off?
Use suitable attachment points, padded clips, reusable zip ties, or bungees, then inspect each item for movement. Keep decorations light and avoid relying on adhesive alone for pieces exposed to wind. Gently test garland, banners, and props while ensuring ties cannot reach wheels or controls.
Can you put an inflatable on a golf cart roof?
Only use an inflatable if it can be mounted without exceeding the cart’s limits, blocking visibility, or creating an unstable roof load. Wind can catch elevated decorations, and a fan may need a compatible power source. Check the owner’s manual and parade rules before choosing one.
What are the best Christmas golf cart themes?
Themes include Santa’s sleigh, gingerbread house, winter wonderland, candy cane express, North Pole workshop, reindeer, and a wrapped present. Choose one that fits the cart, supplies, route, and setup time. A consistent color palette and a few secure focal pieces can create a cohesive look.
How do you make a golf cart look like Santa’s sleigh?
Use a lightweight sleigh-shaped façade, red accents, warm lights, and securely mounted Santa figures. Template panels to fit your cart, pad contact points, and attach them only to suitable frame locations. Keep the windshield, lights, mirrors, wheels, and controls clear.
Are battery-powered or plug-in lights better for a golf cart parade?
Battery-powered lights are usually simpler to set up, while cart-powered lights require a compatible installation. Battery packs need secure placement; vehicle-powered setups require attention to compatibility, wiring, and power use. Compare product instructions with the cart manual and parade requirements.
How do you prevent decorations from scratching golf cart paint?
Use clean surfaces, soft padding, and paint-safe clips or ties rather than fastening rough materials directly to painted panels. Test removable products on a small, inconspicuous area and follow their instructions. Remove decorations carefully after the parade.
What safety rules apply to Christmas golf cart parades?
Follow organizer rules and keep required lights, mirrors, the windshield, controls, and driver view unobstructed. Secure decorations so they cannot fall or reach moving parts, and use electrical accessories only as permitted by the cart manufacturer. Check route, passenger, and local vehicle requirements before participating.
Final Thoughts on Golf Cart Christmas Parade Decorating Ideas
The best golf cart Christmas parade decorating ideas make a theme easy to recognize without making the vehicle harder to operate. Choose one concept, measure your cart, and select lightweight materials that suit the expected conditions.
Before parade day, secure every decoration, test the lights, and confirm the power setup against the cart’s instructions. Check visibility and control access from the driver’s seat, then review organizer guidance for loads, audio, and route requirements. A modular display is easier to inspect, remove, and reuse for next season.
Whether you build a sleigh, gingerbread façade, or present-inspired cart, thoughtful mounting and a clear view help balance festive style with practical preparation. Which theme would you choose for your parade?
Last update on 2026-11-22 / Affiliate links / Images from Amazon Product Advertising API
