As an Amazon Associate GolferHive.com earns from qualifying purchases.
11 Spooky Sharpie Golf Ball Designs And How To Make Them
Looking for a Halloween craft that’s more treat than trick? You want something fun, cheap, and creative that won’t end in a “craft fail.”
This is where the humble golf ball becomes your tiny, dimpled canvas. Using just a few Sharpie markers, you can create spook-tacular decorations, party favors, or just a fun afternoon project. It’s the perfect DIY craft project for any skill level.
Decorating golf balls with Sharpies is a fun, affordable Halloween craft that involves cleaning a golf ball, drawing spooky designs with permanent markers, and sealing the art to make it last. This guide gives you 11 spooky ideas and the exact steps to bring them to life. Get ready to have some fun!
Why Are My Plain Golf Balls So… Un-Spooky?
Tired of the same old Halloween decorations? It’s easy to fall into the trap of buying generic, store-bought items. But creating something with your own hands adds a personal, memorable touch to the spooky season. That’s why this DIY Sharpie golf ball craft is one of my go-to projects for Halloween parties. It’s an easy, affordable, and tested way to make unique party favors and decor that always gets compliments.
This DIY craft project transforms a simple golf ball, your canvas, into a festive piece of art using just Sharpie markers as your tool. We’ll show you how to prepare the surface and provide step-by-step instructions for spooky designs like floating eyeballs and intricate spider webs. You don’t need to be an artist to make something awesome.
11 Spooky Sharpie Golf Ball Designs And How To Make Them
Ready to turn those boring white spheres into Halloween masterpieces? Here are 11 distinct, spooky ideas that are perfect for a beginner-friendly craft project. We’ve selected and tested these Halloween themes for their high impact and ease of execution, even if you think you can’t draw. Each design comes with its own mini how-to guide to ensure your creations are a spooky success.
1. The Classic Spooky Eyeball
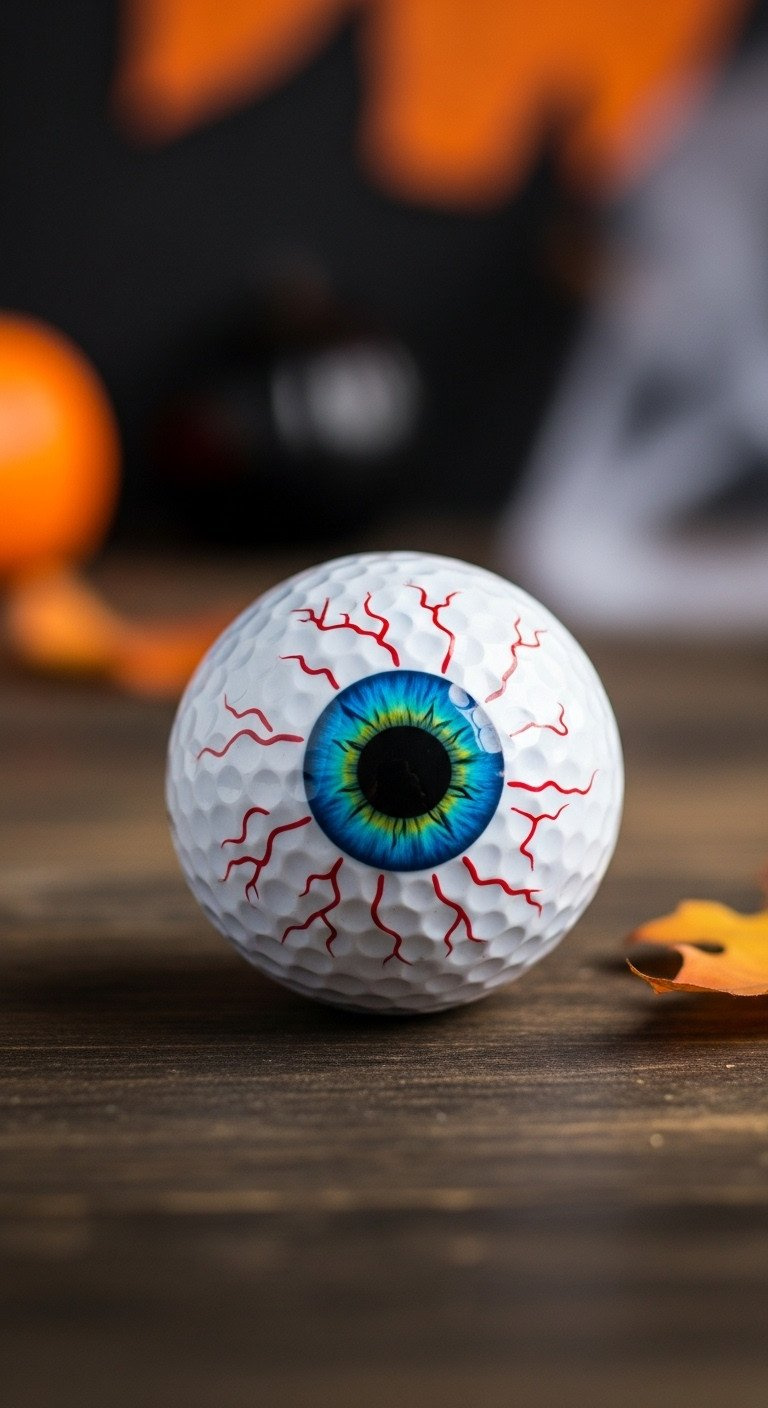
Pin this classic spooky idea for your Halloween party!
Materials Needed:
- 1 clean, white golf ball
- Isopropyl (rubbing) alcohol and a cotton pad
- Blue Sharpie marker (fine point)
- Black Sharpie marker (fine point)
- Red Sharpie marker (ultra-fine point for veins)
- An egg cup or bottle cap to use as a holder
Step-by-Step Directions:
- Prep the Surface: Wipe the entire golf ball with rubbing alcohol to remove any oils. Let it dry completely for 2-3 minutes. Place it in your holder.
- Draw the Iris: Using the blue Sharpie, draw a large circle (about the size of a dime) for the iris. Fill it in completely. Let it dry for 1 minute to avoid smudging.
- Add the Pupil: With the black Sharpie, draw a smaller, solid black circle in the very center of the blue iris.
- Create Veins: Use the red ultra-fine point Sharpie to draw thin, squiggly lines radiating outward from the edge of the blue iris. Vary the length and waviness to make them look like realistic veins.
- Dry & Seal: Let the design dry for at least 10 minutes. For a permanent finish, apply a light coat of clear acrylic spray in a well-ventilated area.
Pro-Tip: For a more realistic eye, leave a tiny white dot in the black pupil to look like a reflection of light. You can do this by carefully avoiding that spot or by using a white oil-based paint pen as a final touch.
2. The Intricate Spider Web
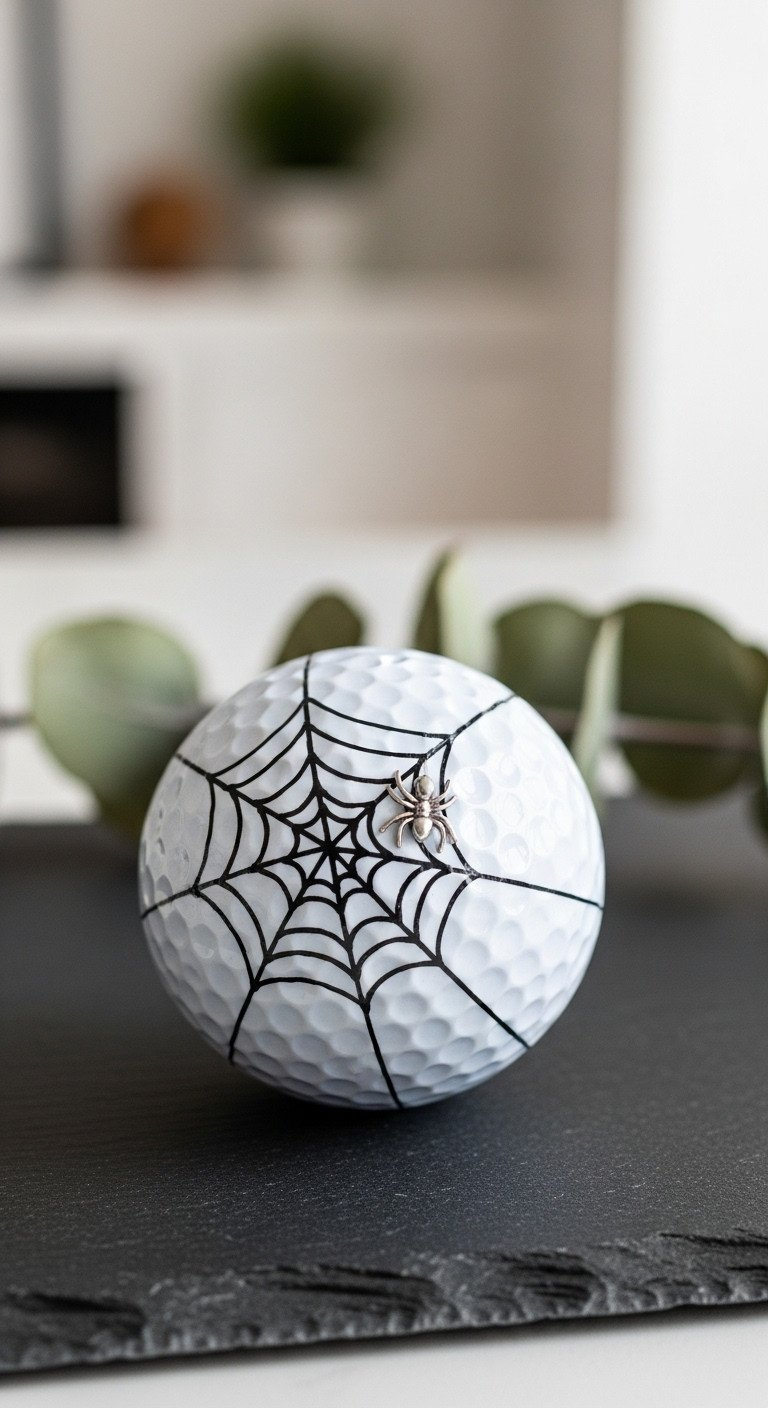
Save this elegant spooky design idea!
Materials Needed:
- 1 clean, white golf ball
- Black Sharpie marker (ultra-fine point is essential for this design)
- Optional: Metallic silver Sharpie for a spider
- A pencil for light sketching (optional but recommended)
- An egg cup or bottle cap holder
Step-by-Step Directions:
- Clean the Ball: Prep the golf ball with rubbing alcohol and let it dry. Place it in the holder.
- Draw Spokes: Using the black ultra-fine Sharpie, draw a small ‘X’ in the center. Then draw a vertical line and a horizontal line through the ‘X’, like you’re cutting a pizza into 8 slices. These are your web’s main support lines. Extend them down the sides of the ball.
- Connect the Web: Start near the center. Connect each spoke to the next with a slightly curved, drooping line. Work your way outwards, creating concentric, curved lines all the way around.
- Add a Spider (Optional): Use the metallic silver or black Sharpie to draw a small circle for the spider’s body and add 8 tiny legs.
- Dry Completely: The fine lines can smudge easily. Let it dry for at least 15 minutes before handling or sealing with a clear coat.
Lesson Learned: Don’t worry about perfect symmetry. Natural spider webs are never perfect, and slight imperfections make the design look more authentic.
3. The Friendly Ghost Face
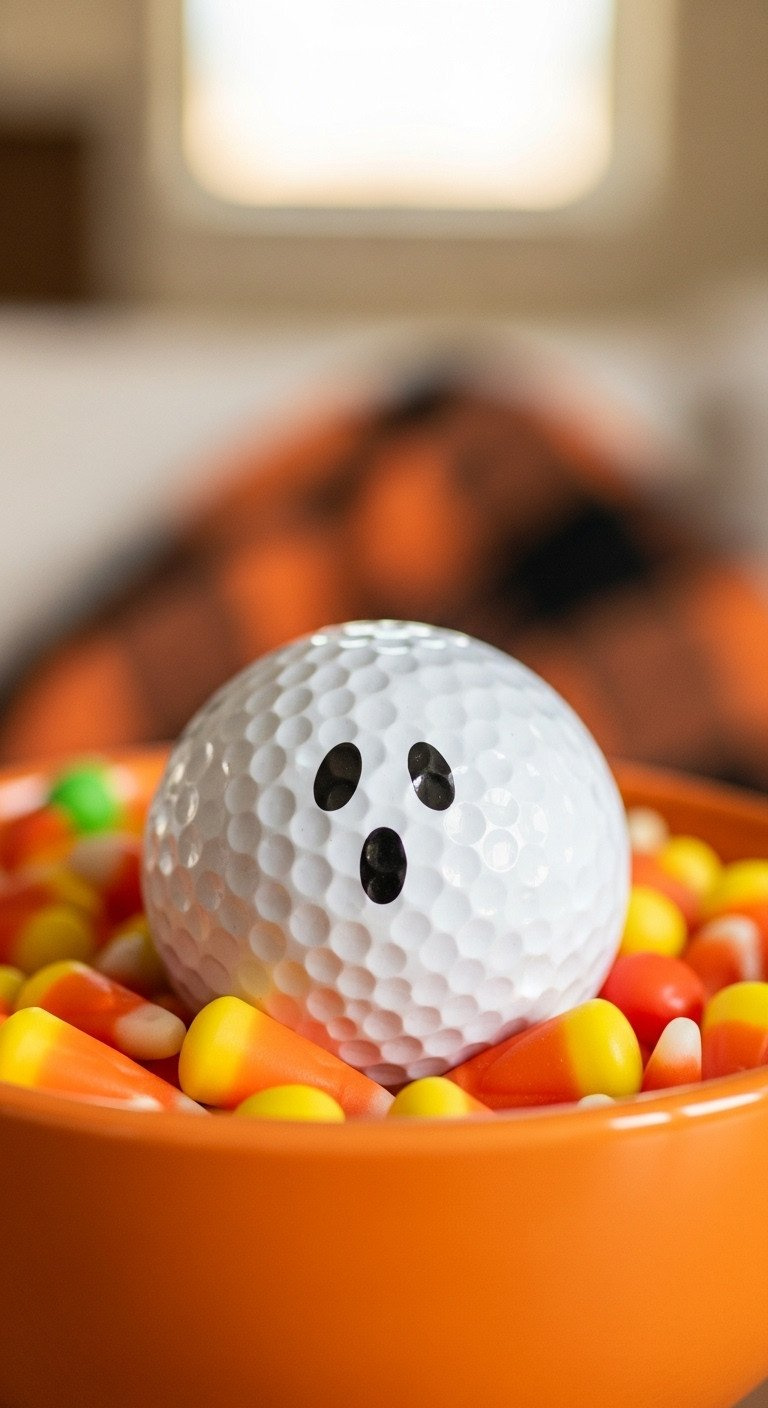
Pin this super easy ghost craft for the kids!
Materials Needed:
- 1 clean, white golf ball
- Black Sharpie marker (fine or chisel tip works well)
- Rubbing alcohol & cotton pad
Step-by-Step Directions:
- Prep the Ball: Clean the golf ball with alcohol and let it dry.
- Draw the Eyes: Use the black Sharpie to draw two large, slightly wobbly ovals for the eyes. Don’t make them perfect circles; a little irregularity adds character.
- Add the Mouth: Below and between the eyes, draw a smaller oval for a classic “O” shaped ghost mouth.
- Fill In: Completely fill in the eye and mouth shapes with the black marker.
- Let Dry: This simple design dries in just a few minutes. Make a whole bowl of them for a quick and cute decoration!
Pro-Tip: Make each ghost unique! Vary the size and shape of the eyes and mouths. Some can be smiling, some surprised, and some can have their mouths off to one side.
4. The Classic Jack-O’-Lantern
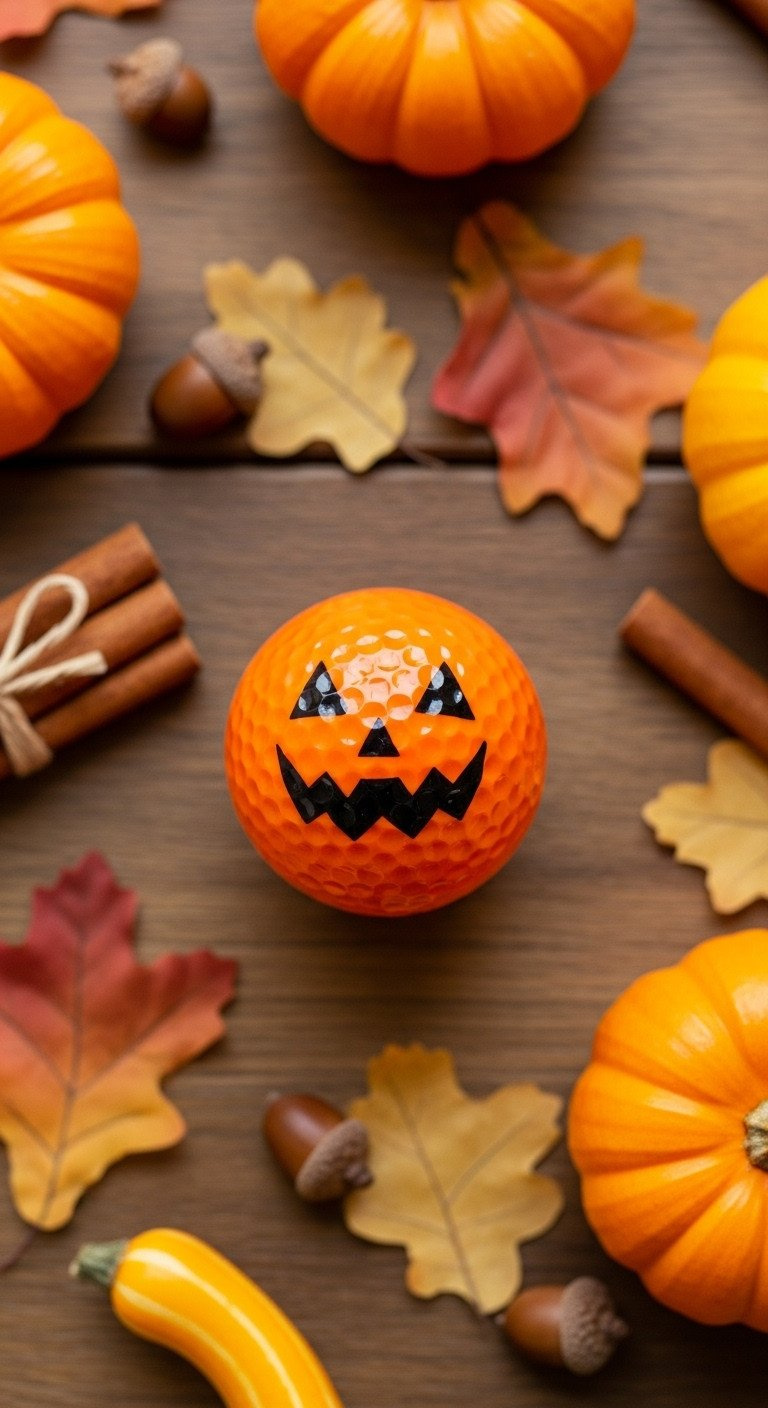
Save this pumpkin design for your fall decor board!
Materials Needed:
- 1 clean, white golf ball
- Orange Sharpie marker (a broad or chisel tip is best for coloring)
- Black Sharpie marker (fine point)
- An egg cup or holder
Step-by-Step Directions:
- Clean and Prep: Wipe the ball with rubbing alcohol and let it dry.
- Create the Base Coat: Use the broad side of the orange Sharpie to color the entire surface of the golf ball. Work in sections, letting each part dry for a minute before rotating it in the holder. Apply a second coat for a more vibrant, even color. Let dry for 10 minutes.
- Draw the Eyes: Use the black fine-point Sharpie to draw two classic triangles for the eyes.
- Add the Nose and Mouth: Draw a smaller triangle for the nose. For the mouth, draw a wide, jagged grin with a few square teeth.
- Fill the Face: Carefully fill in the eyes, nose, and mouth with the black marker. Let it fully dry.
Pro-Tip: Oil-based Sharpie paint pens are fantastic for creating the orange base coat. They provide a much more opaque, paint-like finish than standard markers.
5. The Spooky Black Cat
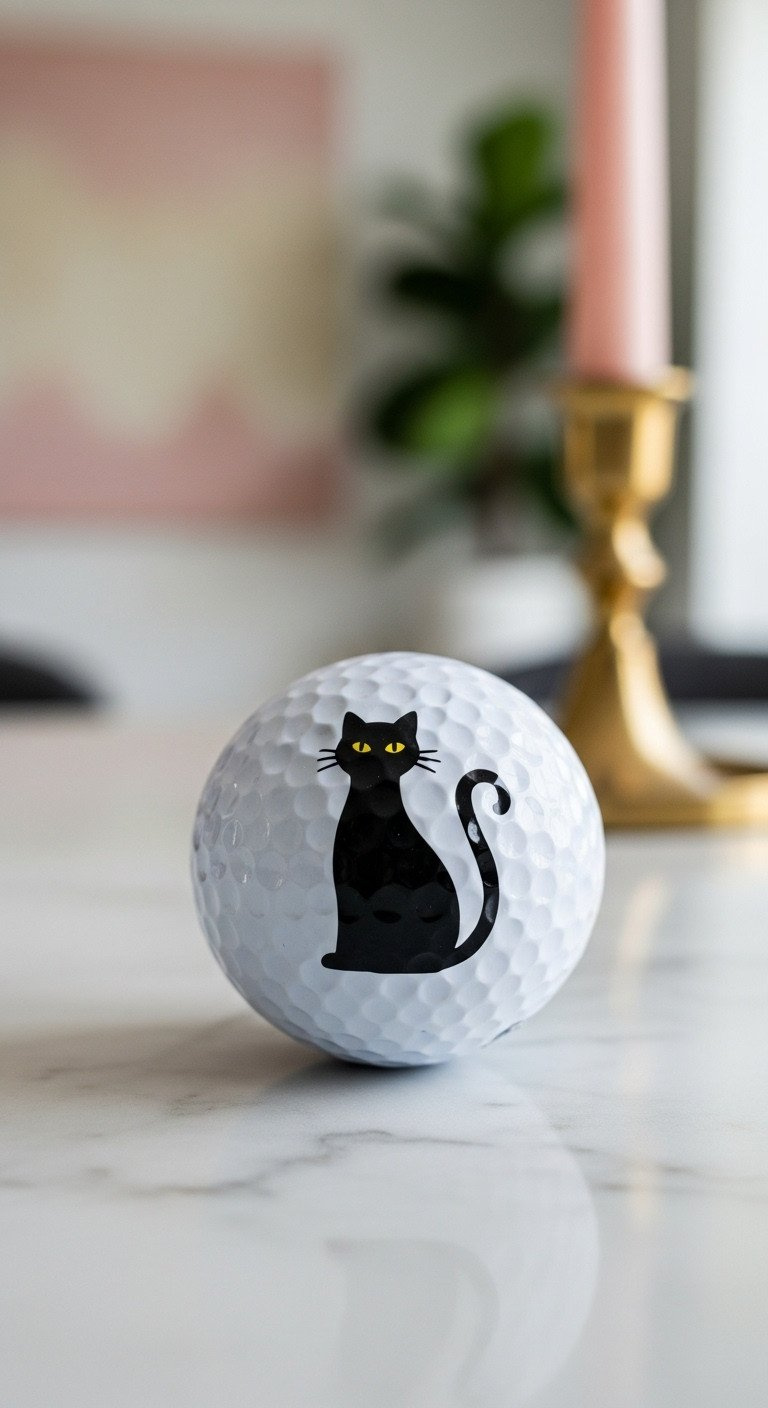
Pin this chic and spooky black cat idea!
Materials Needed:
- 1 clean, white golf ball
- Black Sharpie marker (ultra-fine point)
- Yellow Sharpie marker (ultra-fine point)
- A pencil for sketching
Step-by-Step Directions:
- Prep and Sketch: Clean the ball with alcohol. Lightly sketch the cat’s silhouette with a pencil: an arched back, a small head with a triangular ear, and a long, curling tail.
- Outline the Cat: Carefully trace over your pencil sketch with the black ultra-fine Sharpie.
- Fill It In: Use a slightly thicker black Sharpie (or the same one) to carefully fill in the entire silhouette. Let it dry for 5 minutes.
- Add the Eyes: Use the yellow ultra-fine Sharpie to add two tiny dots for glowing eyes in the cat’s head.
- Final Dry: Let the design dry completely before handling.
Lesson Learned: For silhouettes, a clean outline is key. Using an ultra-fine point for the tracing step makes a huge difference in the final sharpness of the design.
6. The Flying Bat Silhouette
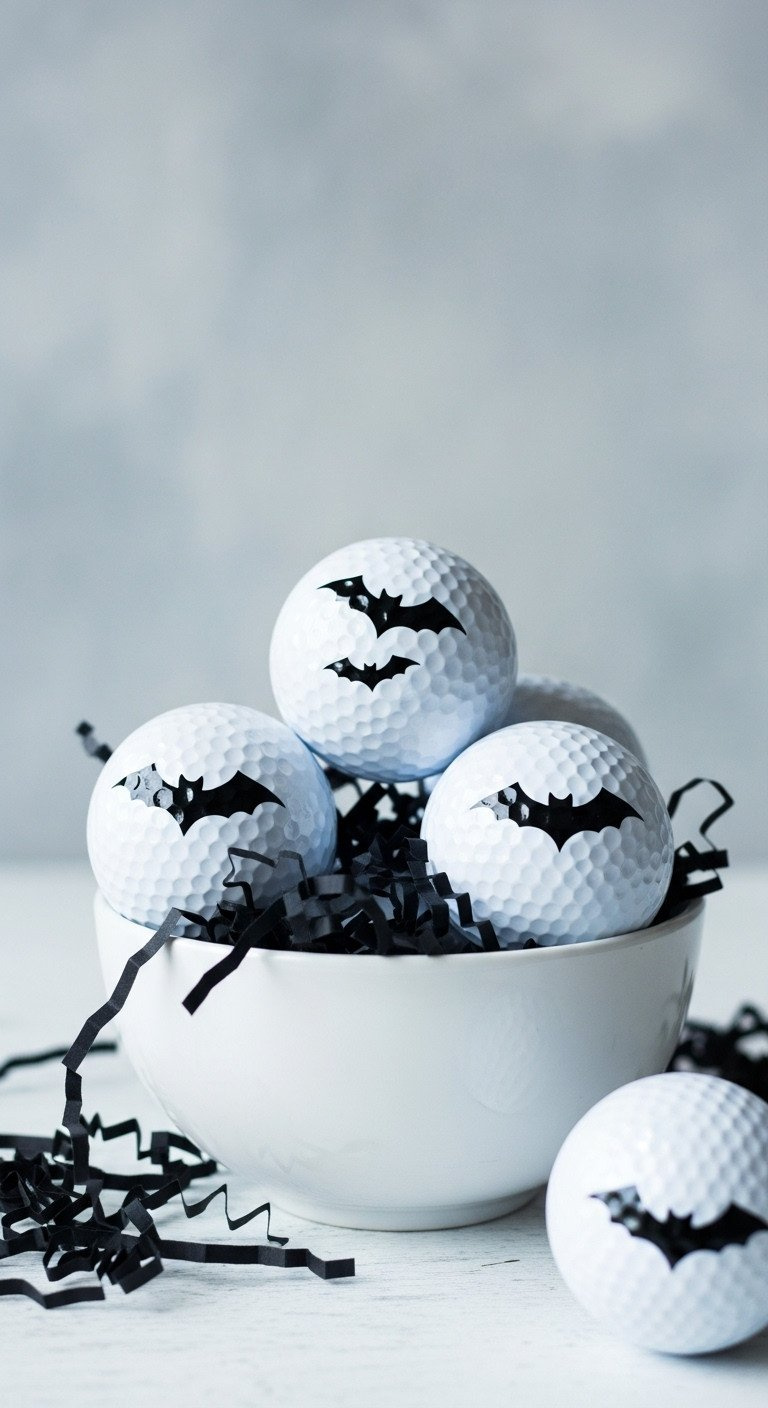
Save this easy bat craft for a modern Halloween look!
Materials Needed:
- Multiple clean, white golf balls
- Black Sharpie marker (fine point)
- Rubbing alcohol
Step-by-Step Directions:
- Clean the Balls: Prep all your golf balls with alcohol and let them dry.
- Draw the Bat Shape: The bat shape is like a wide, stretched ‘M’ with a small bump in the middle for the head. Practice on paper first if you’re unsure.
- Ink the Bats: Draw two or three small bat silhouettes on each golf ball. Vary their size and direction to make them look like they’re flying around the ball.
- Fill In: Completely fill in the bat shapes with your black Sharpie.
- Create a Set: Repeat the process on several golf balls and display them together in a bowl for a high-impact, minimalist decoration.
Pro-Tip: Draw the bats near the “seam” or brand marking on the golf ball. The printed text can serve as a helpful guideline to keep your bats level as you rotate the ball.
7. The Candy Corn Stripes
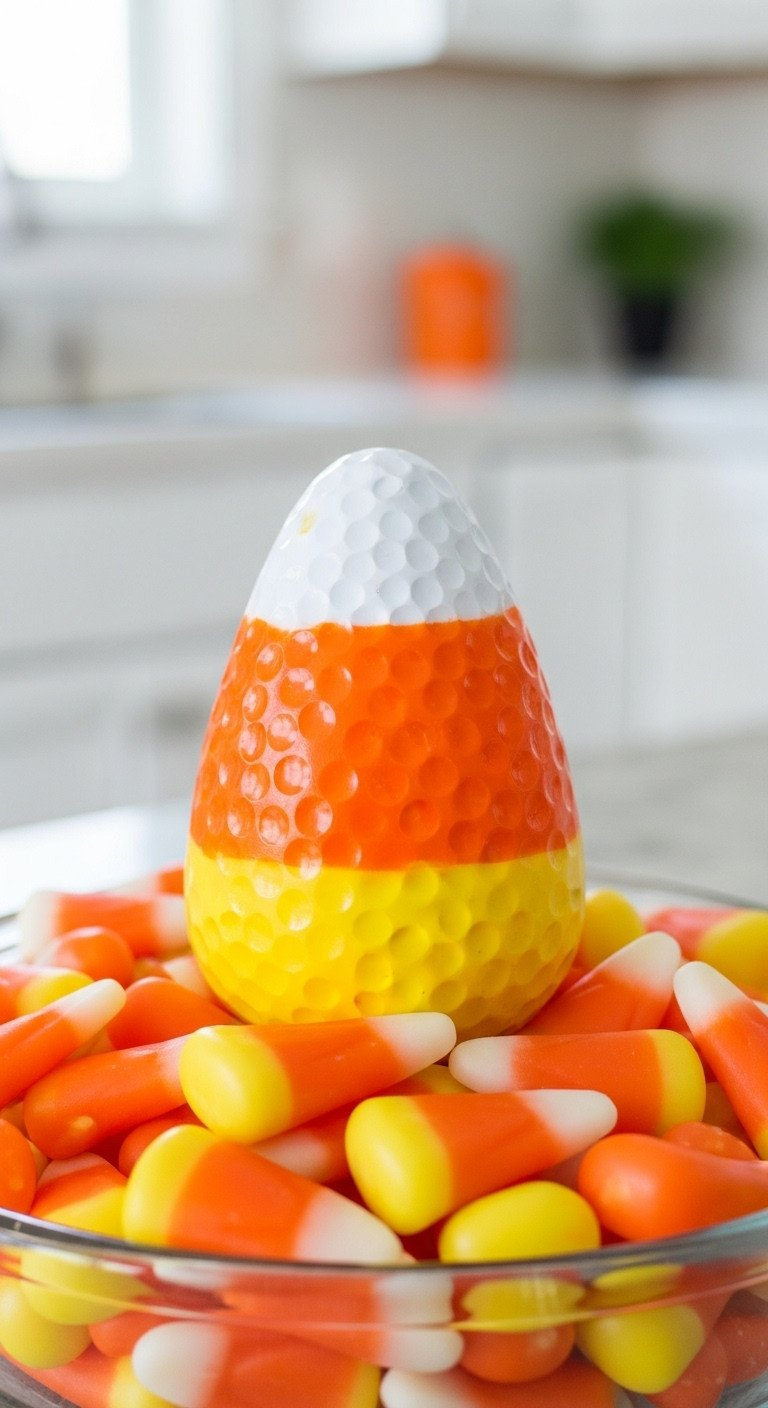
Pin this sweet candy corn idea!
Materials Needed:
- 1 clean, white golf ball
- Orange Sharpie marker (chisel or broad tip)
- Yellow Sharpie marker (chisel or broad tip)
- A pencil
- An egg cup holder
Step-by-Step Directions:
- Clean and Mark: Prep the ball with alcohol. Use a pencil to lightly draw two lines around the ball, dividing it into three roughly equal sections (top, middle, bottom).
- Color the Bottom: Use the yellow Sharpie to color in the entire bottom third of the ball, up to your first pencil line. Let it dry for 5 minutes.
- Color the Middle: Use the orange Sharpie to color in the middle section, between your two pencil lines. Be careful not to color over the yellow.
- Leave the Top: The top third remains white, just like real candy corn.
- Touch Up & Dry: Once dry, go back and apply a second coat of yellow and orange for a more solid color. Let it dry completely.
Lesson Learned: Use the dimples on the golf ball as a guide to help you draw straighter lines around the curved surface. Follow a single row of dimples all the way around.
8. The Goofy One-Eyed Monster
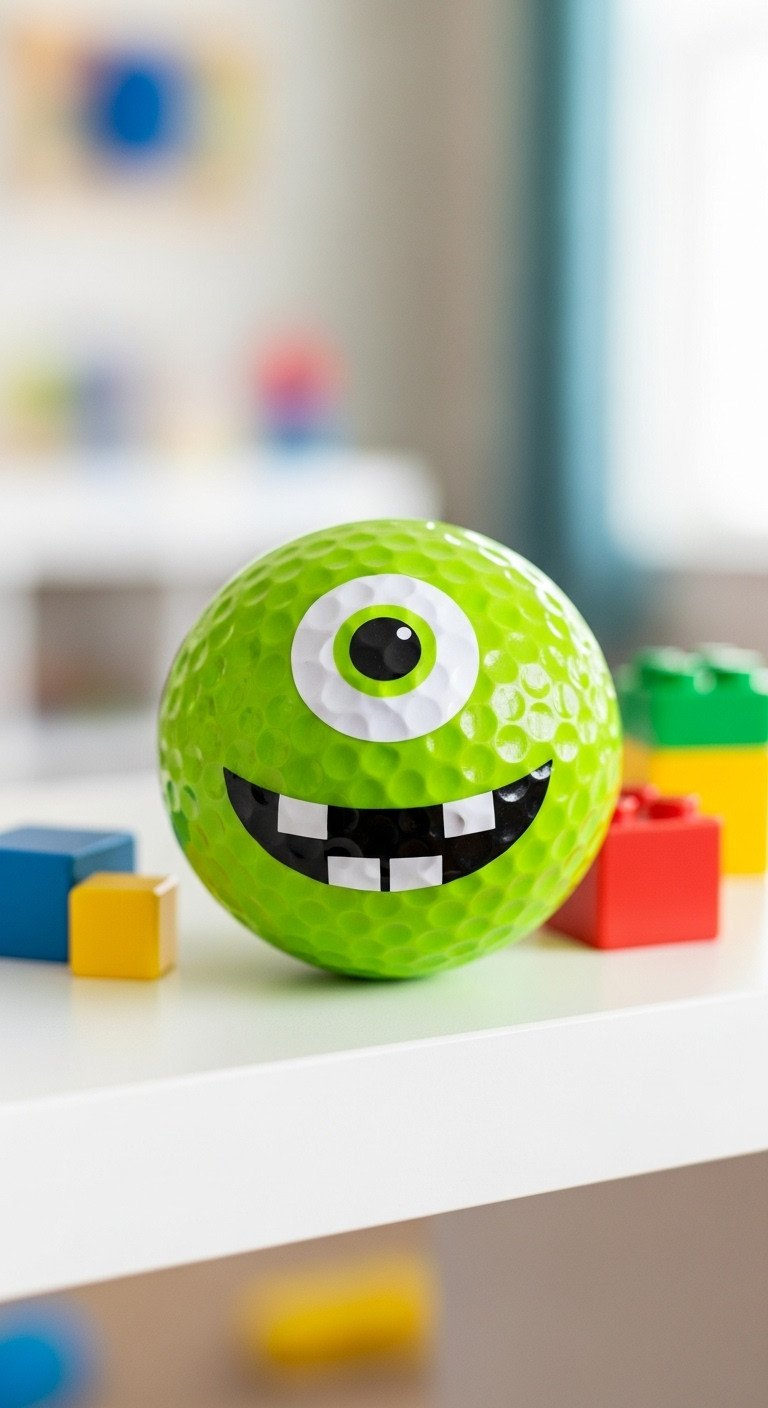
Save this cute monster craft idea for a fun kid’s project!
Materials Needed:
- 1 clean, white golf ball
- Lime Green Sharpie marker (broad tip)
- Black Sharpie marker (fine point)
- White oil-based Sharpie paint pen (essential for the eye and teeth)
Step-by-Step Directions:
- Create the Monster Skin: Clean the ball with alcohol. Use the lime green Sharpie to color the entire ball. Apply two coats for a solid color and let it dry completely (about 10 minutes).
- Make the Eyeball: Use the white paint pen to draw a large white circle in the middle of the ball. Fill it in. Let this dry for 5-10 minutes; paint pens take longer to dry.
- Add the Pupil: Once the white is dry, use the black fine-point Sharpie to draw a black dot in the center of the white eye.
- Draw the Mouth: Use the black Sharpie to draw a wide, smiling mouth shape below the eye.
- Add Teeth: Use the white paint pen to draw two or three square teeth inside the mouth. Let the entire monster dry for at least 20 minutes before sealing.
Pro-Tip: Before using a paint pen, shake it well and press the tip down on a piece of paper until the paint flows. This ensures you get a smooth, opaque line on your golf ball.
9. The Simple Skull & Crossbones
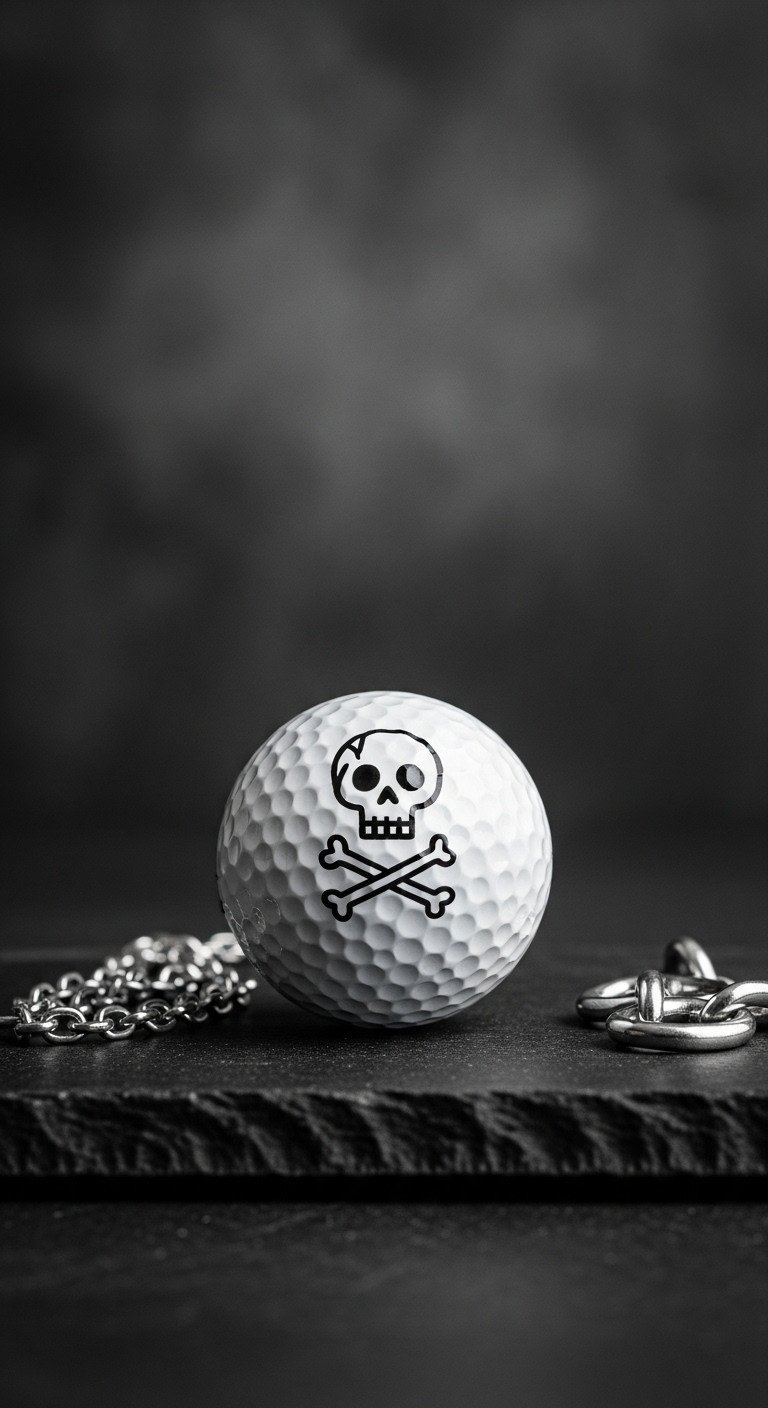
Pin this cool skull design for a pirate-themed Halloween!
Materials Needed:
- 1 clean, white golf ball
- Black Sharpie marker (fine point)
- Pencil for sketching
Step-by-Step Directions:
- Prep and Sketch: Clean the ball. Lightly sketch a simple skull shape with a pencil: a rounded top and a flatter, squarish jaw.
- Draw the Skull: Trace the skull outline with your black fine-point Sharpie.
- Add Facial Features: Draw two simple dots or small circles for eyes and two small vertical lines for the nose cavity.
- Draw the Crossbones: Below the skull, draw a large ‘X’ to represent the crossbones. You can add small circles at the end of each line to look like the ends of bones.
- Let Dry: This line-art design dries very quickly.
Lesson Learned: You don’t need to be an expert artist. A very simple, cartoonish skull is often more charming and effective for this craft than a super-realistic one.
10. The Witch’s Hat & Stars
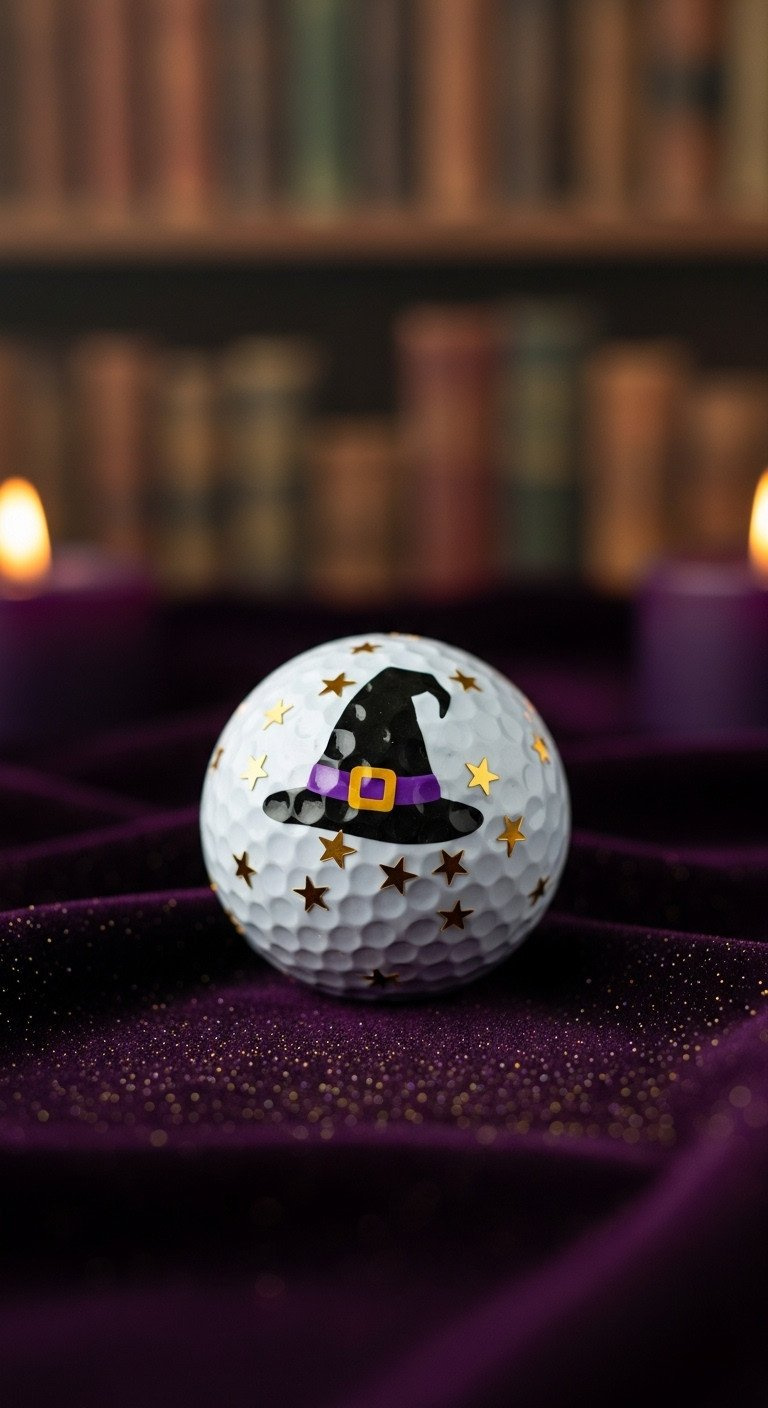
Save this magical witchy design idea!
Materials Needed:
- 1 clean, white golf ball
- Black Sharpie marker (fine point)
- Purple Sharpie marker (fine point)
- Metallic Gold Sharpie marker (extra-fine point)
Step-by-Step Directions:
- Prep the Ball: Clean the golf ball with rubbing alcohol.
- Draw the Hat: Use the black Sharpie to draw a classic witch’s hat: a wide, flat brim and a tall, pointed cone that’s slightly bent at the top.
- Fill the Hat & Add a Band: Fill in the hat with the black marker. Then, use the purple Sharpie to draw a thick band across the base of the cone.
- Add the Stars: Use the metallic gold Sharpie to draw small stars and dots scattered around the hat, filling the empty white space. Vary the sizes of the stars.
- Dry & Seal: Metallic markers can take a bit longer to dry. Wait 15-20 minutes before sealing.
Pro-Tip: The metallic Sharpies look best over a sealed surface. Consider applying one light coat of sealer *before drawing the gold stars. Let it dry, add the stars, then seal again.*
11. The “BOO!” Typography Ball
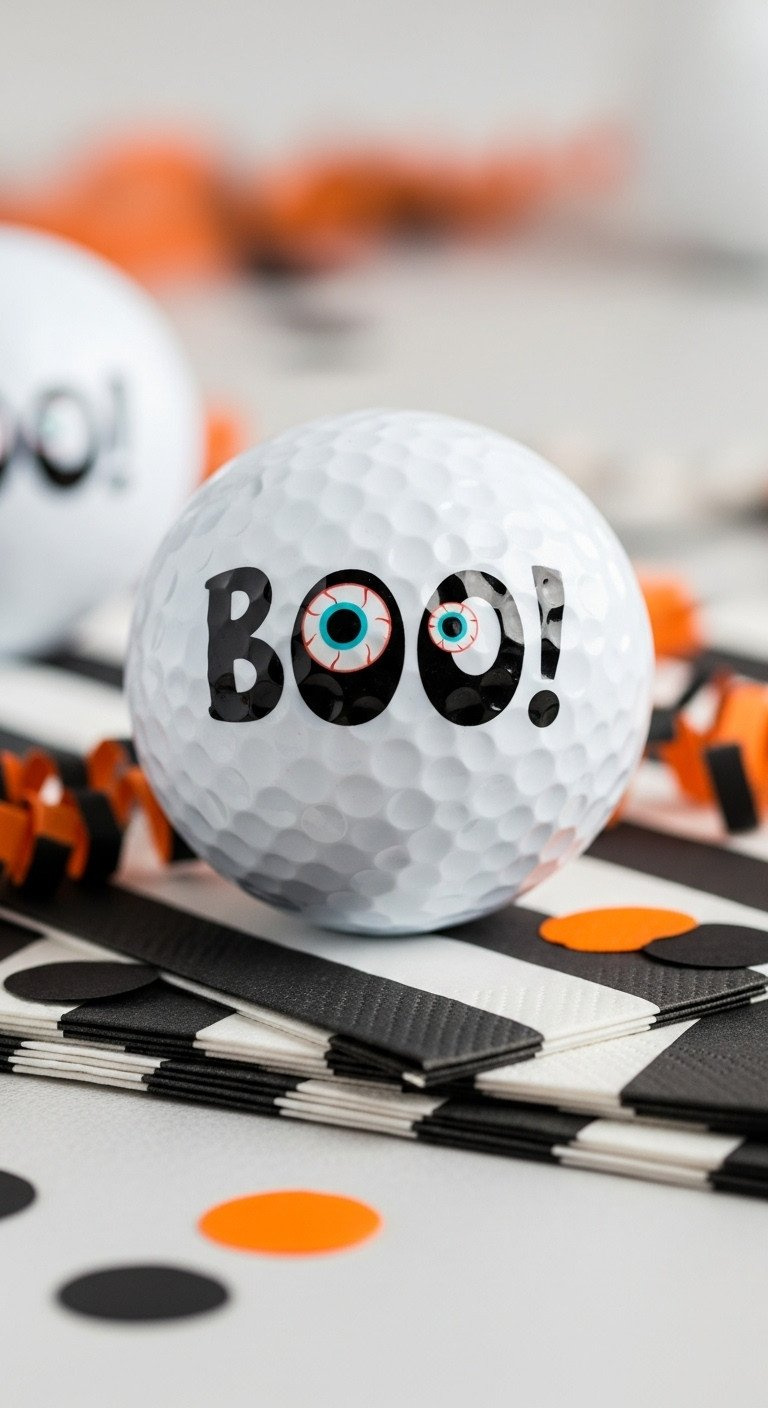
Pin this fun typography idea for your Halloween decor!
Materials Needed:
- 1 clean, white golf ball
- Black Sharpie marker (fine point and a broader chisel tip)
- Pencil for sketching
Step-by-Step Directions:
- Clean and Sketch: Prep the ball with alcohol. Use a pencil to lightly sketch out the word “BOO!” in a bubbly, rounded font. Make the “O”s large and circular.
- Outline the Letters: Carefully trace the pencil outlines with the fine-point black Sharpie.
- Fill In: Use the chisel tip or a thicker marker to fill in the letters completely.
- Add Eyeballs: Inside each of the “O”s, use the fine-point marker to draw a small black circle, turning the letters into cartoon eyes.
- Dry & Display: Let the thick ink dry for 10-15 minutes before handling or sealing.
Lesson Learned: When drawing letters on a curve, they can look distorted. Sketch them slightly taller and thinner than you normally would, as the curve of the ball will make them appear wider.
Key Takeaways: Your Quick Guide to Perfect Sharpie Golf Balls
- Always Prep Your Canvas: Clean every golf ball with rubbing alcohol to remove oils. This is the #1 secret to preventing smudges and making the ink stick.
- Use a Holder: An egg cup or bottle cap is your best friend. It keeps the ball stable while you work and lets it dry without smudging.
- Sketch First, Ink Later: For any design more complex than a ghost face, a light pencil sketch first will save you from permanent marker mistakes.
- Let Layers Dry: When using multiple colors, give each color a few minutes to dry before adding another color that touches it to prevent bleeding.
- Seal for a Lasting Finish: For any design you want to keep, a light coat of clear acrylic spray sealer is non-negotiable. It protects your art from smudging and moisture.
FAQs About golf ball designs sharpie halloween
What kind of markers are best for drawing on golf balls?
For the best results, use oil-based Sharpie paint markers, though standard fine-point Sharpies are great for details. The oil-based markers are more opaque and provide a vibrant, paint-like finish that stands out. For base coats, use a broad or chisel tip marker, and for fine lines like veins or webs, use an ultra-fine tip.
How do you seal Sharpie on a golf ball to make it permanent?
The most effective way to seal Sharpie art on a golf ball is with a clear acrylic spray sealer. You can find this at any craft or hardware store in matte or gloss finishes. Hold the can 8-10 inches away and apply 1-2 very light coats, letting it dry completely between each one. Always do this in a well-ventilated area.
How do you stop Sharpie from smearing on a golf ball?
The key to preventing smears is proper preparation and patience. First, thoroughly clean the ball with rubbing alcohol to remove any residue. Second, use a holder (like an egg cup) so you don’t have to touch wet ink. Finally, allow each color to dry for several minutes before handling the ball or adding another color next to it.
Can you still play golf with a Sharpie-decorated ball?
It’s not recommended because these decorated golf balls are intended for decorative purposes only. The impact from a golf club will immediately chip, scuff, and ruin the artwork, even if it has been sealed. Think of them as tiny, round canvases for your Halloween decor, not for the golf course.
Final Thoughts
Now you have everything you need to transform simple golf balls into fun, spooky, and creative Halloween decorations. This craft is all about having fun and adding a personal touch to your holiday festivities. It’s a simple, affordable project that proves you don’t need expensive materials or expert skills to make something memorable.
Which of these spooky designs are you excited to try first? Let me know in the comments below
Last update on 2026-01-16 / Affiliate links / Images from Amazon Product Advertising API

