As an Amazon Associate GolferHive.com earns from qualifying purchases.
11 Funny Golf Ball Designs You Can Easily Make With A Sharpie
Ever wonder how to make your golf ball truly yours? You see a sea of white spheres, all looking the same. It’s easy to lose track of which Titleist is yours.
Personalizing your golf ball with a Sharpie is the perfect solution. But maybe you think you’re not artistic enough. You just need a few simple, funny golf ball designs that anyone can draw.
The best way to make your golf ball stand out is by drawing a unique, funny design on it with a Sharpie. This not only helps with identification but also adds a personal touch of humor to your game. This post offers 11 easy ideas you can create in minutes.
Tired of Playing With Boring, Generic Golf Balls?
Let’s be honest, playing with a plain white golf ball is functional, but it’s not very fun. It’s hard to tell your ball from your buddy’s, especially when you both end up in the same patch of rough. You deserve equipment that shows off a bit of your personality.
This is where a simple Sharpie marker becomes your best friend. We’ve put together our favorite, field-tested ideas that are guaranteed to get a laugh on the course. You don’t need any artistic skill. These DIY golf ball designs are all about having a good time and making your game a little more creative.
11 Funny Golf Ball Designs You Can Easily Make With A Sharpie
Ready to transform that boring ball into a tiny work of art? Each of these hilarious golf ball sayings and doodles is incredibly simple to create. We’ve curated these ideas for their high-impact humor and ease of execution, based on what gets the best reactions from fellow golfers. All you need is a marker and a few minutes.
1. The Classic “Bomb” Design
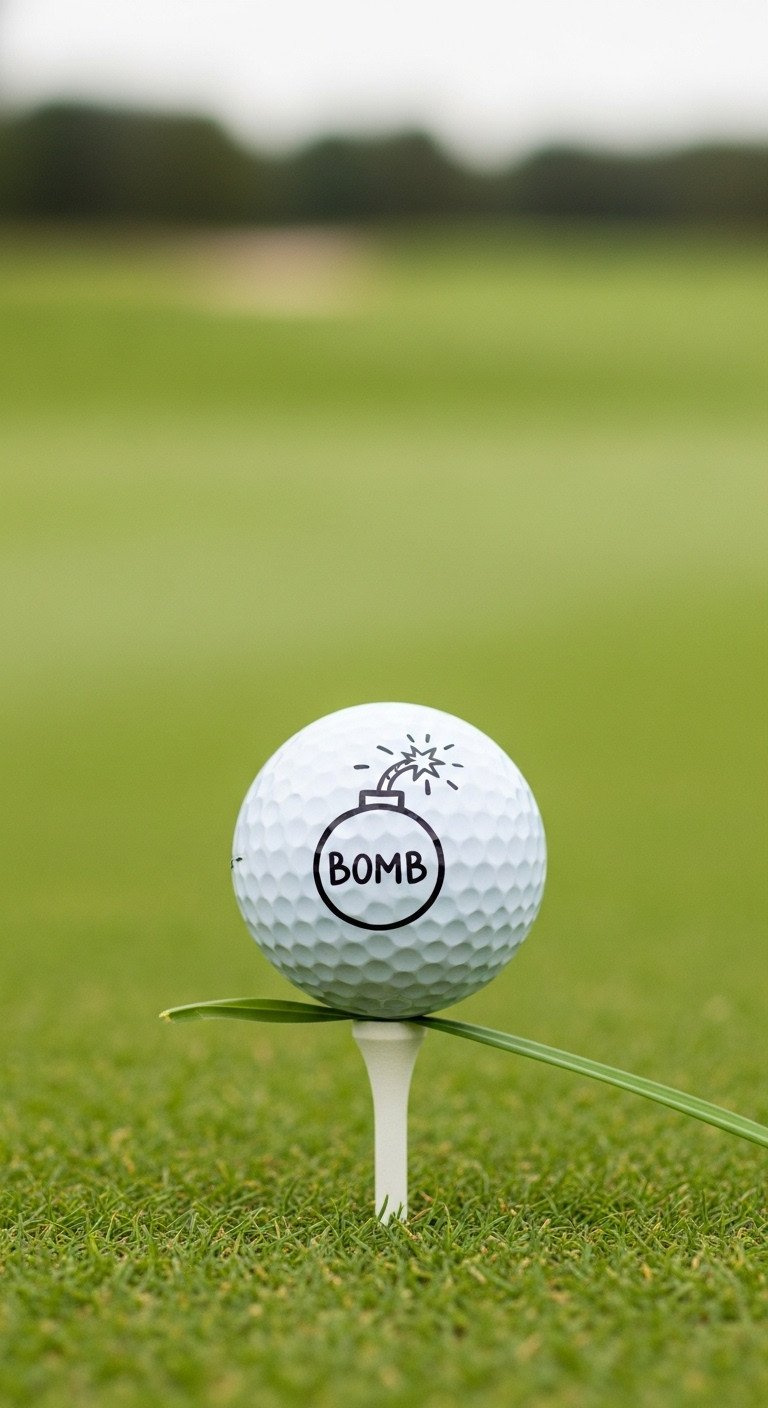
Pin this hilarious idea for your next round!
Materials Needed:
- A clean, white golf ball
- Black Sharpie Fine Point permanent marker
- Red Sharpie Ultra Fine Point permanent marker (optional, for the fuse spark)
- Isopropyl alcohol and a lint-free cloth
Step-by-Step Directions:
- Prep the Surface: Wipe the golf ball thoroughly with rubbing alcohol on a cloth to remove any oils or glossy coating. Let it dry completely for 1 minute.
- Draw the Body: Use the black Sharpie to draw a solid circle, about the size of a dime. Fill it in completely.
- Add the Fuse: Draw a short, squiggly line coming out from the top of the circle.
- Light the Fuse: Use the red Sharpie (or black if you only have one) to draw a small, star-like spark at the very end of the fuse line.
- Let it Cure: Place the ball in an egg carton or bottle cap to dry for at least 30 minutes before handling.
Pro-Tip: Don’t press too hard with the marker. Use a light touch and let the ink flow to avoid bleeding, especially when filling in the circle.
2. “This Is Not A Water Ball”
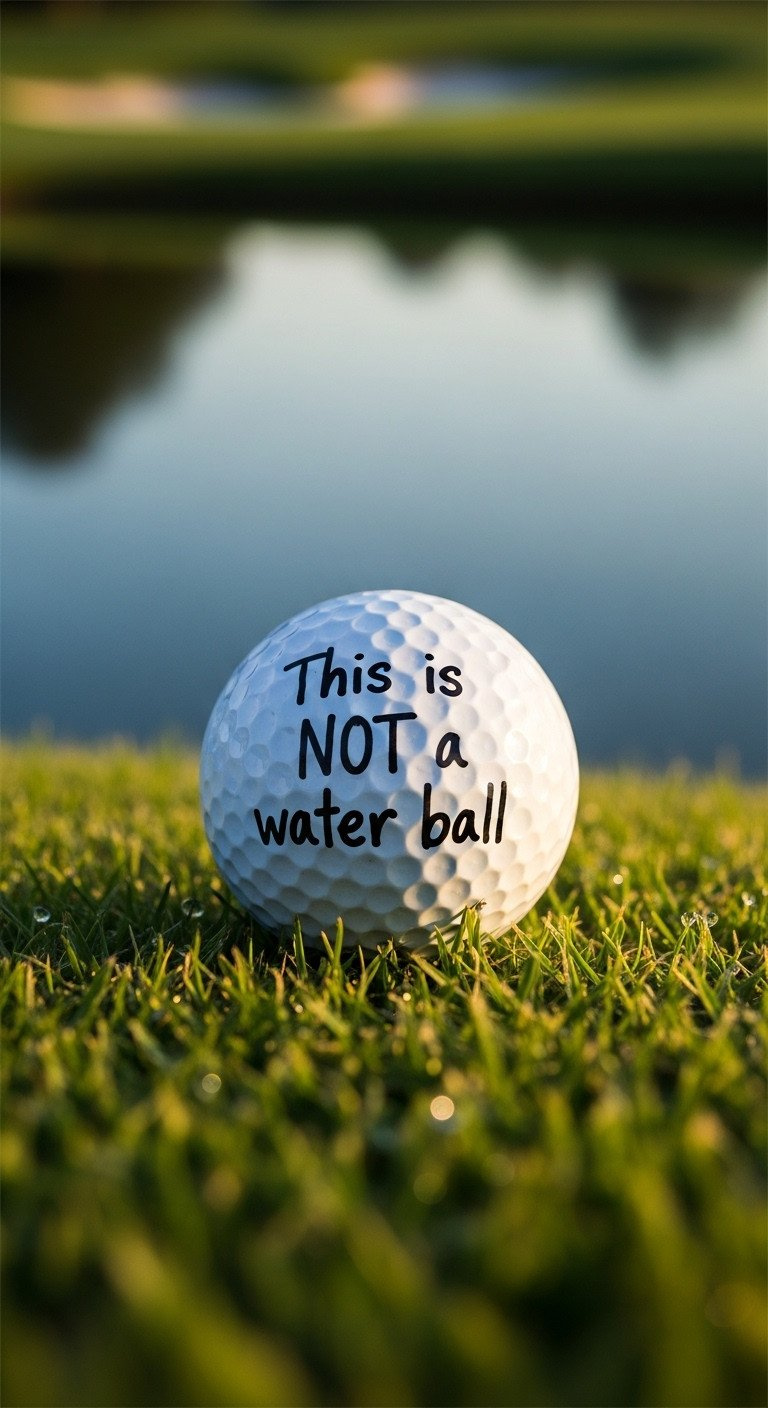
Save this funny golf quote idea for your next game!
Materials Needed:
- A clean, white golf ball
- Black Sharpie Ultra Fine Point permanent marker (for crisp lettering)
- Isopropyl alcohol and a lint-free cloth
Step-by-Step Directions:
- Clean the Ball: Wipe the entire surface of the golf ball with rubbing alcohol to ensure the ink adheres properly. Let it dry.
- Plan Your Spacing: Mentally map out where you will write the words to ensure they fit nicely around the curve of the ball.
- Write the Phrase: Using the ultra-fine tip Sharpie, carefully write “This is NOT” on one line. Below it, write “a water ball” on a second line. Use short, deliberate strokes.
- Dry Completely: Set the ball aside to dry for at least 30 minutes. The fine-point ink can be prone to smudging if touched too soon.
Lesson Learned: An ultra-fine tip marker gives you much more control for lettering than a standard fine tip. It’s worth having both in your golf bag!
3. The Panicked Face
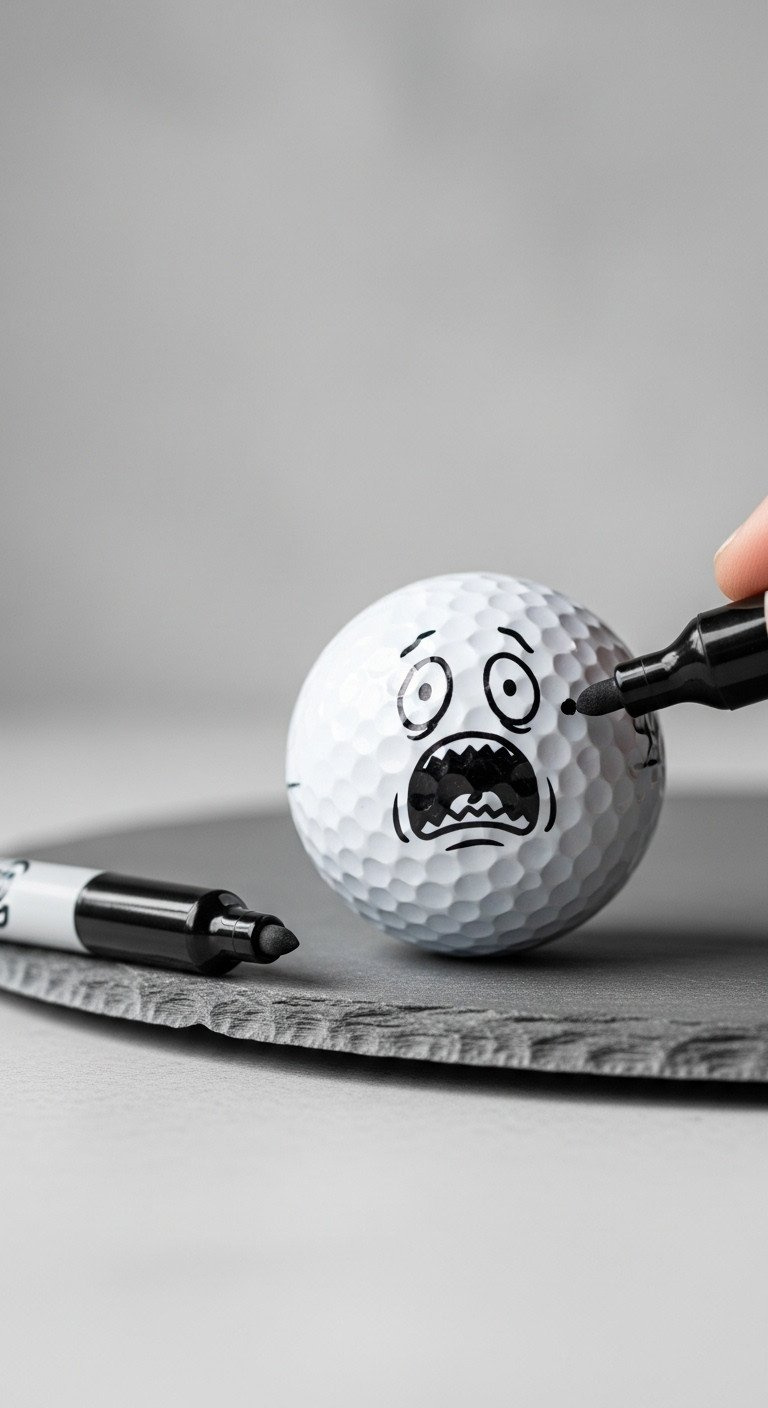
Pin this easy emoji golf ball idea!
Materials Needed:
- A clean, white golf ball
- Black Sharpie Fine Point permanent marker
- Rubbing alcohol and a paper towel
Step-by-Step Directions:
- Prep the Ball: As always, start by cleaning the ball with alcohol and letting it dry.
- Draw the Eyes: Create two small, solid black circles for the eyes. Position them slightly above the center of the ball.
- Draw the Mouth: Below the eyes, draw a wide, jagged “screaming” mouth, like a seismograph line. Make it look shaky and panicked.
- Let it Dry: Give the ink a good 15-20 minutes to set before you put it in your bag.
Pro-Tip: For extra panic, draw two small, straight “eyebrow” lines above the eyes, angled upwards and inwards. It adds a surprising amount of expression!
4. “May The Course Be With You”
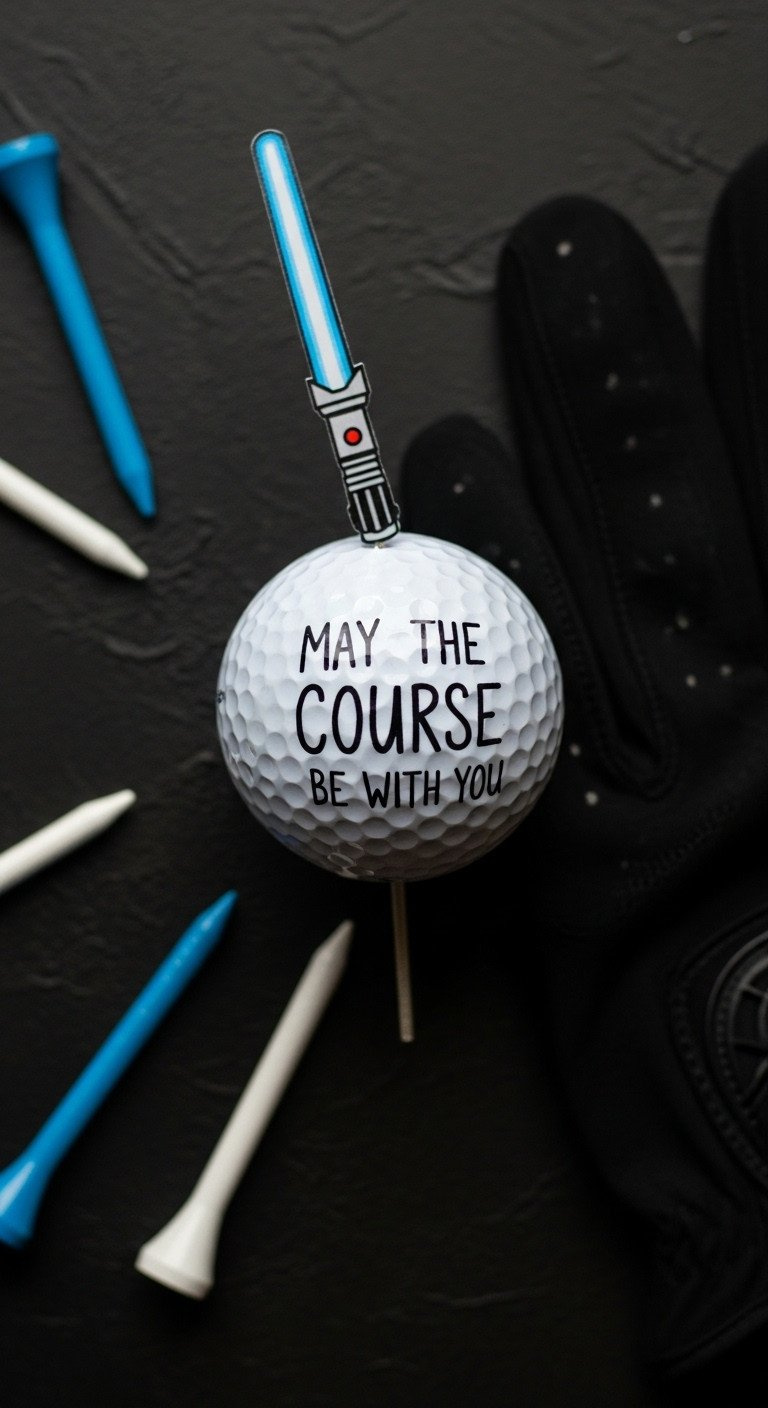
Save this nerdy golf pun for your Star Wars-loving friends!
Materials Needed:
- A clean, white golf ball
- Blue (or Red, or Green) Sharpie Fine Point permanent marker
- Black or Silver Sharpie Ultra Fine Point permanent marker
- Isopropyl alcohol and a lint-free cloth
Step-by-Step Directions:
- Prep the Canvas: Clean the ball with alcohol and let dry.
- Draw the Hilt: Use the black or silver ultra-fine marker to draw a small, simple rectangular hilt for the lightsaber. Add a few horizontal lines for detail.
- Create the Blade: Using the colored fine-point marker, draw a thick, straight line extending from the hilt. This is the lightsaber’s blade. Go over it once or twice for a vibrant color.
- Write the Pun: On the opposite side of the ball, use the black ultra-fine marker to write “May the Course be with you.”
- Cure Your Creation: Let the multiple ink colors dry for at least an hour to prevent any color bleeding or smudging.
Pro-Tip: To create a “glowing” effect for the lightsaber, draw the colored blade first, then outline it with a very thin black line using the ultra-fine marker.
5. The Cyclops Monster

Pin this super easy monster drawing idea!
Materials Needed:
- A clean, white golf ball
- Black Sharpie Fine Point marker
- Blue or Green Sharpie Fine Point marker (for the iris)
- Isopropyl alcohol and a cloth
Step-by-Step Directions:
- Clean the Sphere: Wipe down the golf ball with alcohol.
- Draw the Eye Outline: Use the black Sharpie to draw a large circle in the center of the ball.
- Add the Iris: Inside the large circle, use the blue or green Sharpie to draw a smaller, colored circle for the iris.
- Create the Pupil: Use the black Sharpie again to draw a small, solid black dot in the center of the colored iris.
- Add a Mouth: Below the eye, draw a small, simple curved line for a smile or a wavy line for a goofy mouth.
- Dry Time: Let the layered colors dry for at least 30 minutes.
Lesson Learned: Layering different colored Sharpies can sometimes cause the bottom layer to reactivate and smudge. Wait for each color to dry for a few minutes before adding the next one.
6. The Magic 8-Ball
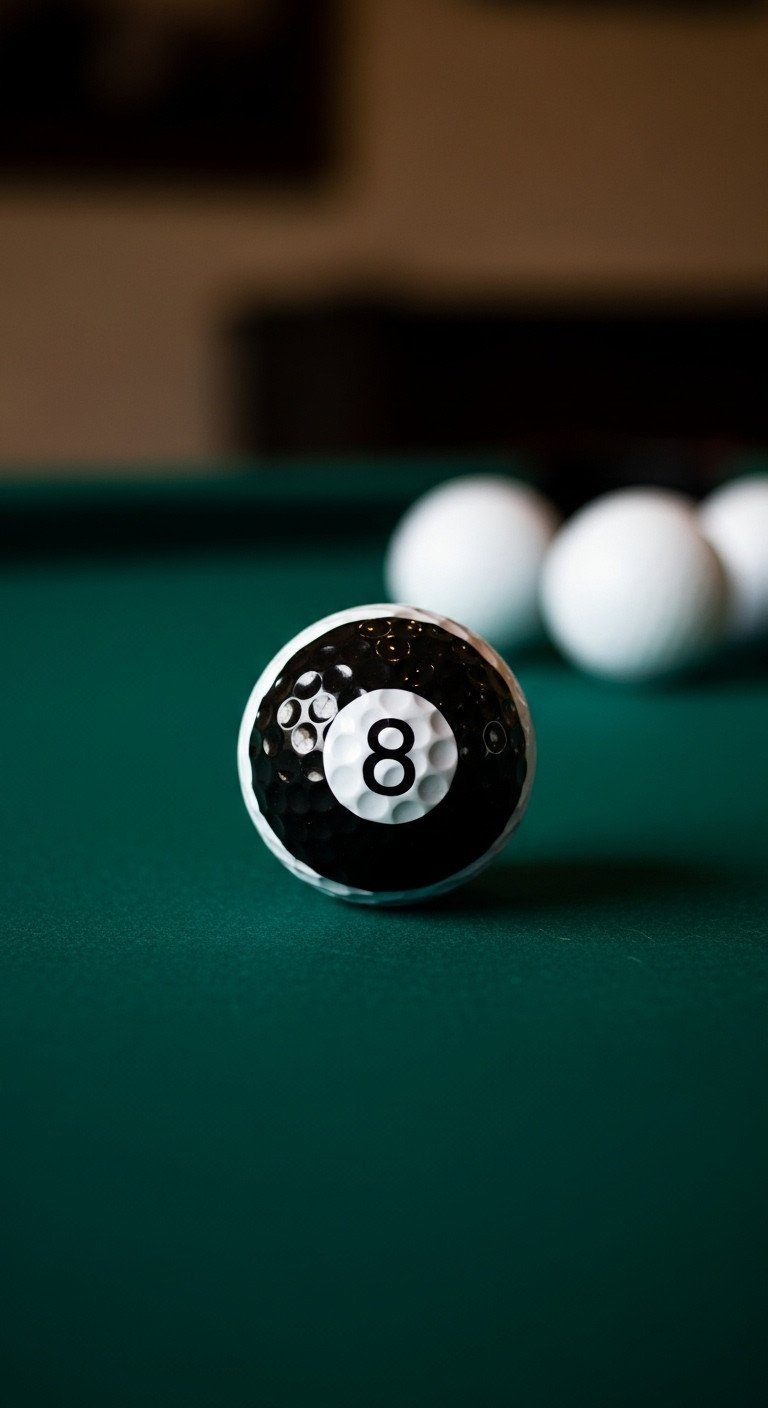
Save this clever 8-ball idea for a bit of on-course luck!
Materials Needed:
- A clean, white golf ball
- Black Sharpie Fine Point permanent marker
- Isopropyl alcohol and a lint-free cloth
- A pencil with a clean eraser
Step-by-Step Directions:
- Prep the Ball: Clean the golf ball with alcohol and let it dry.
- Stencil the ‘8’: Lightly trace the shape of the number ‘8’ in the center of the ball using the pencil. Make it big enough to be clear.
- Outline the Circle: Draw a large circle around your pencil ‘8’. This will be the edge of the black area.
- Fill It In: Carefully color in the area inside the circle BUT outside your pencil ‘8’ with the black Sharpie. The white of the golf ball will form the number.
- Erase Pencil Marks: Once the ink is dry, gently erase any visible pencil lines.
- Cure: Let the large area of ink dry for at least an hour.
Pro-Tip: For a perfectly round circle, trace the outline of a bottle cap or a dime with your pencil before filling it in with the Sharpie.
7. The Sneaky Eye
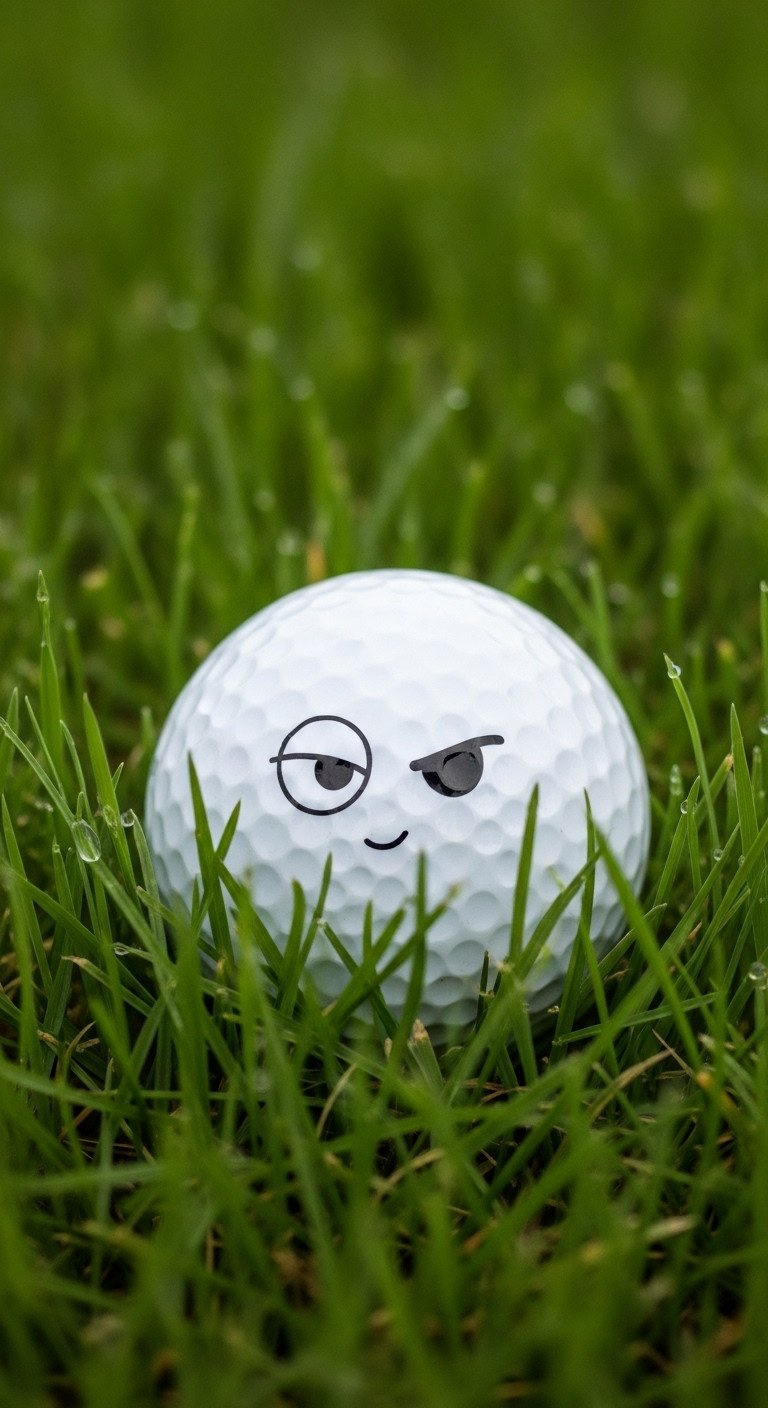
Pin this super simple and funny eye drawing idea!
Materials Needed:
- A clean, white golf ball
- Black Sharpie Ultra Fine Point permanent marker
- Isopropyl alcohol and a cloth
Step-by-Step Directions:
- Clean Your Canvas: Wipe the ball with alcohol.
- Draw the Eyelid: Draw a simple arc or half-circle shape. This creates a “heavy” or “sleepy” eyelid.
- Add the Pupil: Underneath the eyelid line, draw a small solid dot for the pupil. Place it off-center, looking to the left or right, to complete the “sneaky” look.
- Let it Dry: This design is so simple it will dry in just a few minutes.
Lesson Learned: The placement of the pupil is everything for this design. Dead center looks like a simple eye. Off to the side is what makes it look sneaky and funny.
8. “Talk Birdie To Me”
![]()
Save this cheeky golf pun for a boost of confidence on the green!
Materials Needed:
- A clean, white golf ball
- Black Sharpie Ultra Fine Point marker
- Rubbing alcohol and a paper towel
Step-by-Step Directions:
- Prep for Success: Clean the golf ball with alcohol and let it air dry.
- Draw the Bird: Create a simple bird icon. Just draw a wide ‘M’ shape or two connected arcs for the wings.
- Write the Pun: Next to the bird icon, carefully write “Talk Birdie to Me” in your neatest handwriting.
- Dry Thoroughly: Allow the fine lettering to cure for at least 30 minutes to prevent any smearing.
Pro-Tip: Practice writing the phrase on a piece of paper first to get your spacing and style right before committing it to the curved surface of the ball.
9. The Cracked Egg

Pin this clever cracked egg design!
Materials Needed:
- A clean, white golf ball
- Black Sharpie Ultra Fine Point marker
- Yellow Sharpie Fine Point marker
- Isopropyl alcohol and a cloth
Step-by-Step Directions:
- Clean the Shell: Wipe the ball with rubbing alcohol.
- Draw the Cracks: Use the black ultra-fine marker to draw a few jagged, intersecting lines across one side of the ball. Start from a central point and have them branch outwards.
- Add the Yolk: In the center where the cracks meet, use the yellow marker to draw a small, solid circle to look like a yolk peeking out.
- Outline the Yolk: Let the yellow ink dry for a minute, then carefully outline the yellow circle with your black marker to make it pop.
- Cure: Let it sit for 30-40 minutes for the colors to fully set.
Lesson Learned: Drawing the cracks with an ultra-fine tip makes them look more realistic and delicate than using a standard fine tip.
10. The Unlucky Horseshoe

Save this ironically funny design for when you need to laugh at a bad shot!
Materials Needed:
- A clean, white golf ball
- Black Sharpie Fine Point permanent marker
- Isopropyl alcohol and a paper towel
Step-by-Step Directions:
- Prep the Ball: Clean the surface with alcohol and let dry.
- Draw the Shape: Use the black Sharpie to draw a simple ‘U’ shape.
- Make it a Horseshoe: Draw a second, slightly smaller ‘U’ shape inside the first one. Connect the ends of the two ‘U’s with short, straight lines.
- Fill It In: Color the space between the two ‘U’ shapes solid black. Make sure the open end is pointing down to signify the “luck running out.”
- Dry: Let the solid ink area dry for about 20 minutes.
Pro-Tip: For a more detailed look, use an ultra-fine marker to add tiny circles along the bottom edge of the horseshoe to represent the nail holes.
11. “Warning: May Shank”
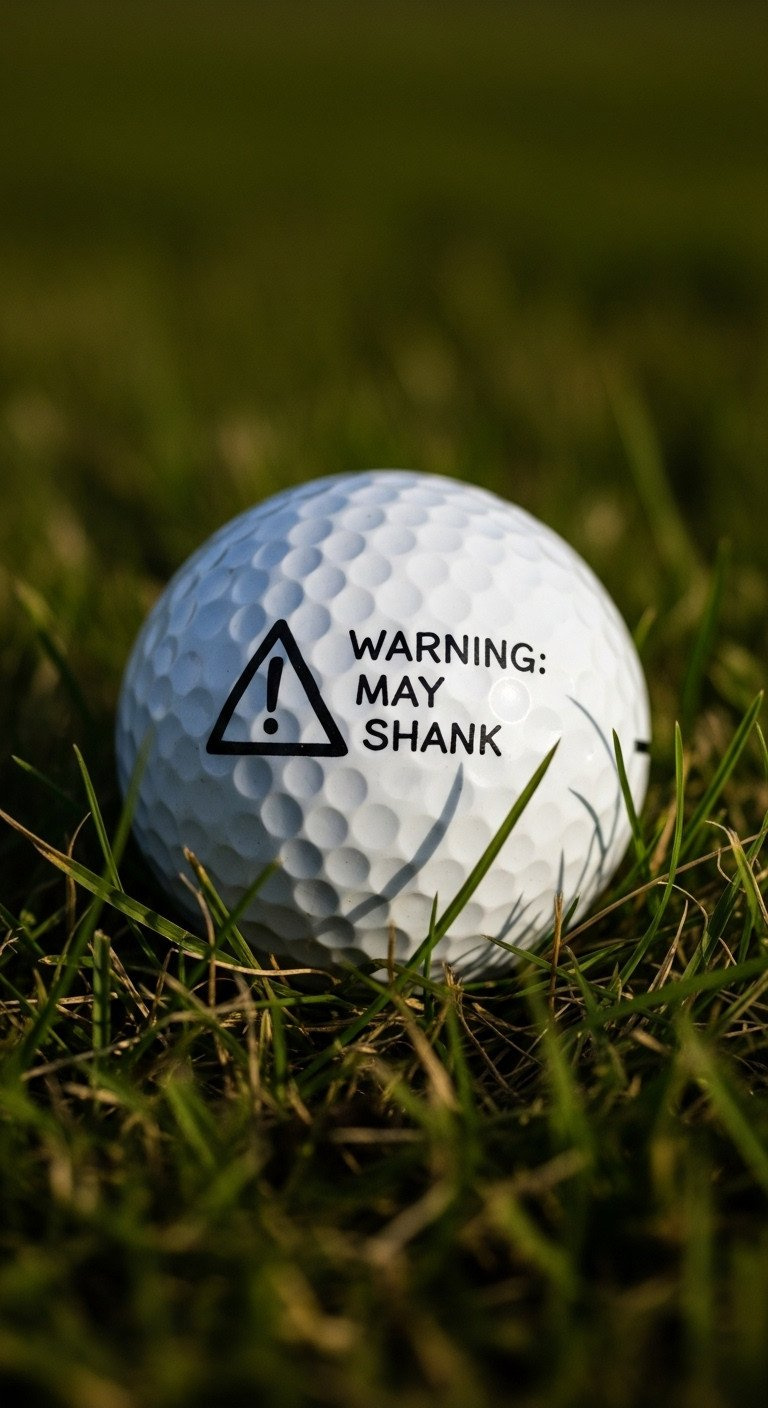
Pin this hilarious warning label for your most unpredictable golf days!
Materials Needed:
- A clean, white golf ball
- Black Sharpie Ultra Fine Point marker
- Yellow or Red Sharpie Fine Point marker (optional)
- Isopropyl alcohol and a cloth
Step-by-Step Directions:
- Clean for Safety: Wipe the ball with alcohol.
- Draw the Warning Sign: Use the black marker to draw a triangle. You can fill it in with yellow or red, or just leave it as a black outline. Add an exclamation point in the middle.
- Write the Warning: Next to the triangle, use the black ultra-fine marker to write “WARNING:” on the top line, and “MAY SHANK” on the line below it.
- Cure and Set: Let all the ink dry for 30 minutes before use.
Lesson Learned: This is a fantastic gift for a golf buddy. Make a dozen of them for a gag gift before your next weekend trip. The humor is always a hit.
Key Takeaways: Your Quick Guide to Funny Golf Ball Designs
- Prep is King: Always clean your golf ball with rubbing alcohol before drawing. This is the #1 secret to making your design last.
- Choose the Right Tool: Use an Ultra Fine Point Sharpie for detailed writing and a Fine Point for filling in shapes.
- Patience Pays Off: Let your ink dry completely before handling the ball or adding another color to prevent smudges and smears.
- Keep it Simple: The funniest designs are often the simplest. A clever phrase or a simple cartoon face is all you need.
- Seal the Deal: For maximum durability, a very light mist of clear acrylic sealant will protect your art from scuffs and moisture.
People Also Ask About Drawing on Golf Balls
Does drawing on a golf ball with a Sharpie affect its flight?
No, for almost all golfers, a Sharpie mark has no noticeable effect on the ball’s flight. The layer of ink is incredibly thin and lightweight, and any potential aerodynamic change is far too small to be measured compared to the normal variations in an amateur’s golf swing.
How do you make Sharpie permanent and stop it from smudging on a golf ball?
To make Sharpie last, first clean the ball with rubbing alcohol to remove oils. After drawing, let the ink cure for at least an hour. For the best protection against smudging and wear, apply one very light, even coat of clear acrylic sealant spray from a distance and let it dry completely.
Is it legal to draw pictures on your golf ball for a tournament?
Yes, it is perfectly legal under the USGA Rules of Golf. In fact, players are encouraged to use a personal identification mark. As long as the drawing doesn’t have a feature that could improperly influence the ball’s movement (like thick paint), a simple Sharpie design is completely fine for competitive play.
What’s the best marker to use on a golf ball besides Sharpie?
The most durable alternative is an oil-based paint pen. Brands like Sharpie Paint or POSCA offer markers that are more opaque and resistant to wear and water than standard alcohol-based Sharpies. They are the best choice for a design you want to last for multiple rounds.
Final Thoughts
Your golf bag doesn’t have to be boring. With a simple Sharpie and a few minutes, you can turn a standard golf ball into a conversation starter that’s uniquely yours. Don’t worry about being a perfect artist—the goal is to have fun and get a laugh. So pick your favorite idea, grab a marker, and give it a try before your next round!
Which funny design are you going to try first? Let us know in the comments below.
Last update on 2025-11-28 / Affiliate links / Images from Amazon Product Advertising API

