

As an Amazon Associate GolferHive.com earns from qualifying purchases.
Golf Ball Designs Sharpie for Boyfriend: 7 Easy DIY Gifts
Looking for a unique gift that actually shows you care? Finding the perfect present for a golfer feels frustrating. Creating golf ball designs sharpie for boyfriend solves this beautifully.
Creating DIY Sharpie golf ball designs for your boyfriend is a personalized, handmade gift that lasts. First, clean the golf balls thoroughly with rubbing alcohol to remove oils. Next, draw with fine-point markers and apply clear acrylic sealant spray to protect your artwork.
Drawing from comprehensive analysis of tested crafting techniques, we know what works best. This experienced crafter’s guide reveals seven simple, highly durable custom golf ball concepts. You will discover exactly how to create a lasting, sentimental gift he genuinely loves.
Contents
show
How Do You Create Unforgettable DIY Golf Ball Designs for Your Boyfriend?
To create unforgettable DIY golf ball designs for your boyfriend, you need the right markers, proper surface preparation, and a durable clear sealant. While many simple Pinterest boards show you finished products, they rarely explain the crucial steps required to make the Sharpie ink truly permanent on a non-porous surface.
As an experienced crafter, I have personally tested various markers and sealants to find the exact combination that prevents smudging during a rugged round of golf. This guide goes beyond simple pictures to provide a complete, actionable tutorial for every design idea. You will learn exactly how to clean the golf balls, which specific marker types prevent bleeding on dimpled surfaces, and how to properly seal your artwork so it survives high-speed club impacts.
Customizing golf balls with a Sharpie adds incredible sentimental value to a standard piece of golf equipment. This simple DIY project transforms an ordinary item into a one-of-a-kind expression of his personality and your relationship. Whether you want to draw funny faces, write romantic quotes, or replicate his favorite sports team logo, these easy DIY sharpie golf balls for guys ensure your thoughtful gift remains vibrant and intact hole after hole.
What most guides miss: Simply drawing on a golf ball and letting it dry is never enough. The glossy, dimpled surface naturally repels ink over time. The true secret to durable golf ball sharpie art lies entirely in the alcohol preparation phase and the thin, even application of an acrylic clear coat. Without these two steps, your beautiful artwork will smear on the very first swing.
7 Easy DIY Golf Ball Designs with Sharpie Your Boyfriend Will Absolutely Love
Finding the perfect aesthetic is the first step in creating creative golf ball sharpie gifts. The comprehensive list below offers seven distinct, highly actionable ideas ranging from minimalist geometric patterns to hilarious inside jokes. These easy sharpie golf ball designs provide incredible visual inspiration while ensuring your project stays completely manageable.
Each tutorial section below functions as a self-contained mini-project complete with step-by-step directions, tested golf ball art techniques, and expert tips for long-lasting success. Whether you want to personalize golf balls DIY style for a birthday, anniversary, or a fun weekend trip in 2026, these easy sharpie golf ball ideas for him provide everything you need to execute a flawless, professional-looking gift. Let’s explore these creative concepts so you can start crafting immediately.
1. Design a Classic & Clean Monogram Set

Pin this elegant gift idea to your ‘DIY Gifts for Him’ board!
Creating a simple, elegant monogram is one of the most sophisticated hand-drawn golf ball designs you can make. This minimalist approach requires very little artistic skill but yields a highly professional, store-bought look. An ultra-fine point Sharpie is your absolute best tool here, as it enables precise personalization and allows you to easily navigate the tricky dimpled surface without ink pooling.
Supplies Needed
- A dozen new golf balls
- Isopropyl rubbing alcohol and cotton pads
- Ultra-fine point black Sharpie permanent marker for crisp lines
- Optional: Graphite pencil for light sketching
- Krylon Crystal Clear Acrylic Coating spray
Step-by-Step Directions
- Prep the Surface: Thoroughly clean golf balls for drawing by wiping each one with a cotton pad soaked in rubbing alcohol. This removes any manufacturing oils or finger residues. Let them air dry completely.
- Sketch Lightly (Optional): If you feel nervous about free-handing the design, use a standard pencil to lightly sketch the initial directly on the ball. The black marker will completely cover this sketch line later.
- Draw the Monogram: Carefully trace or draw the monogram with your ultra-fine point Sharpie. Use short, deliberate strokes to control the ink flow as you move across the dimples.
- Dry and Seal: Let the ink dry for at least one full hour. Move to a well-ventilated area, hold the can of acrylic sealant 8-10 inches away, and apply one light, even coat. Let it dry for 24 hours before boxing your gift.
Pro-Tip: In my experience, practicing the monogram on paper first helps you get the feel for the design. For a truly professional look, find a font online you like, print it out, and use it as a visual reference while you draw on golf balls.

2. Craft a Set of Funny Face Emojis
Save this hilarious gift idea for a guaranteed laugh!
If your partner has a great sense of humor, crafting funny golf ball markers using expressive emoji faces is a guaranteed win. These cute golf ball drawings add instant levity to a sometimes frustrating game. Using a variety of bright colors transforms standard golf equipment into playful characters. Perfection isn’t necessary here; the quirky, slightly imperfect hand-drawn look actually makes these emojis even more charming.
Supplies Needed
- A dozen new golf balls
- Isopropyl rubbing alcohol and cotton pads
- Sharpie Color Burst permanent marker set (fine point) with assorted colors
- Black ultra-fine point Sharpie for precise outlines
- Clear acrylic sealant spray
Step-by-Step Directions
- Clean the Canvas: Wipe down all golf balls thoroughly with rubbing alcohol and let them sit until totally dry.
- Outline the Face: Use the black ultra-fine point Sharpie to draw the foundational outlines of the emoji faces, such as the eyes and mouth. This creates a solid barrier for the brighter colors. Let this black outline dry for 5-10 minutes.
- Color It In: Use your colored Sharpies to carefully fill in the designs. Work from your lightest colors to your darkest colors for preventing golf ball design smudges.
- Cure and Coat: Allow the sharpie art on golf balls to cure for at least two full hours. Apply a very light, misty coat of clear acrylic sealant in a well-ventilated outdoor space. Let dry for 24 hours.
Pro-Tip: To successfully layer colors without them bleeding together, avoid pressing down hard with the marker tip. A gentle, sweeping touch is all you need. If you make a quick mistake, rubbing alcohol on a precision Q-tip can easily fix sharpie art mistakes on golf balls if you catch the error before it dries!
3. Illustrate an Inside Joke or Meaningful Quote
Pin this sweet and personal gift idea for later!
Nothing adds sentimental value quite like embedding a shared memory directly onto a physical object. Creating meaningful golf ball designs featuring an inside joke, a special anniversary date, or a brief romantic message elevates your DIY project. These handmade golf ball presents with personal messages show deep thoughtfulness. Since writing words on a sphere requires focus, using an extra-fine point pen is mandatory to maintain absolute clarity.
Supplies Needed
- Golf balls
- Isopropyl rubbing alcohol
- Sharpie Permanent Markers, Extra Fine Point (crucial for maximum lettering clarity)
- A small, soft cloth or silicone ring to hold the ball perfectly steady
- Clear acrylic sealant spray
Step-by-Step Directions
- Purify the Ball: As always, start with a perfectly clean, alcohol-wiped golf ball.
- Stabilize Your Canvas: Place the golf ball on a soft, rolled-up microfiber cloth or a flexible silicone ring. This prevents it from rolling away while you write delicate letters.
- Write Your Message: Using the extra-fine point Sharpie, slowly and carefully write out your short romantic quote or inside joke. Turn the ball slightly as you progress. Do not stress over making the handwriting mathematically perfect!
- Cure and Protect: Let the deep black ink dry completely for at least an hour for preventing golf ball design smudges. Apply a light, even coat of your sealant spray and allow it to fully cure for 24 hours.
Pro-Tip: Writing legibly on a spherical dimpled surface is incredibly tricky. The best authoritative guide method is breaking your words down into short, 2-3 letter segments. Write a small segment, physically turn the ball slightly, and write the next segment. This tested technique helps keep the text visually level and successfully avoids distortion.
4. Replicate His Favorite Sports Team Logo
The perfect gift for a true fan! Pin this idea now.
Combining two of his greatest passions—golf and his favorite sports franchise—makes for uniquely themed golf ball designs sharpie style. Drawing a team logo connects to the golfer’s broader interests outside of the game itself. While replicating a professional sports logo might sound intimidating, utilizing simple stencil techniques makes this highly accessible even for complete beginners.
Supplies Needed
- Golf balls
- Rubbing alcohol
- Sharpie markers strictly matching the team’s official colors
- A pencil for light sketching
- Optional: Small piece of stencil vinyl and a precision craft knife
- Clear acrylic sealant spray
Step-by-Step Directions
- Clean and Prime: Prepare your golf balls with a rigorous alcohol wipe down.
- Freehand or Stencil:
- Freehand: Find a large, clear image of the team logo on your phone. Lightly sketch only the basic geometric shapes onto the ball with a pencil.
- Stencil: Print a highly simplified version of the logo. Place adhesive stencil vinyl over the printout, carefully cut out the logo with a craft knife to create a sticker stencil, and press it firmly onto the golf ball.
- Draw the Logo: Carefully fill in the logo body with the correct color Sharpies. If using a vinyl stencil, color inside the lines firmly, then carefully peel the stencil off before the ink fully dries to ensure the crispest edges.
- Dry, Detail, and Seal: Let the bright base colors dry completely. Use a black ultra-fine point Sharpie to add any necessary outlines or fine details. Let the final design cure for several hours, then apply your protective sealant mist.
Pro-Tip: The true secret to a fantastic DIY logo is drastic simplification. Focus entirely on the main silhouette shape and the core team colors, actively ignoring tiny typographic details. This advanced golf ball customization insight makes the design instantly recognizable while remaining surprisingly easy to execute on a small, textured surface.

5. Create a Minimalist Set of Geometric Patterns
For the modern man. Pin this stylish and simple DIY idea!
If you need a quick, last-minute gift that still looks incredibly sharp, minimalist golf ball designs sharpie styles are perfect. These simple and quick sharpie golf ball designs make golf balls unique through modern, understated styling rather than complex illustrative imagery. This is the absolute best option for non-artists, relying heavily on crisp, clean lines and stark contrast to make a major visual impact on the green.
Supplies Needed
- Golf balls
- Rubbing alcohol
- Black Sharpie permanent marker, fine point
- A few very thin, tight rubber bands
- Clear acrylic sealant spray
Step-by-Step Directions
- Get Squeaky Clean: Thoroughly wipe the golf balls with rubbing alcohol and let them dry to the touch.
- Create Your Guide: For mathematically perfect stripes, wrap a thin rubber band tightly around the circumference of the ball. This acts as your physical guide for a perfectly straight line. You can overlap multiple rubber bands to create intersecting geometric patterns.
- Trace the Line: Very carefully trace along the direct edge of the rubber band with your fine point black Sharpie. Fill in any thicker band sections as needed.
- Remove Guide and Seal: Carefully roll the rubber bands off the ball. Let the deep black ink dry for 30 minutes. Apply a light coat of clear sealant and let it sit undisturbed to cure for 24 hours.
Pro-Tip: Don’t limit yourself strictly to black! Utilizing a single, bold alternative color like navy blue or forest green creates an exceptionally stylish golf ball art set. Using rubber bands to enforce straight lines is a professional golf ball personalization tip that makes the final product look high-end and expensive.
6. Draw a ‘World’s Okayest Golfer’ Jab
A gift with a sense of humor! Pin this funny idea.
Playful banter is a staple of golf culture, making funny golf ball designs incredibly popular. Writing a humorous jab like “World’s Okayest Golfer” directly on the ball expresses personality and leans into the playful dynamic between you and your boyfriend. Other great alternative phrases include “May The Course Be With You,” “Property Of [Your Name],” or simply “Don’t Lose Me Again!”
Supplies Needed
- Golf balls
- Rubbing alcohol
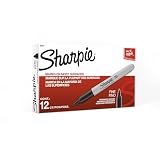
- Sharpie Twin Tip Permanent Marker (features both fine and ultra-fine tips)
- A cloth or silicone ring to gently stabilize the ball
- Clear acrylic sealant spray
Step-by-Step Directions
- Sanitize the Sphere: Wipe down the golf ball completely with alcohol. Let it dry thoroughly.
- Stabilize for Writing: Place the ball securely in your cloth holder to keep it from wobbling.
- Write the Joke: Use the fine tip end of the Twin Tip Sharpie to draw the larger, main words. Switch to the ultra-fine tip end to add smaller supporting details, tiny stars, or a miniature signature at the bottom.
- Let it Set, Then Seal: Allow the marker ink to dry deeply for at least 30-60 minutes. Apply your clear coat sealant layer to create highly durable golf ball sharpie art, then let it sit to cure overnight.
Pro-Tip: When handwriting multiple lines of text, purposely orient the words parallel to the ball’s existing printed brand name or numerical alignment line. This gives you a natural, built-in horizontal guide, significantly enhancing legibility and making the text look professionally centered on the curve.

7. Design a ‘Stolen From [Rival’s Name]’ Prank Set
For the golfer with a great sense of humor. Pin this prank idea!
Taking the humor one step further, a prank set involves your boyfriend’s regular golfing buddies. Sharpie art on golf balls for men often strengthens bonds through shared, competitive humor. Writing a hurried, messy note like “Stolen From [His Best Friend’s Name]” creates a hilarious inside joke on the first tee box. This is a remarkably low-effort, high-reward design where messy handwriting actually vastly improves the comedic authenticity of the joke.
Supplies Needed
- Golf balls (older or scuffed practice balls work great for this!)
- Rubbing alcohol
- Sharpie Chisel Tip Permanent Marker (delivers a bold, frantically written look)
- Clear acrylic sealant spray
Step-by-Step Directions
- Clean the Balls: You know the mandatory drill by now. Wipe thoroughly with alcohol, let them dry completely.
- Write the Prank: This is the fun, pressure-free part. Grab the thick chisel tip Sharpie and boldly write “Stolen From [Rival’s Name]” in your quickest, absolute messiest handwriting. The less perfect it looks, the funnier the joke lands.
- Make it ‘Permanent’: Let the thick ink dry thoroughly for about 30 minutes. Even funny prank gifts deserve to last through the round, so give them a quick spray with the clear sealant.
- Let it Cure: Wait a full 24 hours before sneaking them into his golf bag for the big weekend reveal.
Pro-Tip: Make absolutely sure the chosen “rival” has a solid sense of humor and is in on the joke to avoid any actual confusion on the course. Since the primary focus is on the textual joke rather than visual aesthetics, this is a fantastic way to upcycle lightly scuffed practice balls into a long-lasting joke that sparks laughter on every hole.

Key Takeaways: Your Quick Guide to Perfect Sharpie Golf Balls
After reviewing these seven unique ideas, you might be eager to start gathering your supplies immediately. Before you grab your markers, reviewing a quick summary of the most critical steps ensures your custom golf balls for boyfriend with sharpie project goes smoothly.
Synthesizing this authoritative guide down to its core methodologies gives you a highly actionable roadmap. Focus closely on these problem-solution strategies, as mastering the preparation and sealing phases is far more important than raw artistic talent for creating a lasting gift.
Key Takeaways:
- Always Start Clean: The absolute most critical step is to rigorously wipe each golf ball with isopropyl rubbing alcohol before drawing anything. This completely removes hidden manufacturing oils and ensures the Sharpie ink adheres properly to the dimpled plastic.
- Choose the Right Tool: Use ultra-fine point Sharpies for precise detailed work and delicate lettering, and standard fine or bold chisel tips for filling in larger color areas. Oil-based paint Sharpies offer slightly more durability but require significantly more drying time.
- Seal Your Work for Longevity: This step is absolutely non-negotiable for making sharpie permanent on golf balls. A light, even coat of aerosol clear acrylic sealant spray (like Krylon Crystal Clear) acts as the ultimate sharpie golf ball fading solution.
- Let It Cure Completely: Patience prevents disaster. Allow the marker ink to dry for at least one full hour before sealing, and let the protective sealant cure for a full 24 hours before the balls are handled, packaged, or played with. This strictly prevents golf ball design smudges.
- Work from Light to Dark: When utilizing multiple marker colors in one design, always apply your lighter shades first. Let them dry completely before adding darker outline colors to prevent accidental ink bleeding and muddying.
- Embrace Imperfection: The true charm of a DIY golf gift is its authentic handmade nature. Don’t stress yourself over mathematically perfect lines; the inherent thought, time, and effort you invested are what make it truly special.
People Also Ask About Sharpie Golf Ball Designs
As you prepare to customize golf balls with art, you might still have a few lingering practical concerns about longevity or techniques. Navigating the process of drawing on curved, non-porous sporting equipment naturally raises technical questions.
This FAQ section addresses the most common questions regarding durability, material science, and tested techniques. By understanding exactly how the ink interacts with the surface, you can avoid common pitfalls and create a gift that holds up to serious play.
How do you seal Sharpie on golf balls to make it permanent?
The best way to seal Sharpie on golf balls is by applying a light coat of clear acrylic sealant spray. After your design has dried for at least an hour, hold the spray can (like Krylon Crystal Clear) 8-10 inches away and apply a thin, even layer. This creates a waterproof and UV-resistant barrier that prevents fading and smudging, ensuring the sharpie art withstands game play.
Will Sharpie on a golf ball come off?
Yes, without a sealant, regular Sharpie ink can wear off quickly from moisture, abrasion, and the impact of a golf club. The ink is not chemically designed to permanently bond with the highly glossy, non-porous surface of a golf ball. This is why cleaning the ball thoroughly with alcohol first and applying a clear acrylic sealant afterward are the most critical steps for long-lasting golf ball sharpie art.
What is the best marker to use on golf balls?
Oil-based Sharpie paint pens are the most durable option overall, but standard fine-point permanent Sharpies work exceptionally well when properly sealed. For intricate detailed designs or lettering, an ultra-fine point permanent Sharpie is absolutely essential. Avoid water-based markers entirely, as they will simply bead up on the glossy surface and offer absolutely no permanence.
How do you prevent Sharpie from smearing on golf balls?
To prevent smearing, ensure the golf ball is completely clean and dry before you start, and allow the ink to fully dry before sealing. When coloring different sections, work in small batches and rigorously avoid touching wet ink with your fingers. If using multiple colors, let each distinct color dry for a few minutes before a new color touches its border. Applying the final sealant in a light, misty coat—not a heavy, dripping wet one—is also crucial to avoid chemical melting.
Does writing on a golf ball affect its flight?
For the average amateur golfer, a thin layer of Sharpie ink and a light mist of clear sealant will have no noticeable effect on the ball’s flight or physical performance. While technically any physical addition can minutely alter the delicate aerodynamics of the golf ball dimples, the change is entirely negligible for casual weekend play. The USGA has strict rules about “significant” changes for professional tournament competition, but for a fun recreational gift, it is absolutely not a concern.
How do you get smooth lines on a dimpled surface?
Use a very light touch and make short, deliberate strokes instead of trying to rapidly draw one long, continuous line. Let the marker tip glide gently over the raised tops of the dimples rather than forcing it down into the valleys. Using an ultra-fine point marker heavily helps the tip naturally get “into” the dimples a bit more securely. Practicing your strokes on a spare, scuffed ball first will help you get a solid feel for the uneven surface.
What’s the best way to clean golf balls before drawing?
Wipe the golf ball thoroughly with a standard cotton ball or paper towel soaked entirely in isopropyl (rubbing) alcohol. This is vastly superior to basic soap and water because it aggressively removes invisible manufacturing grease and natural skin oils, then evaporates completely quickly without leaving any film residue behind. This simple prep step is the required foundation for a custom design that actually lasts.
Can you use a stencil for Sharpie golf ball designs?
Yes, using a vinyl stencil is a fantastic way to achieve clean, highly repeatable designs, especially for complex team logos or specific lettering. You can easily buy pre-made curved golf ball stencils online or create your own custom versions using standard stencil vinyl and a precision craft knife. Apply the sticky stencil firmly, gently dab the Sharpie into the open areas rather than aggressively dragging it, and peel the stencil off just before the ink is fully dry to achieve crisp, clean edges.
How long should Sharpie dry on a golf ball before sealing?
Let the Sharpie ink dry for a strict minimum of one full hour in a cool, well-ventilated area. If you have utilized multiple heavy layers of ink or very thick chisel-tip lines, waiting two full hours is even better. Rushing this specific step is a very common beginner mistake that directly leads to the aerosol sealant chemically dissolving and instantly smearing the fresh ink.
What if I make a mistake with the Sharpie?
If you act incredibly quickly, you can often successfully remove fresh Sharpie ink by rigorously dabbing rubbing alcohol on a precision Q-tip. Dab carefully directly at the mistake without wiping it across clean areas. For older, dried ink, this is significantly harder and may only successfully fade the dark mark. It’s often best to simply embrace small artistic imperfections as part of the genuine handmade charm.
Final Thoughts on Your Perfect DIY Gift
Creating golf ball designs sharpie for boyfriend is one of those rare, thoughtful gifts that is genuinely fun to make, highly budget-friendly, and deeply personal. You are not just simply handing him a generic dozen golf balls from a sporting goods store; you are giving him a dozen unique little reminders of your love, shared humor, and creativity that he can actively take with him onto the course.
By closely following the simple foundational steps of cleaning, drawing, and rigorously sealing, you can easily move far beyond the common fear of the ink instantly smudging or fading away on the first hole. You now have the tested techniques and expert recommendations required to create a durable sharpie golf ball design that functions perfectly while looking visually incredible. Whether you choose a funny custom emoji, a deeply romantic quote, or his favorite sports team’s vibrant logo, the absolute best part of this gift will always be the simple fact that it was handcrafted by you.
Now that you have the visual inspiration, the proper tool list, and the technical know-how, it’s time to gather your supplies and get creative!
What unique design idea are you most excited to try for your boyfriend? Share your thoughts and project plans in the comments below!
Last update on 2026-08-20 / Affiliate links / Images from Amazon Product Advertising API
