As an Amazon Associate GolferHive.com earns from qualifying purchases.
Brilliant Sharpie Golf Ball Designs That Will Not Wear Off
Tired of your generic white golf ball getting lost in a sea of identical ones? A Sharpie golf ball design is the perfect way to add personality to your game. But the real challenge is creating cool sharpie golf ball designs that don’t smudge or wear off after a few holes.
Sharpie golf ball designs are a DIY craft where you use permanent markers to draw custom patterns or images on a golf ball for personalization. In this guide, you’ll discover nine brilliant design ideas you can actually play with. We will also reveal the professional-standard technique for sealing your art, ensuring it stays vibrant round after round.
Tired of Your Golf Ball Looking Like Everyone Else’s?
That moment on the course when three people hit their Titleist Pro V1s into the same patch of rough is a familiar one. “Is that mine?” becomes the question of the hour. Personalizing your golf ball isn’t just a fun, creative outlet; it’s a practical way to identify your ball instantly and play with confidence. It’s a chance to turn a piece of standard equipment into a personal statement.
This guide moves beyond simple dots and lines. We’ve tested these methods to solve the common problems of smudging, fading, and ink bleeding into the dimples. We’re sharing not just beautiful diy golf ball designs, but the secrets to making them durable enough to survive a full 18 holes, a sand trap, and even the ball washer. Get ready to create custom sharpie golf balls that look amazing and are built to last.
9 Brilliant Sharpie Golf Ball Designs You Can Actually Play With
Here is a gallery of creative inspiration, ranging from minimalist and modern to fun and whimsical. Each design is a fun sharpie art project that is easy to achieve, even for beginners who don’t consider themselves artists. All of these golf ball drawing ideas have been chosen with durability in mind, so you can be confident your masterpiece will last.
1. The Minimalist: Simple Lines & Dots
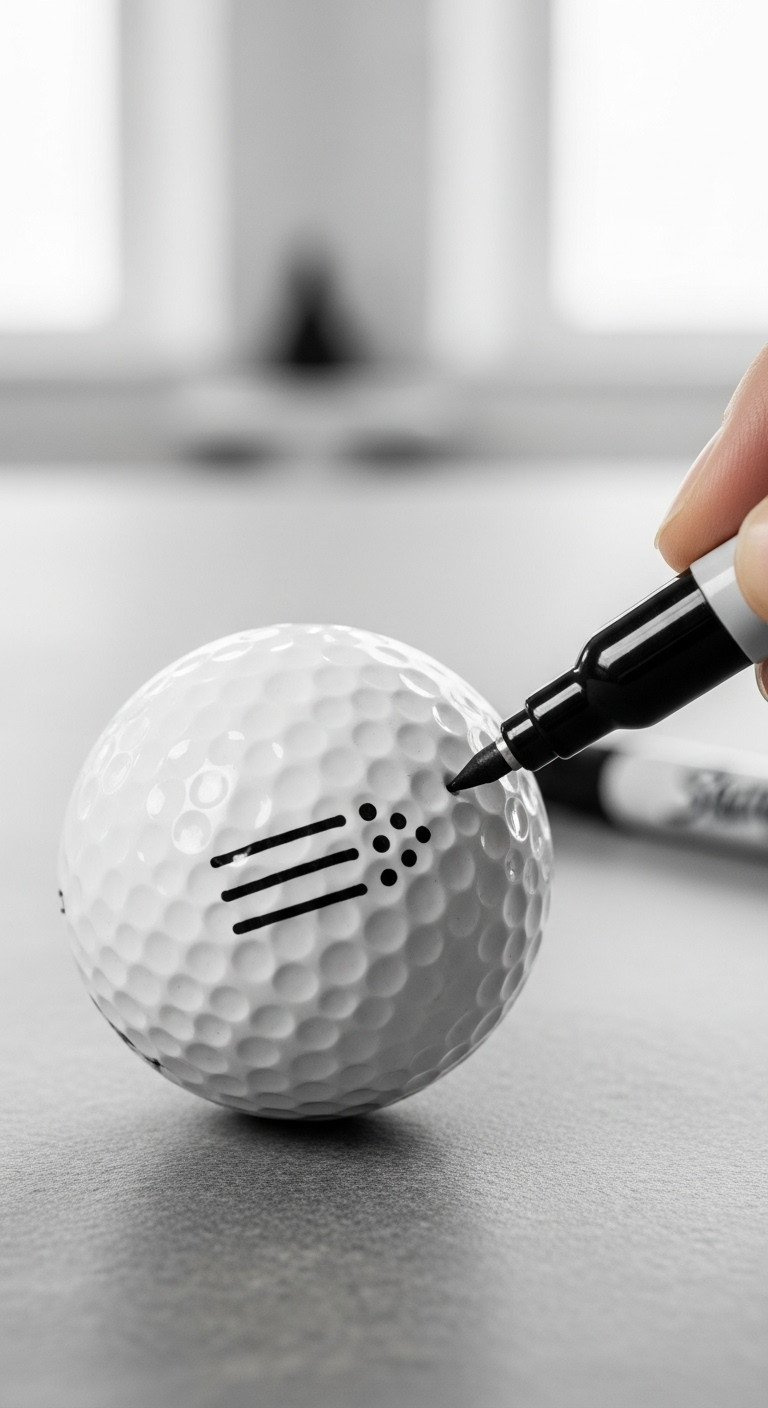
Pin this elegant and easy idea to your ‘DIY Golf’ board!
This classy, easy-to-execute design looks professional and doesn’t require any artistic skill. It’s the perfect way to get started with golf ball personalization diy.
Materials Needed:
- One new or clean golf ball
- Isopropyl alcohol wipe
- Black oil-based Sharpie paint pen, extra-fine point
- Golf ball line marking stencil tool (for perfectly straight lines)
Step-by-Step Directions:
- Wipe the entire surface of the golf ball with the alcohol wipe and let it air dry completely.
- Place the ball in the line marking tool. Using the extra-fine point Sharpie, draw three crisp, parallel lines.
- Remove the ball from the tool. On a different section of the ball, carefully draw a small, tight cluster of five dots.
- Let the ink dry untouched for at least 30 minutes before handling. For best results, allow it to cure for 24 hours before sealing.
Pro-Tip: To keep dots from bleeding, touch the marker to the ball with a very light, quick “tap” instead of pressing down.
2. The Architect: Clean Geometric Patterns
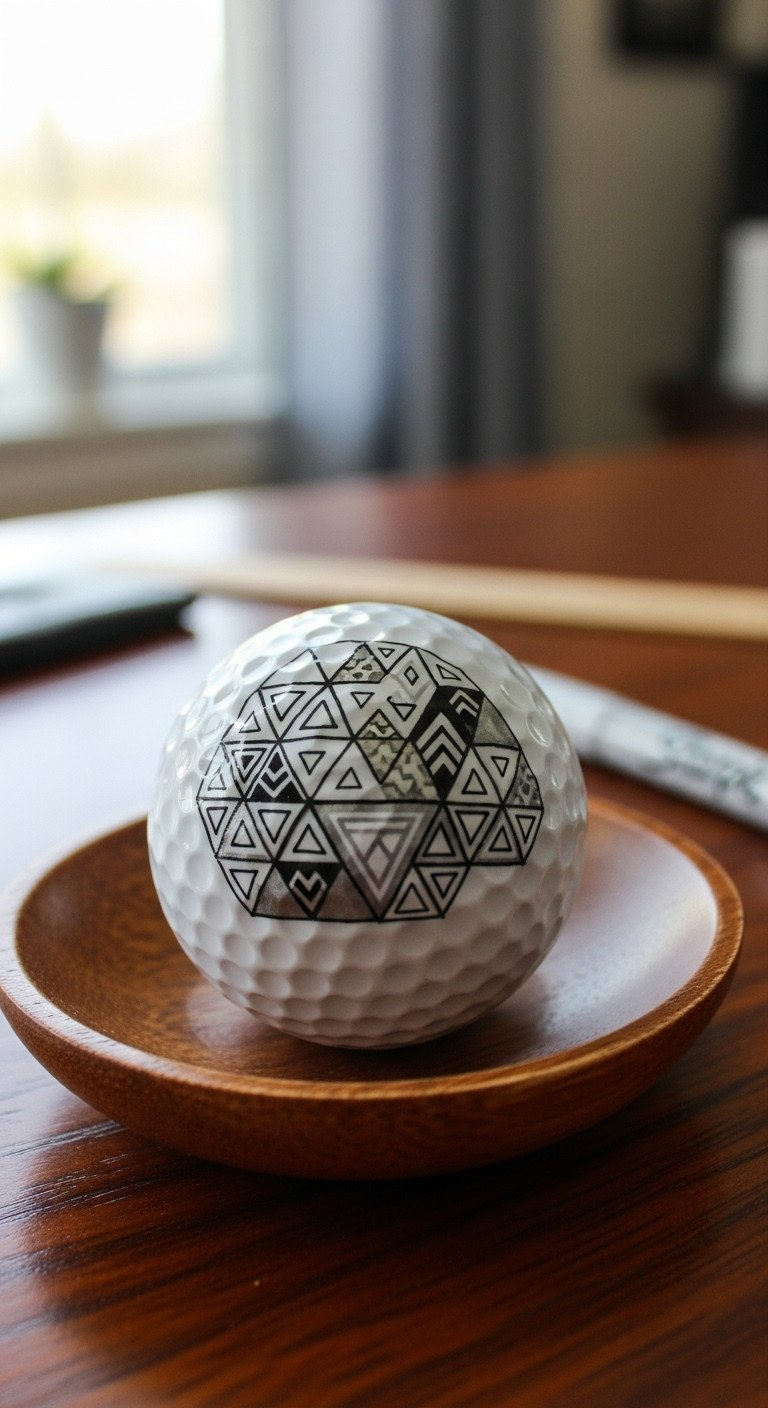
Save this cool geometric pattern for your next DIY session!
Create a modern, visually interesting design that looks complex but is made from simple shapes. This geometric golf ball design is a fantastic example of creative golf ball markings.
Materials Needed:
- Golf ball
- Isopropyl alcohol wipe
- Black oil-based Sharpie, ultra-fine point
- Metallic silver oil-based Sharpie, ultra-fine point
- A small ruler or straight edge (optional)
Step-by-Step Directions:
- Prep the ball’s surface with an alcohol wipe and let dry.
- Using the black Sharpie, draw a series of interconnected straight lines to form triangles around the ball. Don’t worry about perfection; an abstract look is great.
- Fill in some of the triangles completely with the black marker.
- Use the metallic silver Sharpie to outline the empty triangles or to add accent lines.
- Allow to dry fully, giving the metallic ink extra time as it can be slower to cure.
Lesson Learned: When filling in shapes, use small, circular motions to avoid streaks and apply the ink evenly within the dimples.
3. The Naturalist: Simple Floral Doodles
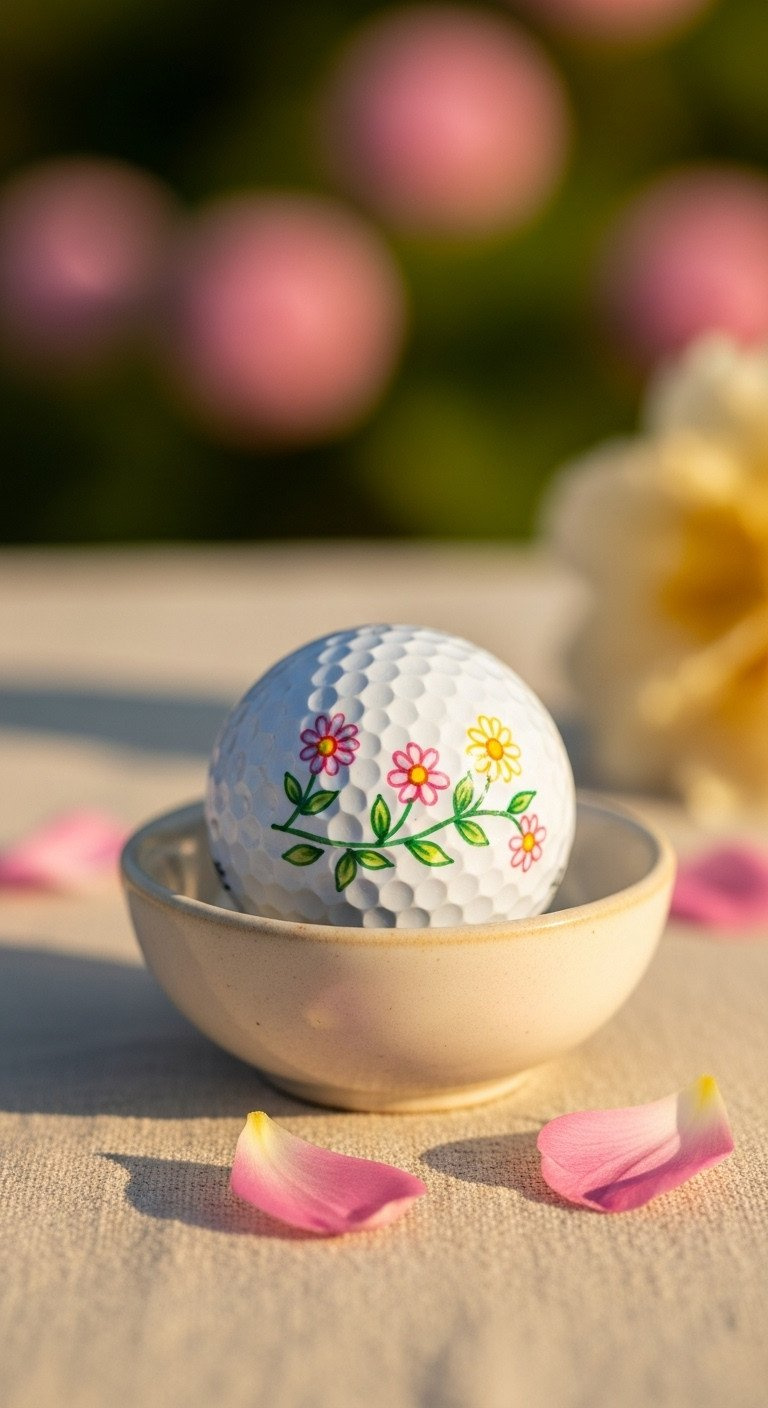
Pin this adorable floral idea for a personalized touch!
Draw a cute, nature-inspired design that feels personal and hand-made. These colorful sharpie golf balls are sure to brighten up your game.
Materials Needed:
- Golf ball
- Isopropyl alcohol wipe
- Oil-based Sharpie paint pen multi-pack, fine point (including green, pink, and yellow)
Step-by-Step Directions:
- Clean the golf ball with alcohol and let dry.
- Using the green Sharpie, draw a simple, curving vine line around the equator of the ball.
- Add small, simple leaf shapes branching off the vine.
- Use the pink and yellow markers to draw small, simple 5-petal flowers along the vine. A simple dot in the center completes them.
- Let each color dry for a few minutes before adding an adjacent color to prevent bleeding.
Pro-Tip: For multi-color designs, always start with the lightest color first. It’s easier to cover up a light-colored mistake with a dark color than the other way around.
4. The Superfan: Favorite Sports Team Logo
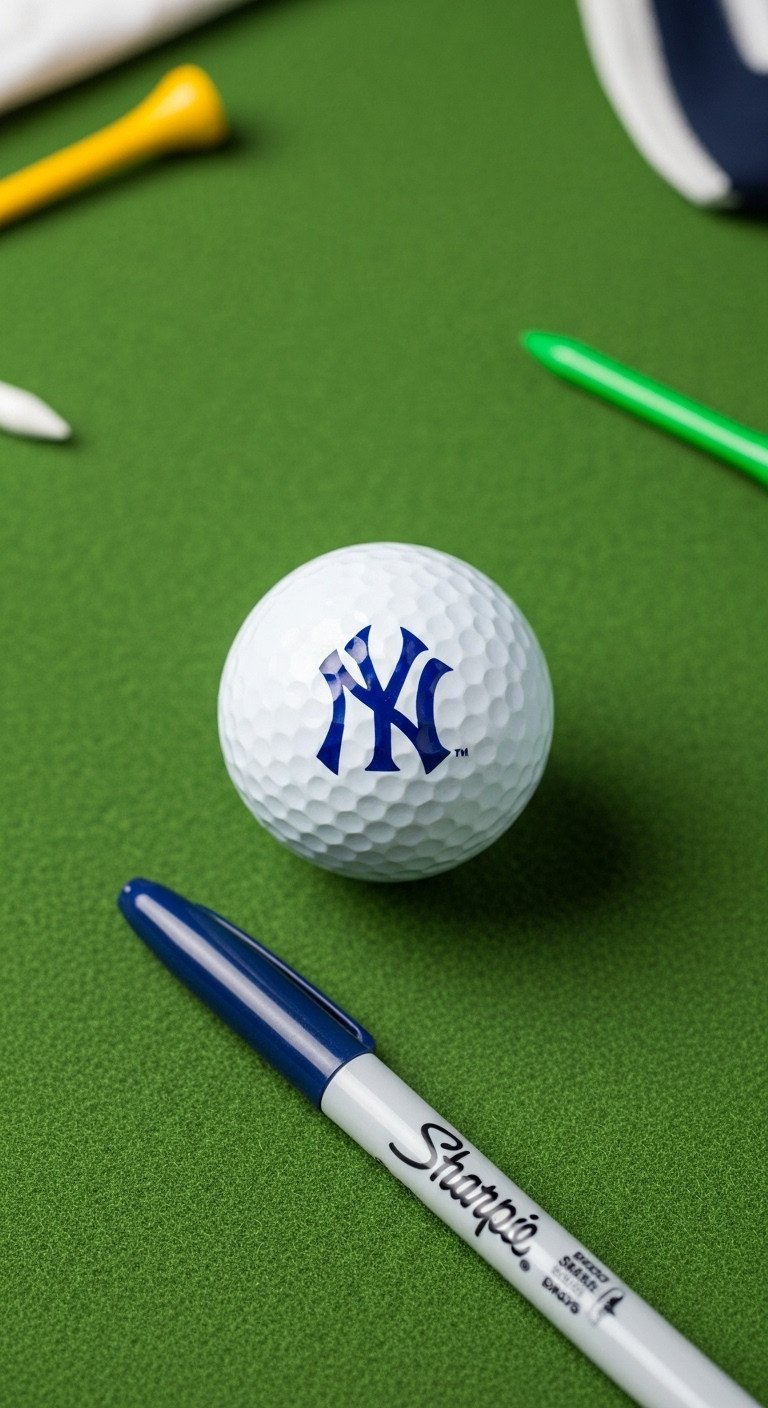
Save this gift idea for the sports fan in your life!
Create a personalized gift for a sports fan by drawing their favorite team’s logo. This is one of the best sharpie golf ball designs for dad or any golf lover.
Materials Needed:
- Golf ball
- Isopropyl alcohol wipe
- Oil-based Sharpie paint pens in your team’s primary colors (e.g., blue and white)
- A printed-out, small version of the team logo for reference
- Fine-tipped pencil (for light sketching)
Step-by-Step Directions:
- Clean the ball with alcohol and let it dry.
- Look at your reference logo. Using the pencil, very lightly sketch the basic outline of the logo onto the ball. The graphite will wipe away later.
- Carefully trace over your pencil sketch with the primary color Sharpie. Use an ultra-fine point for intricate details.
- Fill in any solid color areas. Let the first color dry completely.
- Add details with your second team color. Let the finished design cure for at least 24 hours before sealing.
Lesson Learned: For complex logos, focus on simplifying them into their most recognizable shapes. You don’t need to replicate every tiny detail.
5. The Comedian: Funny Quotes & Sayings
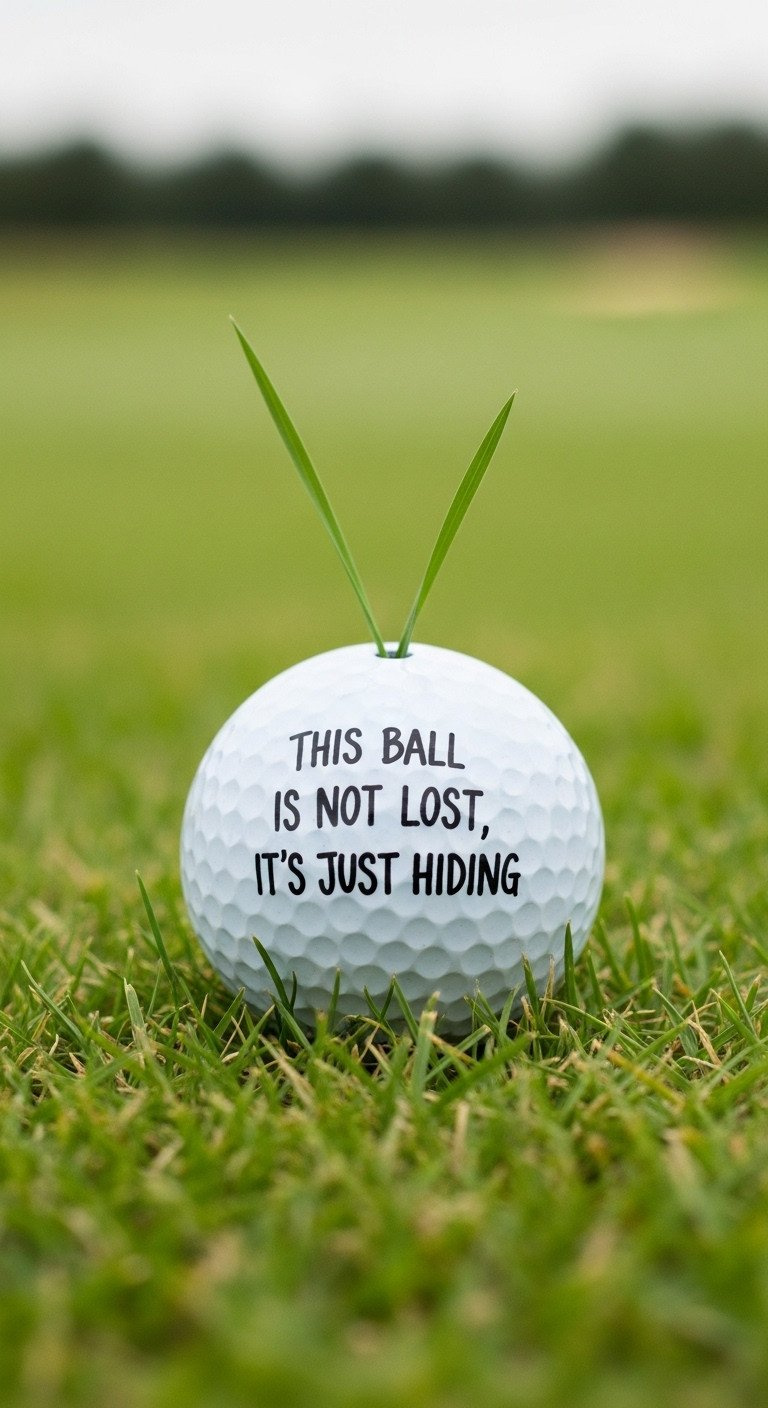
Pin this hilarious idea for a great golf gift!
Find funny phrases to write on a golf ball for a humorous and personal touch. This is a simple and effective way to create unique golfer gifts.
Materials Needed:
- Golf ball
- Isopropyl alcohol wipe
- Black oil-based Sharpie paint pen, ultra-fine point for crisp lettering
Step-by-Step Directions:
- Clean the ball with alcohol and let dry.
- To keep your text straight, find a line of dimples and use it as a baseline guide.
- Slowly and carefully write your chosen quote (e.g., “World’s Okayest Golfer,” “May The Course Be With You,” “Not in the water!”).
- Use short, deliberate strokes. It’s easier to control the pen on the curved surface this way.
- Let it dry completely. A second pass can make the letters bolder if needed, but wait for the first layer to dry.
Pro-Tip: Write in all caps for an easier, neater look if you’re not confident in your cursive or script handwriting.
6. The Classic: A Personal Monogram
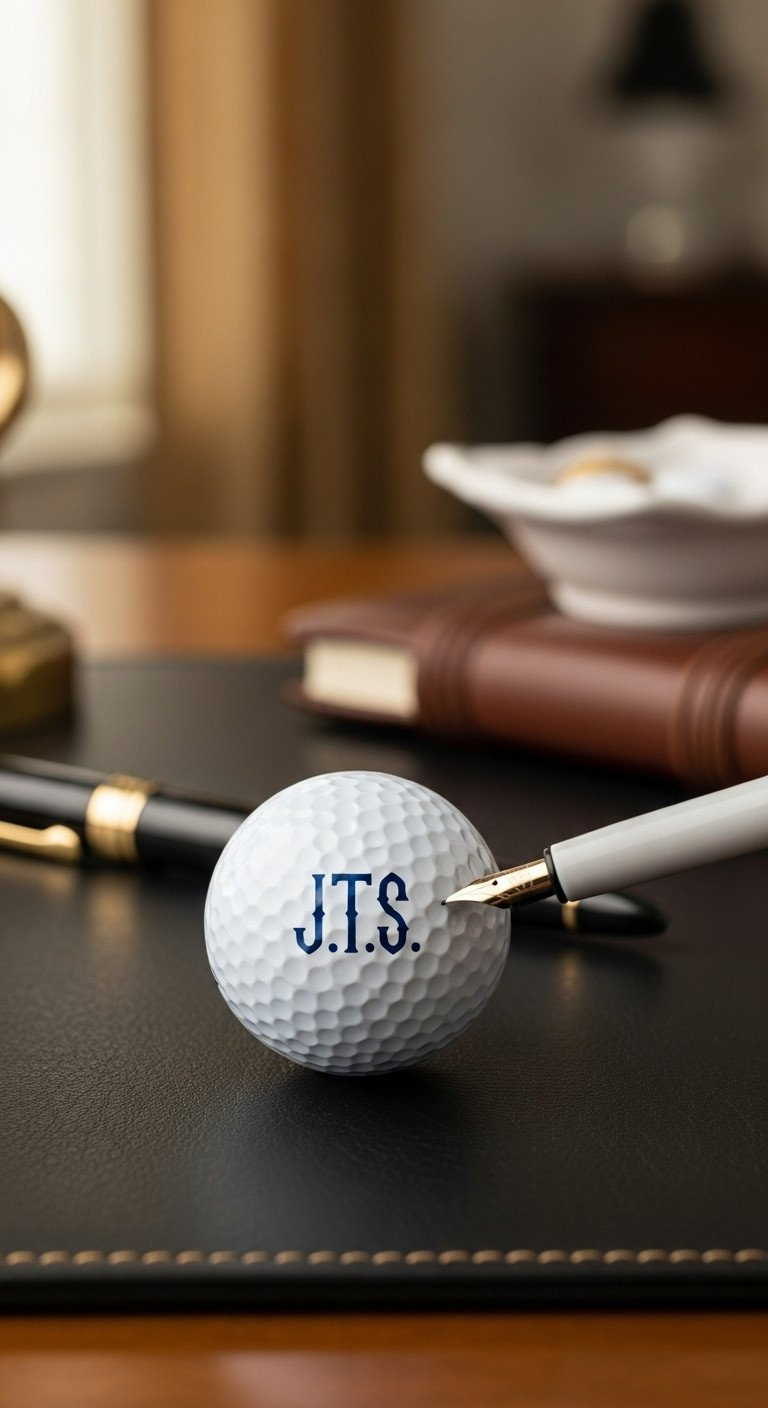
Save this timeless monogram idea for a classic, personalized gift.
Create a sophisticated and classic identification mark using personal initials. This is the best way to mark golf balls for a timeless, elegant look.
Materials Needed:
- Golf ball
- Isopropyl alcohol wipe
- Oil-based Sharpie paint pen in a classic color like navy, black, or dark green (fine point)
- Small alphabet stencils (optional, for perfect lettering)
Step-by-Step Directions:
- Clean the ball thoroughly with alcohol.
- If using a stencil, hold it firmly against the curved surface of the ball. This can be tricky, so small, flexible stencils work best.
- Carefully dab the marker through the stencil to form the letter.
- If free-handing, lightly sketch the initials with a pencil first to ensure proper spacing.
- Trace over the pencil with your Sharpie, using slow, confident strokes. Let it cure before sealing.
Lesson Learned: For a traditional three-letter monogram, the initial of the last name is typically larger and placed in the center.
7. The Whimsical: Cute Character Faces

How cute is this? Pin this fun character idea!
Create a fun, playful design that is simple and brings a smile to someone’s face. This is one of the most creative ways to mark your golf ball.
Materials Needed:
- Golf ball
- Isopropyl alcohol wipe
- Black oil-based Sharpie, ultra-fine point (for outlines)
- Various colored oil-based Sharpies (e.g., yellow for emojis, pink for cheeks)
Step-by-Step Directions:
- Clean the ball with alcohol.
- Using the black ultra-fine marker, draw the outline of the face—two eyes and a mouth.
- Let the black outline dry for a few minutes to prevent smearing.
- Carefully fill in any colored areas, like making a yellow emoji face or adding pink cheeks.
- For characters like a bee, draw black stripes around the ball, let them dry, then fill in the gaps with yellow.
Pro-Tip: Use the ball’s existing logo or number as a feature, like a nose or an eye, to incorporate it into your character design.
8. The Artist: Abstract Color Fields
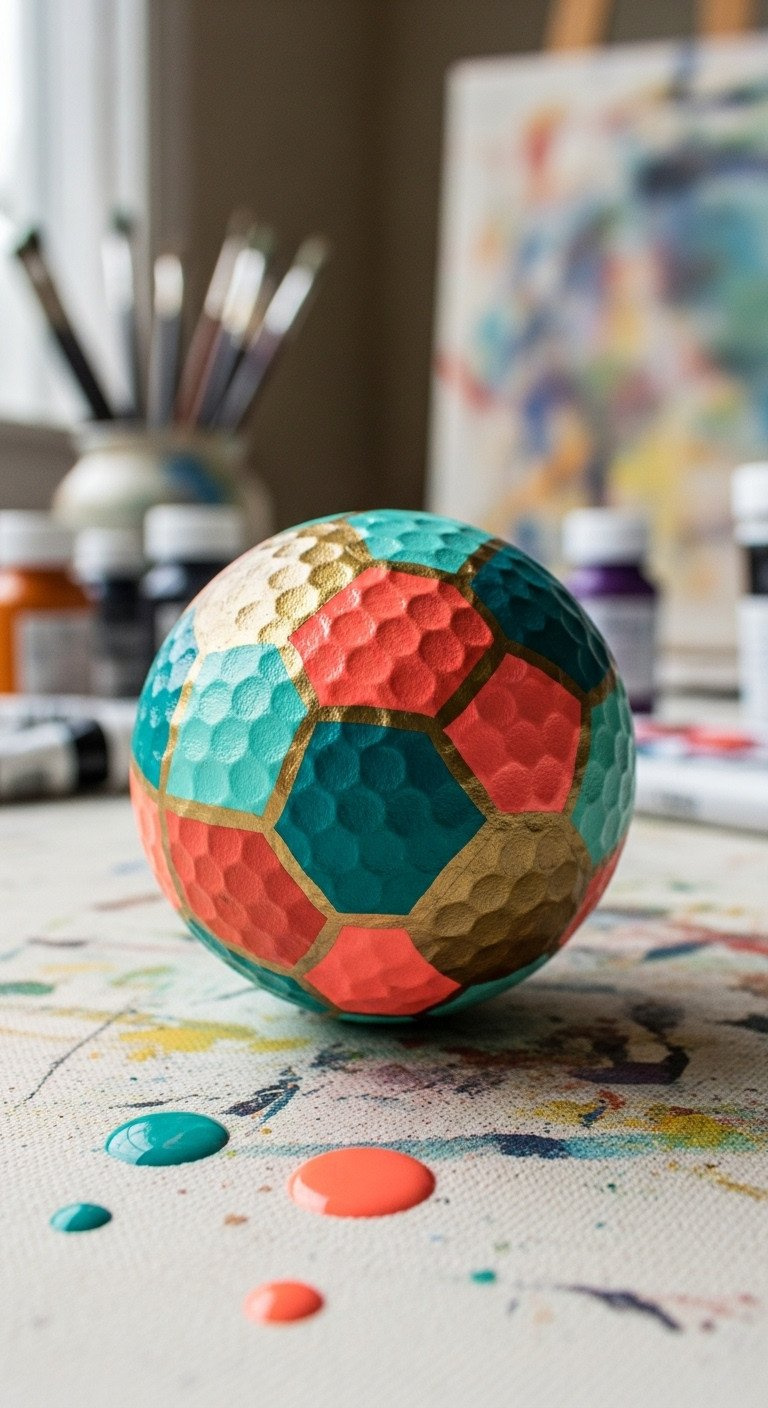
Save this artistic idea for a truly unique look on the green!
Create a visually stunning, artistic ball that doesn’t require any drawing skills, just a good sense of color. This golf ball art sharpie technique is modern and impressive.
Materials Needed:
- Golf ball
- Isopropyl alcohol wipe
- 3-4 oil-based Sharpie paint pens in complementary colors (e.g., blues and greens, or sunset colors)
Step-by-Step Directions:
- Clean the ball with alcohol and let it dry.
- Choose your first color and draw a large, organic-shaped block of color on one side of the ball.
- Fill the shape in completely. Let it dry for at least 15-20 minutes.
- Take your second color and draw another large shape that slightly overlaps the first one. Fill it in.
- Repeat with your third color, creating a layered, abstract look. This is a great way to cover the entire ball.
Lesson Learned: This is one of the most forgiving designs. Don’t worry about staying in the lines—the overlapping, imperfect shapes are what make it look artistic.
9. The Zen Master: Mandala-Inspired Dots
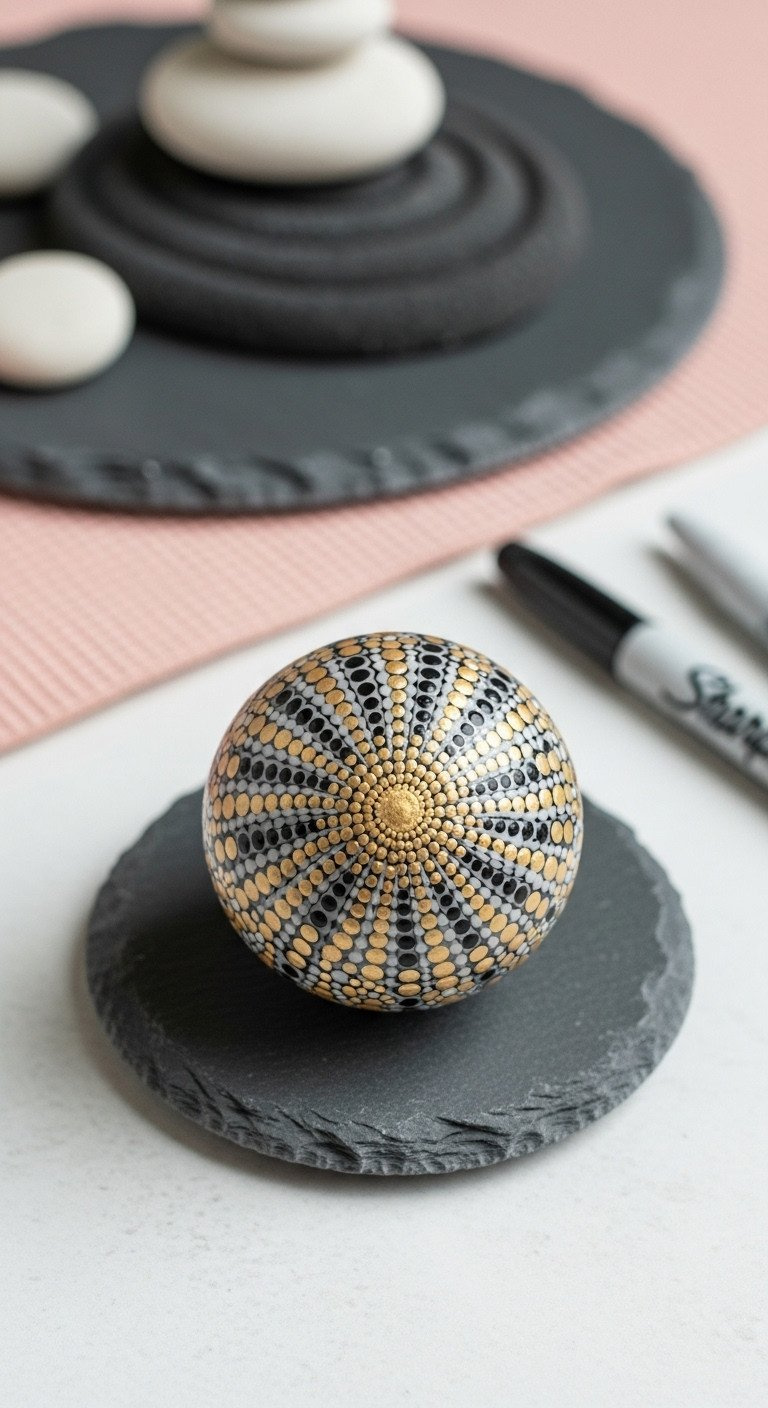
Find your zen and pin this beautiful mandala dot art idea!
Create a detailed, meditative, and beautiful design using a simple dotting technique. This intricate golf ball art uses the dimples as a natural grid.
Materials Needed:
- Golf ball
- Isopropyl alcohol wipe
- Oil-based Sharpie paint pens in 2-3 colors, ultra-fine point is essential
Step-by-Step Directions:
- Clean the ball with alcohol.
- Pick a dimple to be your center point. Place one dot of your primary color in that dimple.
- Create a ring of dots in the surrounding dimples. Use the ball’s natural grid of dimples as your guide.
- Create another, larger ring of dots using a second color.
- Continue creating concentric rings of dots, alternating colors and dot sizes to create a beautiful mandala effect.
Pro-Tip: For this technique, a steady hand is key. Rest your drawing hand on the table and use your other hand to slowly rotate the ball.
The Secret to Designs That Won’t Wear Off: Your Durability Guide
You’ve picked the perfect design. Now, let’s make sure it lasts. This is the professional-level knowledge that separates a fun doodle from a durable, long-lasting piece of playable art. The problem of a Sharpie wearing off a golf ball is completely solvable with the right tools and process. My own trial and error has shown this four-step method is the key to creating a waterproof golf ball marker design.
Step 1: Choose the Right Weapon (The Best Marker)
The single most important factor for a durable design is the marker you choose. Not all Sharpies are created equal. You must use an oil-based paint marker, not a standard alcohol-based Sharpie.
- Standard Sharpies use an alcohol-based ink. It’s great for paper but sits on top of a golf ball’s non-porous surface and will smudge and wear away almost immediately with moisture or friction.
- Oil-Based Sharpie Paint Pens use an ink designed to adhere to surfaces like plastic, glass, and metal. The oil base makes it naturally water-resistant and far more resistant to abrasion. This is the correct tool for the job.
Step 2: Prepare Your Canvas (Surface Prep is a Must)
Before you even uncap your marker, you must prepare the golf ball’s surface. New golf balls have a coating and all balls have oils from your hands that prevent ink from bonding permanently.
The solution is simple: thoroughly wipe the entire surface of the golf ball with an isopropyl alcohol (rubbing alcohol) wipe. This removes any residue and creates a perfectly clean surface for the ink to adhere to. Let it air dry for a minute before you begin drawing. This step alone dramatically increases the lifespan of your design.
Step 3: Patience is a Virtue (The Curing Process)
Your design might feel dry to the touch in a few minutes, but it is not fully cured. The solvents in the oil-based ink need time to completely evaporate. If you seal it too soon, the sealant can react with the wet solvents, causing the ink to run and ruining your hard work.
For a truly permanent sharpie golf ball, you must let your finished design cure, untouched, for a full 24 hours. Set it in a safe place (an egg cup works well as a stand) and let it be.
Step 4: The Finishing Touch (How to Seal Your Design)
This is the final step that makes your design waterproof and tough enough for the course. You will need a can of clear acrylic spray sealant, which is available at any craft or hardware store.
The key is to apply several light coats, not one thick one. A thick coat will drip and can also cause the ink to run.
1. In a well-ventilated area, hold the can about 8-10 inches away from the ball.
2. Spray a very light, misty coat over the design.
3. Let it dry for at least 30 minutes.
4. Apply a second light coat.
5. For maximum durability, you can apply a third and final light coat after another 30 minutes.
This process creates a hard, protective shell over your artwork without affecting the ball’s performance.
Key Takeaways: Your Quick Guide to Durable Golf Ball Art
If you remember nothing else, these are the critical steps for success. This quick guide ensures your hand-drawn golf balls will look great for a long time.
- Always Use Oil-Based: Your #1 key to durability is using oil-based Sharpie paint pens. Standard markers will not last.
- Clean First, Draw Second: A quick wipe with rubbing alcohol before you start makes a huge difference in ink adhesion and prevents the Sharpie from smudging.
- Wait 24 Hours Before Sealing: You must allow your design to fully cure to prevent smearing when you apply the clear coat. Patience is essential.
- Seal with Light Coats: Use 2-3 thin, misty layers of clear acrylic spray, not one thick, drippy one.
- Embrace the Dimples: Don’t fight the ball’s surface. Use the natural grid of dimples as a guide for your designs to create cleaner, more professional-looking art.
FAQs About golf ball designs sharpie diy
What is the best Sharpie to use for golf balls?
The best markers are oil-based Sharpie paint pens. Their ink is specifically designed for non-porous surfaces like plastic and metal. It is far more durable, opaque, and resistant to water and abrasion than the ink in standard, alcohol-based Sharpies, making it perfect for golf balls that will be used during play.
How do you seal Sharpie on a golf ball so it doesn’t come off?
Use a clear acrylic spray sealant. After your oil-based Sharpie design has dried for at least 24 hours, apply 2-3 very light, even coats of the sealant. Hold the can 8-10 inches away and let each coat dry for 30 minutes. This creates a hard, protective layer over the ink.
Will drawing on a golf ball affect its flight?
No, for almost all amateur players, a simple Sharpie design will have no noticeable effect on the ball’s flight. While a very thick layer of paint could theoretically alter the aerodynamics slightly, the micro-thin layer of ink from a Sharpie is negligible and will not impact your performance.
Is it legal to put Sharpie designs on your golf ball?
Yes, it is completely legal under the Rules of Golf. According to official golf regulations, Rule 6.3a requires you to be able to identify your ball. Using a unique Sharpie marking is a common and accepted way to fulfill this rule. Just ensure the mark doesn’t cover the entire ball or obscure its original markings.
Final Thoughts
Personalizing your golf ball is more than just a practical way to identify it on the course; it’s a fun, relaxing, and inexpensive way to express your creativity. Whether you’re making a thoughtful, personalized gift for a special someone or just adding some flair to your own game, the possibilities are endless.
From a simple, elegant monogram to a funny quote that will make your foursome laugh, the designs you can create are limited only by your imagination. Remember the key principles: use the right oil-based markers, prep your surface, and seal your work correctly. By following this guide, anyone can create durable, beautiful, and unique golf ball art.
What design are you excited to try first? Share your ideas in the comments below
Last update on 2025-12-25 / Affiliate links / Images from Amazon Product Advertising API

