As an Amazon Associate GolferHive.com earns from qualifying purchases.
13 Cool Sharpie Golf Ball Designs With Step By Step Tips
Tired of your golf balls looking just like everyone else’s? It’s time to add a splash of personality to your game.
A Sharpie golf ball design is a fun, creative way to personalize your gear. But the big problem is always the same: smudged, faded artwork after just a few holes. It can be so frustrating.
Decorating golf balls with a Sharpie is an easy DIY project, but the key is to properly clean the ball, use the right markers, and seal the design with a clear coat. This guide will show you how. You’ll discover 13 cool ideas with the exact steps to make your art last.
Why Settle for Boring Golf Balls When You Can Create Tiny Masterpieces?
Let’s face it, a plain white golf ball is a blank canvas just waiting for some creativity. This fun DIY craft is the perfect way to make your equipment stand out or to create a thoughtful, handmade personalized gift for the golfer in your life. From our experience, the frustration of a smudged design is real, but the satisfaction of discovering a method that actually works is even better. We’re not just here to show you cool golf ball drawings; we’re here to give you the step-by-step tips to ensure your tiny masterpieces survive the back nine. This is an easy and rewarding project, whether you’re creating a baseball design for Father’s Day or simple alignment lines for your own game.
13 Cool Sharpie Golf Ball Designs With Step-by-Step Tips
Ready for some inspiration? We’ve curated a list of creative golf ball ideas that range from iconic sports themes to simple patterns perfect for absolute beginners. Each piece of Sharpie golf ball art comes with its own simple guide, empowering you to start creating your own custom golf balls immediately. Whether you’re looking for unique golf ball markings or just a fun weekend project, you’ll find it here.
1. The Classic Baseball Stitches
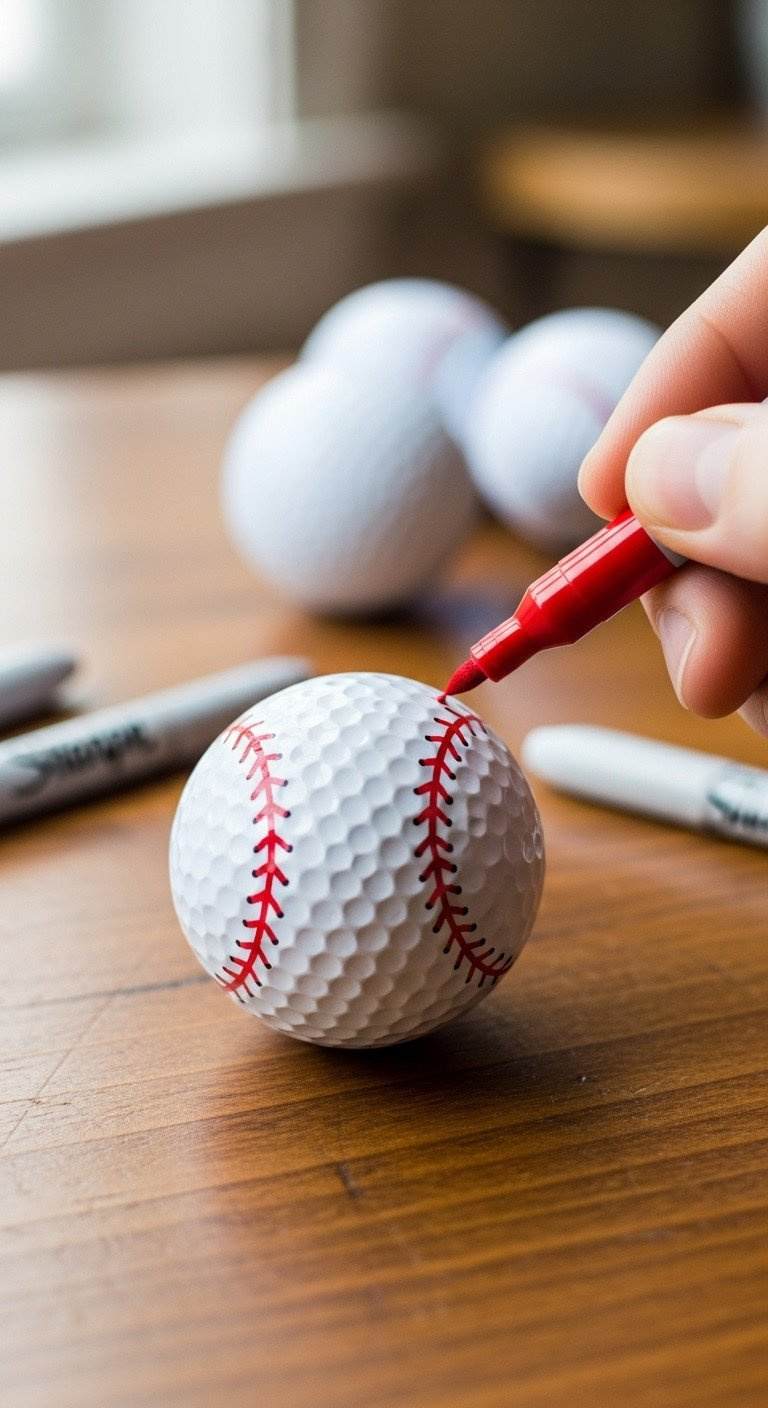
Pin this iconic design for your next DIY gift!
Materials Needed:
- 1 clean, white golf ball (prepped with rubbing alcohol)
- 1 red fine-point permanent marker (oil-based recommended for vibrancy)
- 1 black ultra-fine point permanent marker (optional, for outlining)
Step-by-Step Directions:
- Draw the Curves: Using the red marker, draw two large, opposing C-shaped curves on the ball. Imagine you’re drawing the seams on a real baseball.
- Add the Stitches: Along each red curve, draw a series of small, evenly spaced ‘V’ shapes. Make sure the points of the ‘V’s face away from the red line.
- Let it Dry: Set the ball aside for at least 30 minutes to an hour to ensure the red ink is completely dry to the touch.
- Seal for Durability: Once fully cured (ideally after a few hours), apply a thin coat of clear acrylic spray sealant to protect your work.
Pro-Tip: For perfectly symmetrical curves, find the seam line on the golf ball (where the two halves are joined) and use it as a guide for your first red line.
2. The Elegant Monogram
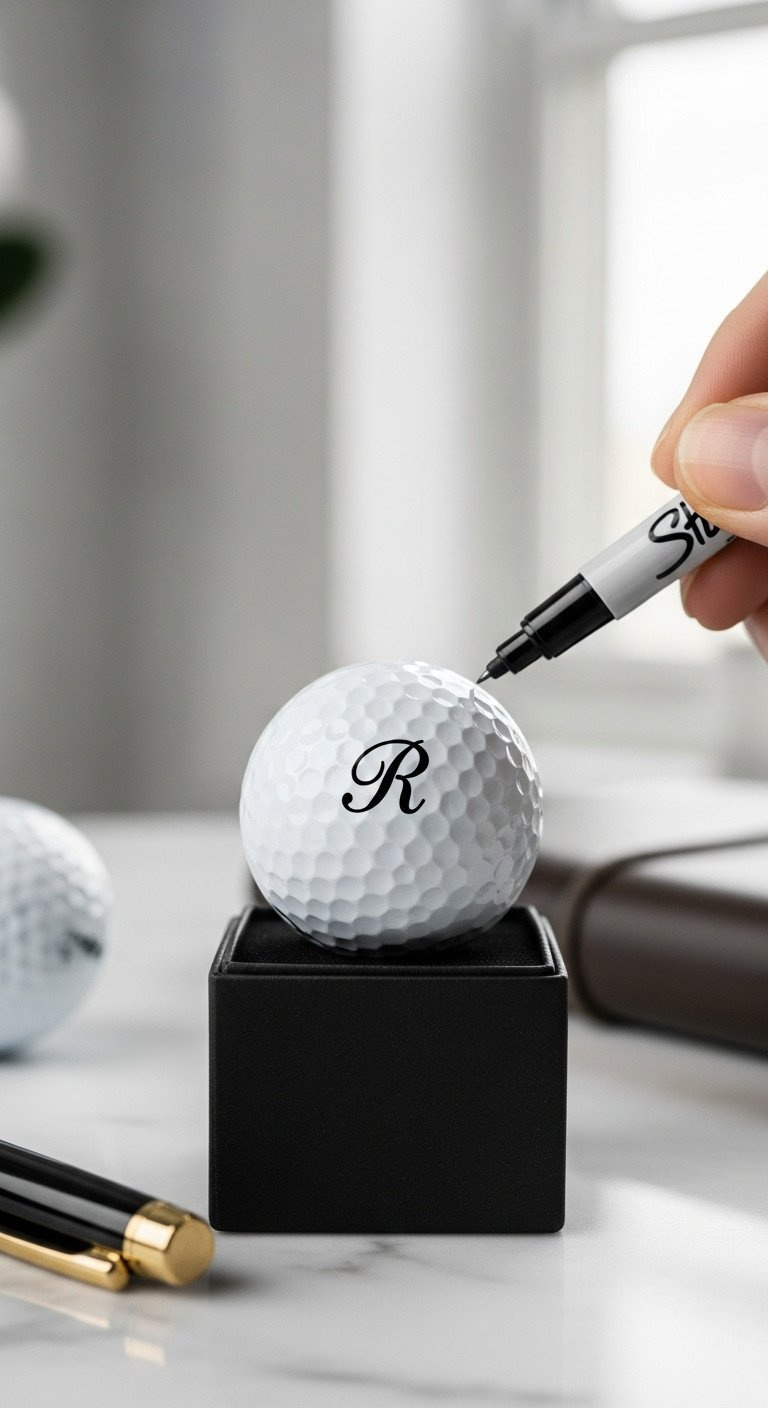
Save this simple idea for a classy, personalized touch!
Materials Needed:
- 1 clean, white golf ball
- 1 black ultra-fine point permanent marker
- A pencil with a soft lead (optional, for sketching)
- Golf ball letter stencil (optional, for perfect lettering)
Step-by-Step Directions:
- Plan Your Placement: Decide where you want the monogram. A spot opposite the brand logo usually works best.
- Sketch Lightly (Optional): If drawing freehand, lightly sketch your initial(s) with a pencil. This allows you to erase and adjust before using permanent ink.
- Trace in Ink: Carefully trace over your pencil sketch with the ultra-fine point Sharpie. Use slow, deliberate strokes. If using a stencil, place it firmly on the ball and fill it in.
- Dry and Seal: Let the ink dry completely before handling, then apply a clear sealant to protect it.
Lesson Learned: Don’t press too hard with the ultra-fine tip! It can cause the ink to bleed into the dimples. A light, consistent touch is all you need.
3. Fun & Easy Polka Dots
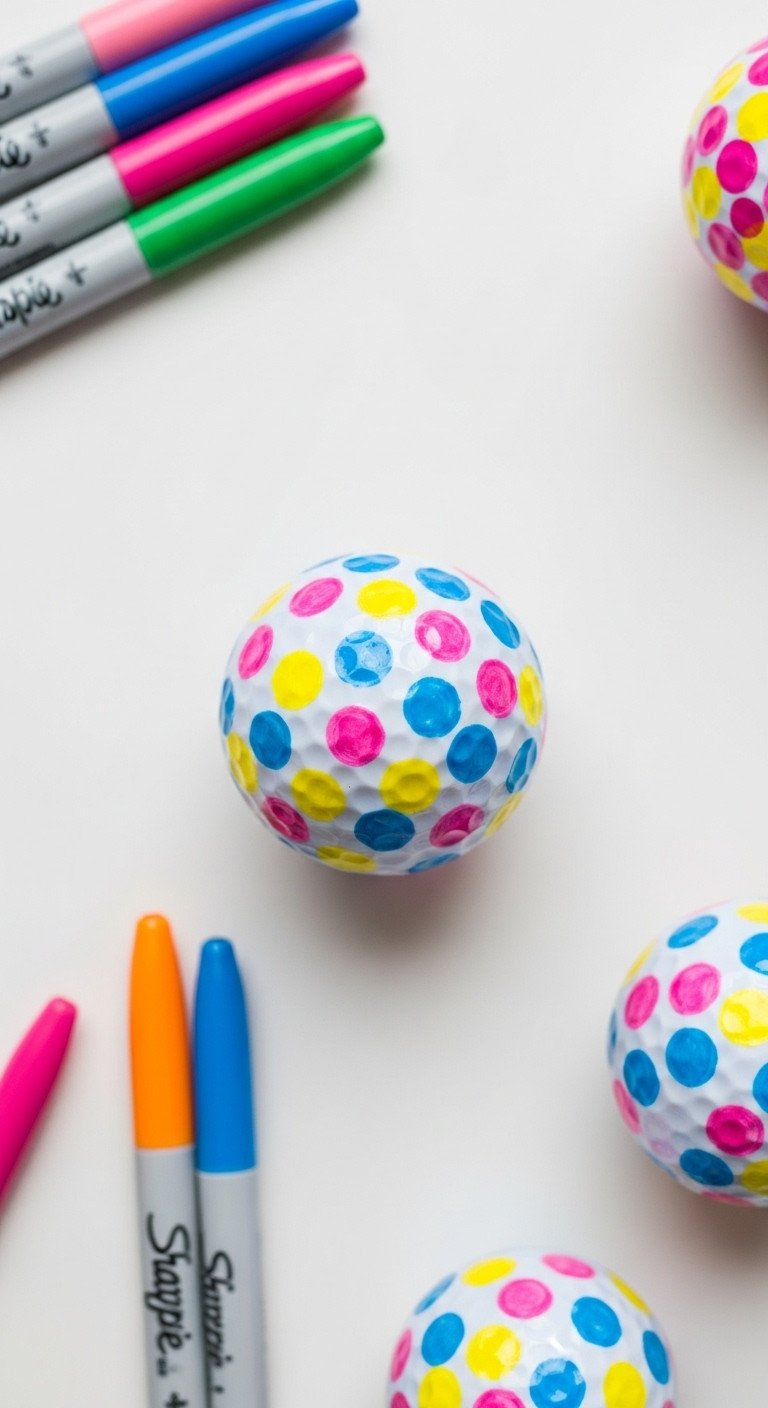
Pin this super easy design for a pop of color on the course!
Materials Needed:
- 1 clean, white golf ball
- 3-4 permanent markers in your favorite colors (fine-point tip works well)
Step-by-Step Directions:
- Start with Your First Color: Take your first marker and create several dots of varying sizes, scattered around the ball. The fine point allows you to simply press down to create a perfect dot.
- Add the Second Color: Take your next color and add more dots, filling in some of the empty spaces.
- Complete the Pattern: Continue with your remaining colors until you’re happy with the coverage and balance.
- Dry and Seal: Let the dots dry thoroughly to prevent smearing, then apply your clear sealant.
Pro-Tip: For a more dynamic look, slightly overlap some of the dots, but make sure the first color is completely dry before adding the second on top to prevent bleeding.
4. Your Favorite Sports Team Logo
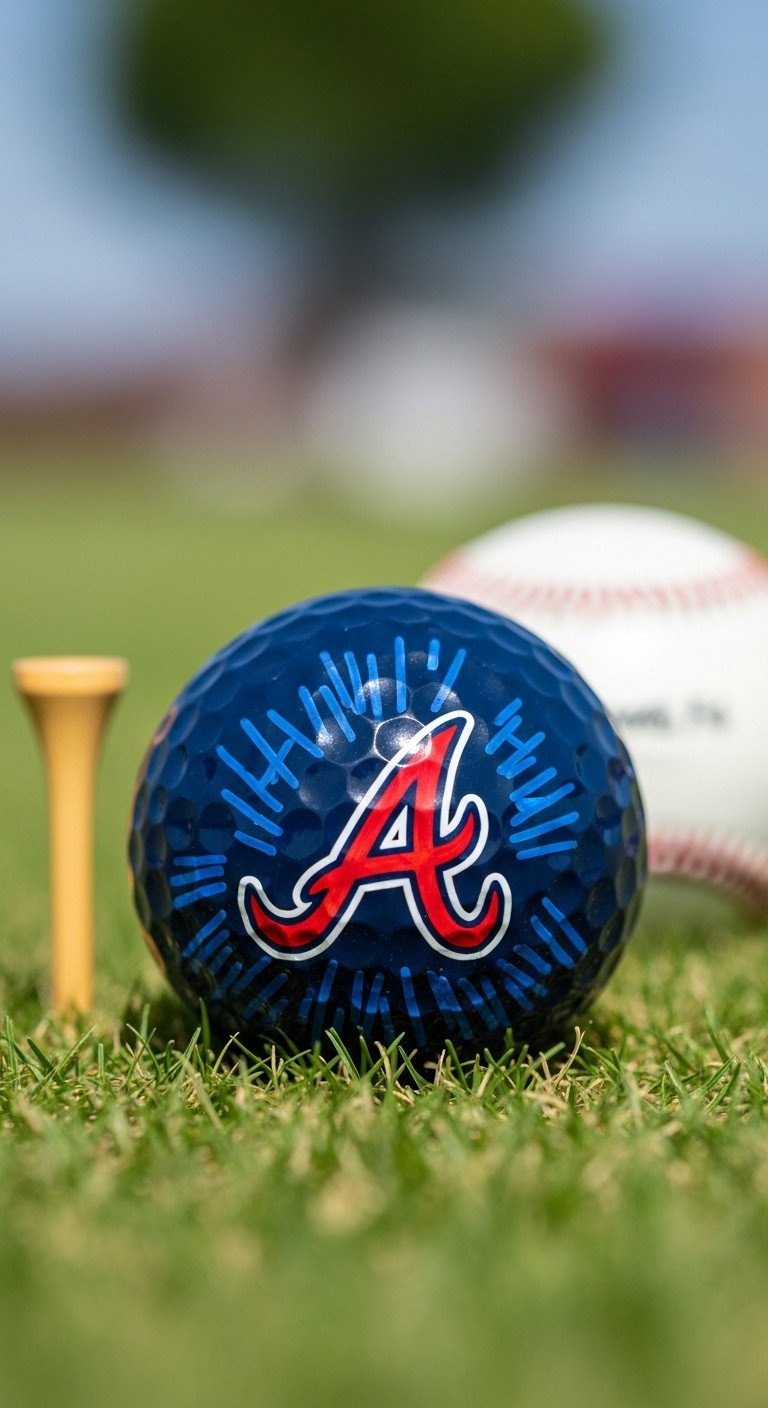
Save this idea for the ultimate sports fan gift!
Materials Needed:
- 1 clean, white golf ball
- Permanent markers in your team’s primary colors (e.g., blue and red)
- A printout of the team’s logo for reference
- A pencil for sketching
Step-by-Step Directions:
- Choose a Simple Logo: Pick a version of your team’s logo that is relatively simple, like a letter or basic shape.
- Sketch the Outline: Looking at your reference image, lightly sketch the logo’s outline onto the golf ball with a pencil.
- Ink the Outline: Carefully trace the main outline with the primary color marker. Use an ultra-fine tip for any detailed parts.
- Fill in the Color: Use a fine-point marker to fill in the areas of color. Work slowly to stay within the lines. Let dry completely before sealing.
Pro-Tip: If the logo is complex, consider using a stencil. You can find many sports logo stencils online or create your own with painter’s tape and a craft knife.
5. Minimalist Alignment Lines
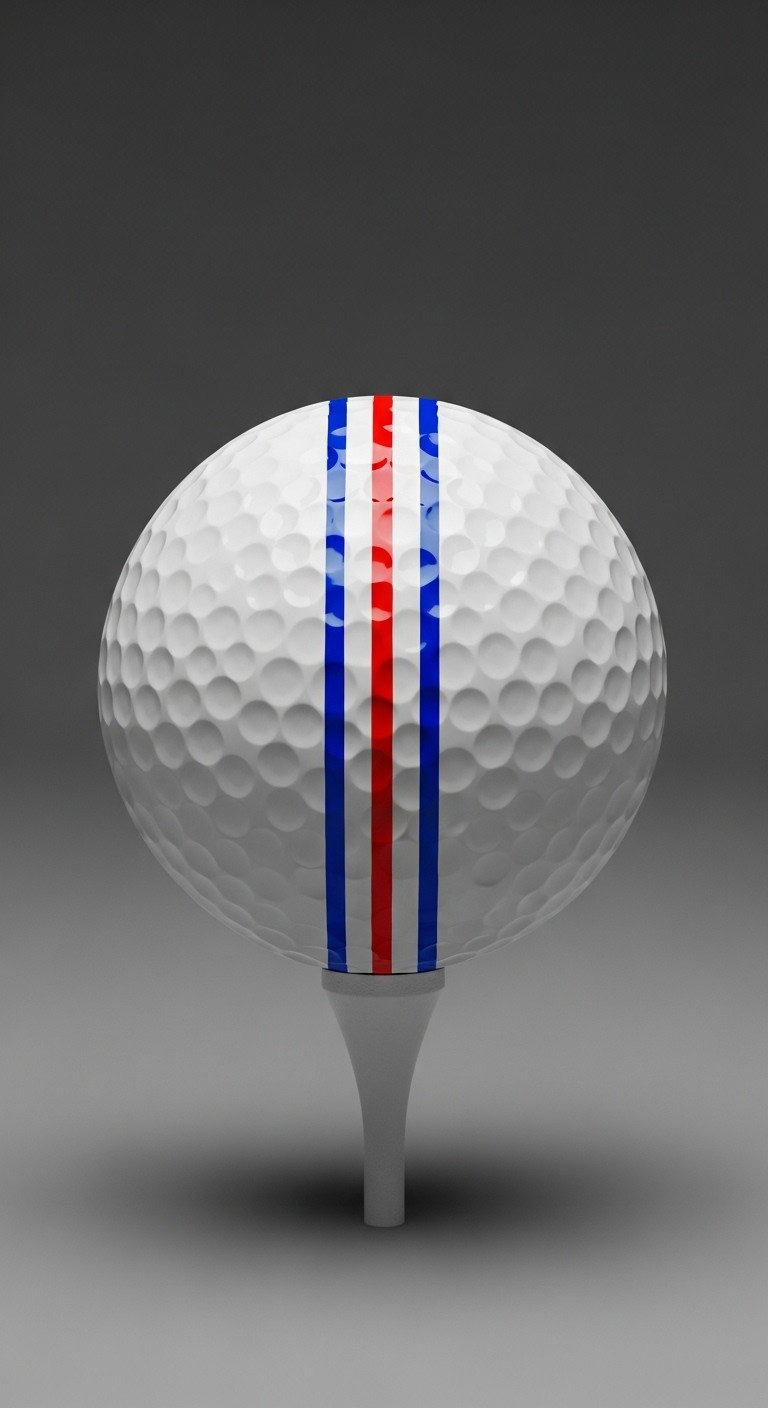
Pin this functional tips to improve your putting game!
Materials Needed:
- 1 clean, white golf ball
- A golf ball line marking tool or stencil
- Fine-point permanent markers in 1-3 colors
Step-by-Step Directions:
- Secure the Ball: Place the golf ball securely inside your line marking tool. Make sure it doesn’t wobble.
- Trace the Line: Hold the tool firmly and use your first marker to trace along the stencil’s guide. Apply even pressure for a consistent line.
- Add More Lines (Optional): If your tool has multiple guides, you can create a triple-track line using different colors. Let the first line dry for a minute before drawing the next one.
- Remove and Dry: Carefully remove the ball from the tool. Let the ink cure completely before use. Sealing is optional but recommended for longevity.
Lesson Learned: Don’t try to draw a long alignment line freehand. It’s nearly impossible to get it perfectly straight on a sphere. A simple, inexpensive line marking tool is worth every penny for this design.
6. Funny Emoji Faces

Save this fun idea to bring a smile to the golf course!
Materials Needed:
- 1 clean, white golf ball
- 1 yellow fine-point permanent marker
- 1 black ultra-fine point permanent marker
Step-by-Step Directions:
- Create the Yellow Base: Use the yellow marker to draw a solid circle on the golf ball. Fill it in completely and let it dry for 10-15 minutes.
- Draw the Eyes: With the black ultra-fine marker, draw the eyes for your chosen emoji (e.g., hearts for the heart-eyes emoji, sunglasses for the cool emoji).
- Add the Mouth: Carefully draw the mouth. A simple curve or a wide grin works perfectly.
- Dry and Seal: Let the black ink dry fully, then apply a clear sealant to keep your emoji looking fresh.
Pro-Tip: Make a set of different emojis! The winking face, crying-laughing face, and heart-eyes face are all easy and instantly recognizable.
7. Abstract Galaxy Design
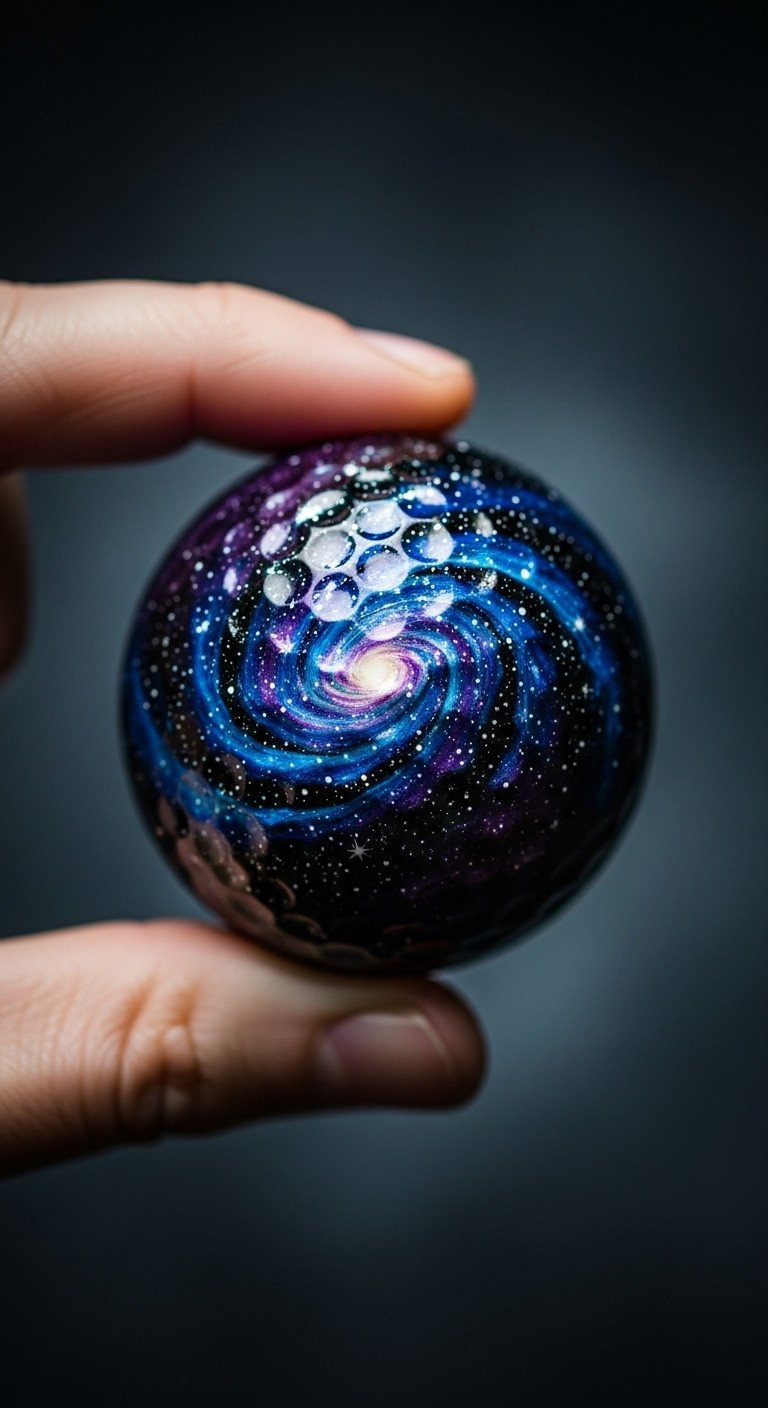
Pin this cosmic design for a truly out-of-this-world golf ball!
Materials Needed:
- 1 clean, white golf ball
- Permanent markers in dark blue, purple, and black
- A silver or white oil-based paint pen (for stars)
- A small amount of rubbing alcohol on a cotton swab
Step-by-Step Directions:
- Lay Down Color Patches: Scribble patches of blue, purple, and black marker directly onto a section of the golf ball, allowing them to touch.
- Blend the Colors: While the ink is still slightly wet, take your cotton swab dipped in a tiny amount of rubbing alcohol and gently dab at the edges where the colors meet. This will soften and blend the inks together.
- Repeat and Build Layers: Continue this process in sections around the ball until you have a swirling, galaxy-like base.
- Add the Stars: Once the base is completely dry, use your silver or white paint pen to add tiny dots for stars. Create a few larger stars and many tiny ones for depth. Let dry and seal carefully.
Lesson Learned: Use the rubbing alcohol for blending very sparingly. Too much will remove the ink entirely. A slightly damp swab is all you need to activate the blending effect.
8. Delicate Floral Vine
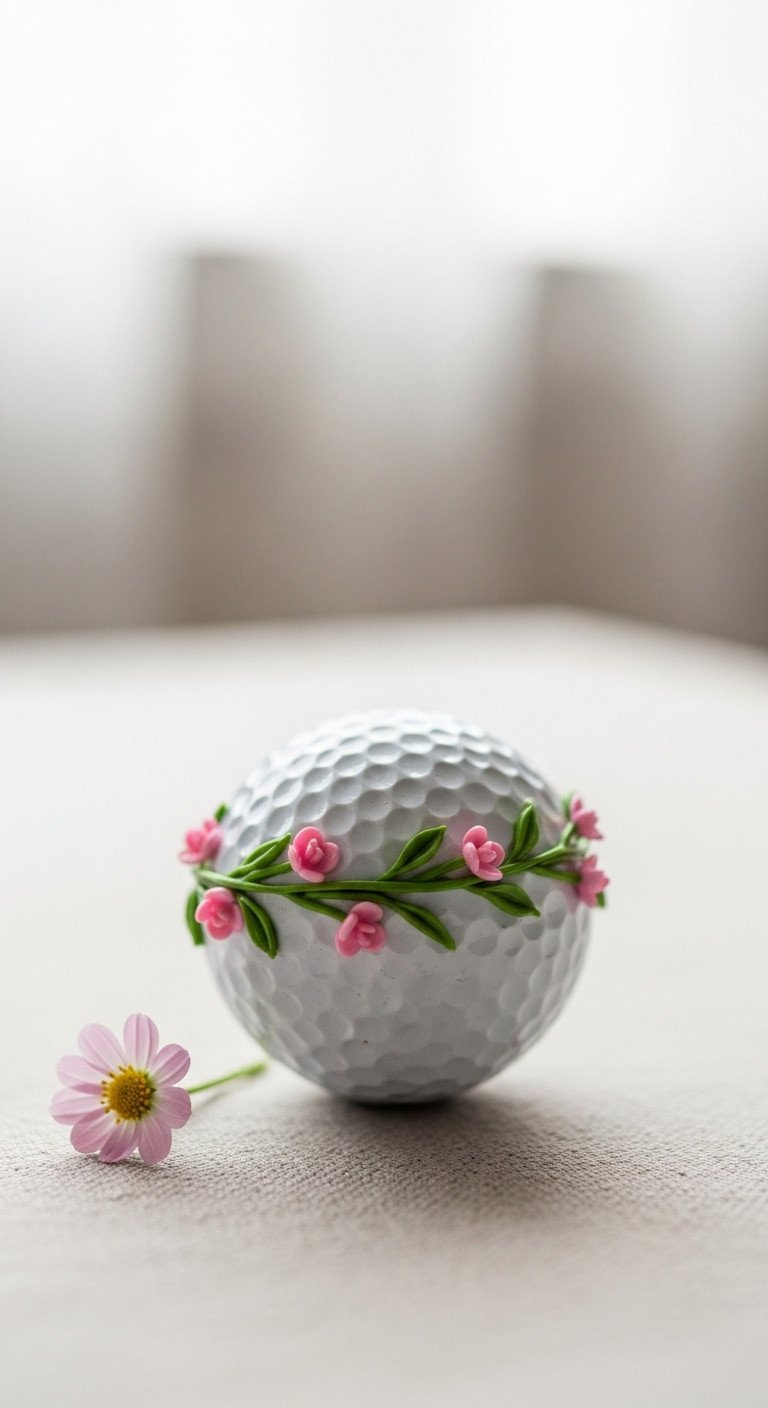
Save this beautiful floral design idea!
Materials Needed:
- 1 clean, white golf ball
- 1 green ultra-fine point permanent marker
- 1 pink (or other color) fine-point permanent marker
Step-by-Step Directions:
- Draw the Vine: Using the green marker, draw a single, wavy line that wraps around the ball. Don’t worry about making it perfect; natural vines are irregular.
- Add the Leaves: Along the vine, draw small, simple leaf shapes. A simple almond shape on either side of the vine works perfectly.
- Add the Flowers: Use the pink fine-point marker to create the flowers. A simple dot with 5 smaller dots around it creates an easy, recognizable flower shape. Scatter these along the vine.
- Dry and Seal: Allow the delicate design to dry completely before applying a sealant.
Pro-Tip: For a more varied look, use two different shades of green for the leaves and vine to add depth to your design.
9. Patriotic American Flag
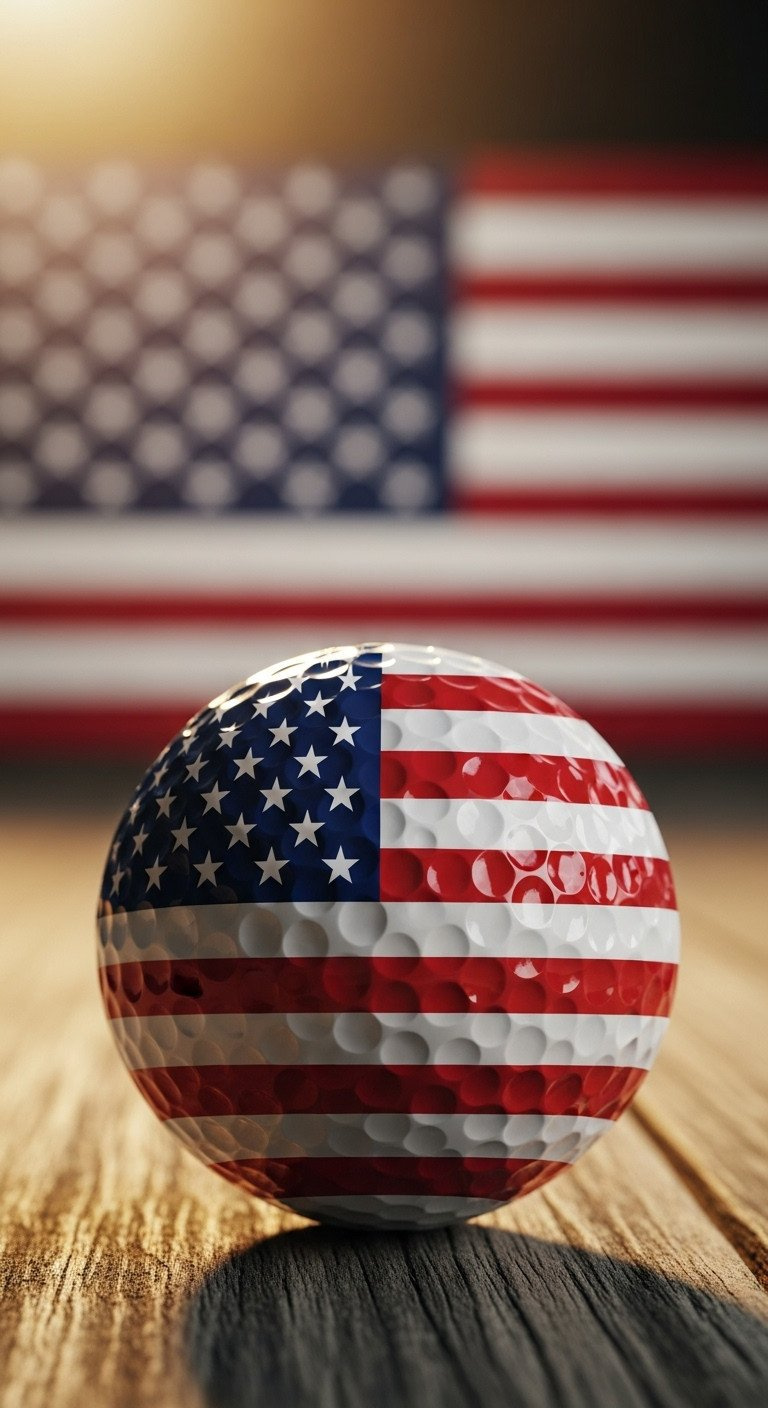
Pin this patriotic design for the 4th of July or Memorial Day!
Materials Needed:
- 1 clean, white golf ball
- 1 red fine-point permanent marker
- 1 blue fine-point permanent marker
Step-by-Step Directions:
- Draw the Blue Field: In the upper left quadrant of your chosen area, draw a small square or rectangle and fill it in with the blue marker.
- Draw the Red Stripes: Using the red marker, draw several horizontal stripes extending from the blue field. Use the natural lines of the dimples as a guide to keep them straight.
- Let it Dry: Let the design dry completely. The white of the golf ball will serve as the white stripes and stars.
- Seal for Protection: Apply a clear sealant to protect the design during play.
Lesson Learned: Trying to draw tiny white stars on the blue field is very difficult. It’s much easier and cleaner to let the blue field represent the star area without drawing the stars themselves.
10. Lucky Four-Leaf Clover
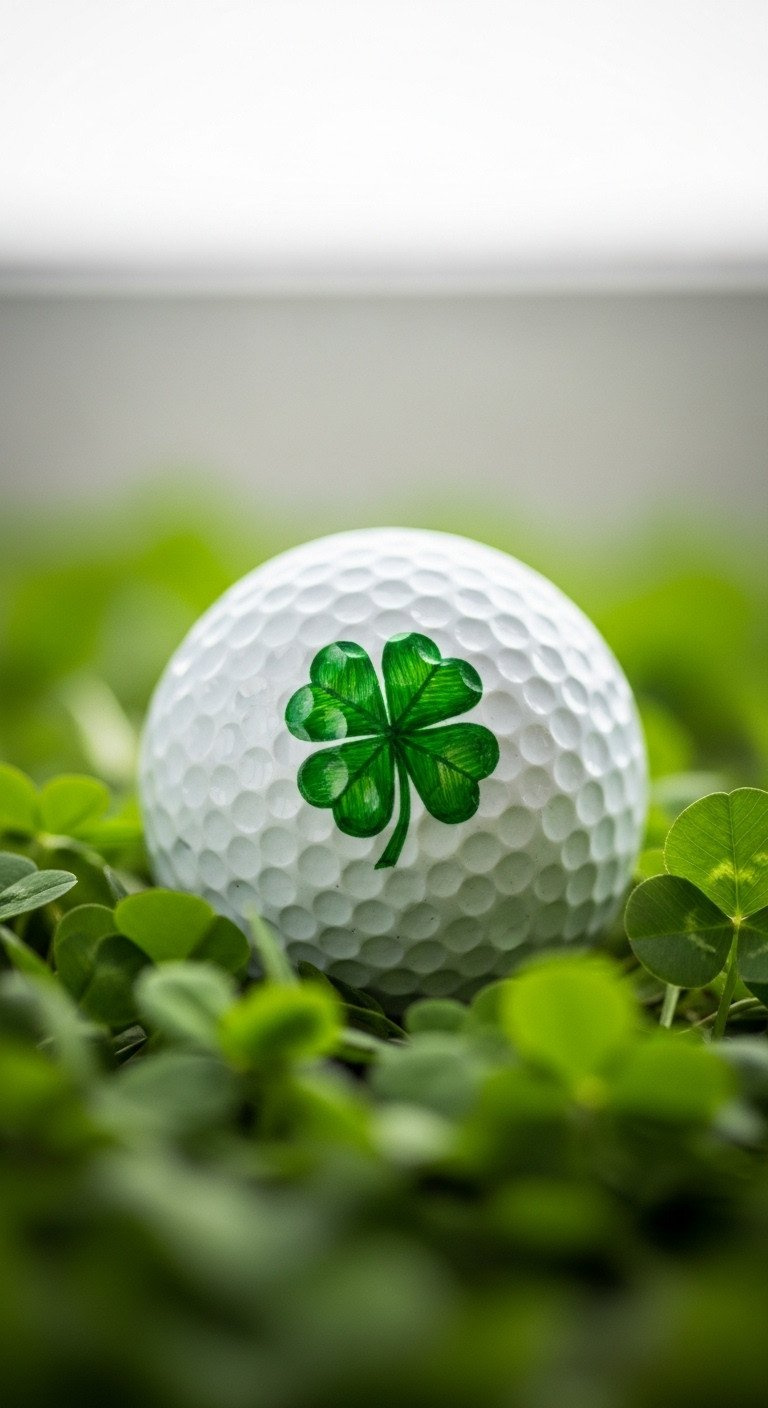
Save this lucky charm idea for your next important round!
Materials Needed:
- 1 clean, white golf ball
- 1 green fine-point permanent marker
Step-by-Step Directions:
- Draw the First Heart: A four-leaf clover is just four heart shapes joined together. Draw a small, simple heart shape.
- Draw the Remaining Hearts: Draw three more heart shapes, with the points of all four hearts meeting in the center.
- Add the Stem: From the center point where the hearts meet, draw a short, slightly curved line for the stem.
- Fill and Seal: Fill in the heart shapes with the green marker, let it dry completely, and then apply a clear sealant.
Pro-Tip: If you’re not confident drawing hearts, you can practice on paper first. The key is to keep them all roughly the same size for a balanced look.
11. Football Laces Design

Pin this design for the football fan in your life!
Materials Needed:
- 1 clean, white golf ball
- 1 brown fine-point permanent marker
- 1 white oil-based, extra-fine point paint pen (for opaque laces)
Step-by-Step Directions:
- Create the Football Shape: Draw an oval or football shape on the golf ball with the brown marker and fill it in completely. Let this dry for at least 30 minutes.
- Draw the Center Lace: Using the white paint pen, draw one straight line down the center of the brown oval.
- Add the Cross Laces: Draw 3-4 shorter horizontal lines crossing over the center vertical line.
- Dry and Seal: The paint pen will take longer to dry than a Sharpie. Let it cure for several hours before sealing.
Lesson Learned: A standard white Sharpie is not opaque enough to show up well on the brown background. An oil-based white paint pen is essential for this design to get crisp, bright white laces.
12. Classic Basketball Lines
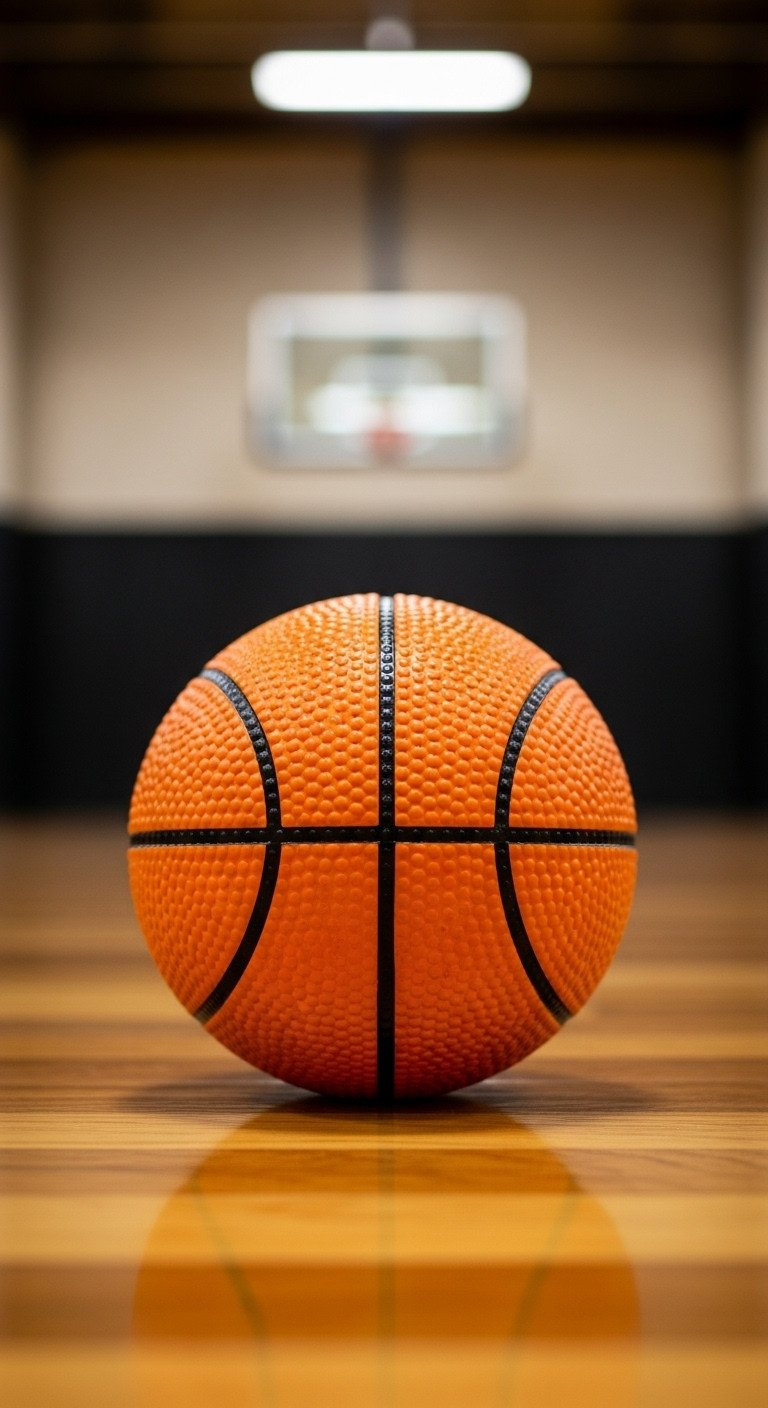
Save this great idea for basketball lovers!
Materials Needed:
- 1 clean, white golf ball
- 1 orange fine-point permanent marker
- 1 black ultra-fine point permanent marker
Step-by-Step Directions:
- Create the Orange Base: Color a large circular area of the golf ball with the orange marker. For a full basketball look, color the entire ball, but this will take time and ink. Let the orange base dry completely.
- Draw the Main Lines: Using the black marker, draw one vertical line and one horizontal line that cross in the middle of the orange area, dividing it into four quadrants.
- Add the Curved Lines: In the top two quadrants, draw a curved line that mimics the seams on a basketball. Repeat for the bottom two quadrants.
- Dry and Seal: Let the black lines dry fully before applying your clear coat.
Pro-Tip: Use the golf ball’s own seam line as a guide for your main horizontal line to ensure it’s perfectly centered.
13. A Short, Inspiring Quote

Pin this motivational idea for a little boost on the course!
Materials Needed:
- 1 clean, white golf ball
- 1 black (or any color) ultra-fine point permanent marker
- A pencil for sketching (highly recommended)
Step-by-Step Directions:
- Choose a Short Quote: Select a very short phrase like “Nice Shot,” “Get in the Hole,” or “Play Happy.”
- Sketch the Letters: Lightly sketch the letters with a pencil first. This helps with spacing and centering on the curved surface.
- Ink Carefully: Use the ultra-fine point marker to slowly and carefully trace over your pencil lines. Take your time to ensure the letters are neat and legible.
- Dry and Seal: Let the ink cure for at least an hour. Due to the fine lines, it’s very important the ink is fully dry before sealing to prevent smearing.
Lesson Learned: Writing on a dimpled, curved surface is tricky. Writing in all caps is often easier and more legible than cursive. Break the words into syllables and tackle one small section at a time.
Key Takeaways: Your Quick Guide to Perfect Sharpie Golf Balls
Here is a quick summary of the most important steps and easiest ideas to get you started.
The 4 Golden Rules:
* Clean First: Always wipe the ball with rubbing alcohol to remove oils. This is the #1 secret to making ink stick.
* Choose the Right Tool: Oil-based paint pens offer the best durability and color. For standard Sharpies, use a fresh, fine-point marker.
* Patience is Key: Let your design air dry completely (for several hours, if possible) before handling or sealing.
* Seal for a Pro Finish: A thin mist of clear acrylic spray sealant is the best way to protect your art from moisture and wear.
Top 3 Easiest Designs for Beginners:
* Classic Baseball: Iconic, simple, and always a huge hit as a gift.
* Polka Dots: No artistic skill required, just a few colorful markers.
* Monogram: Classy, personal, and easy to do with a stencil.
People Also Ask About Decorating Golf Balls
Will Sharpie rub off a golf ball?
Yes, a standard Sharpie can rub off a golf ball over time, especially with exposure to moisture and abrasion from golf clubs. To make it permanent, you must first clean the ball with rubbing alcohol and then protect the finished, dried design with a clear sealant like acrylic spray or clear nail polish.
What is the best marker to use on golf balls?
The best and most durable marker for golf balls is an oil-based paint marker. These markers are more opaque, vibrant, and adhere better to the ball’s non-porous surface than standard alcohol-based Sharpies. For fine details, a standard ultra-fine point Sharpie is still an excellent tool.
How do you seal Sharpie on a golf ball so it doesn’t smudge?
To seal Sharpie ink, first let the design dry for at least a few hours. Then, in a well-ventilated area, apply a very light mist of clear acrylic spray sealant from 6-8 inches away. Let it dry for 15-20 minutes, then apply a second light coat. This creates a durable, non-smudge finish.
Is it legal to draw on your golf ball for tournaments?
Yes, it is perfectly legal under the Rules of Golf to put an identification mark on your ball. As long as the drawing is just ink and doesn’t significantly alter the ball’s surface texture or aerodynamics (a simple Sharpie drawing will not), it is acceptable for all levels of play.
Final Thoughts
Now that you have the inspiration and the pro techniques, there’s nothing stopping you from turning that sleeve of plain golf balls into a set of custom art. Whether it’s for your own bag or a thoughtful gift for Father’s Day, this simple project is a guaranteed hole-in-one. What cool design will you create first? Share your ideas in the comments below
Last update on 2026-01-17 / Affiliate links / Images from Amazon Product Advertising API

