As an Amazon Associate GolferHive.com earns from qualifying purchases.
Decorate Your Golf Cart for Christmas With 7 Genius Ideas
Ready to transform your golf cart from a simple ride into the star of the Christmas parade? You’ve seen those dazzling, festive carts lighting up the neighborhood and thought, “I can do that!” But turning that vision into a brilliant, road-worthy reality involves more than just a few strings of lights. This activity, a unique form of holiday decorating and vehicle modification, is all about blending creativity with practical know-how to create a mobile masterpiece.
The challenge isn’t just about making it look good; it’s about making it work safely on a moving vehicle. You’re probably wondering how to securely attach all those decorations so they don’t fly off at the first turn, or how to power a brilliant light display without draining your golf cart’s battery. These are valid concerns that can turn an exciting DIY project into a frustrating puzzle. The fear of damaging your cart, creating an electrical hazard, or simply having your hard work fall apart mid-parade is real.
Decorating your golf cart for Christmas involves selecting a theme, choosing durable outdoor decorations, securely attaching all elements, and managing power for lights safely. The best results blend creativity with practical installation techniques for parades. This guide is your complete roadmap, packed with 7 genius ideas that cover everything from show-stopping light extravaganzas and creative themes to crucial safety features and smart storage for next year. Get ready to deck your driveway and become the talk of the holiday season.
Transform Your Ride: Unlocking 7 Genius Ideas to Decorate Your Golf Cart for Christmas
The excitement of the holiday season brings a unique opportunity to express your festive spirit, and what better canvas than your golf cart? This isn’t just about stringing up a few lights; it’s a chance to create a rolling piece of holiday art that brings joy to your community. However, we know the process can feel daunting. You need ideas that are not only visually stunning for a Christmas golf cart parade but also practical, durable, and safe. That’s why we’ve curated a list of proven concepts that balance jaw-dropping creativity with straightforward, secure installation. These ideas are designed to empower you with the confidence and knowledge to build a festive golf cart display that lasts through the season and keeps you safe on the move.
Deck the Driveway: 7 Genius Ideas to Decorate Your Golf Cart for Christmas Parades
Ready for the ultimate holiday makeover for your ride? We’ve gathered 7 genius ideas designed for maximum impact and minimal hassle. Each concept comes with detailed guidance, ensuring your festive golf cart is not only a creative masterpiece but also a safe and durable entry for any parade. From dazzling light shows that demand attention to whimsical themes that tell a story, these proven strategies will help you create an unforgettable holiday display. Let’s dive into the specifics of turning your golf cart into a Christmas celebration on wheels.
1. Dazzling Light Show Extravaganza
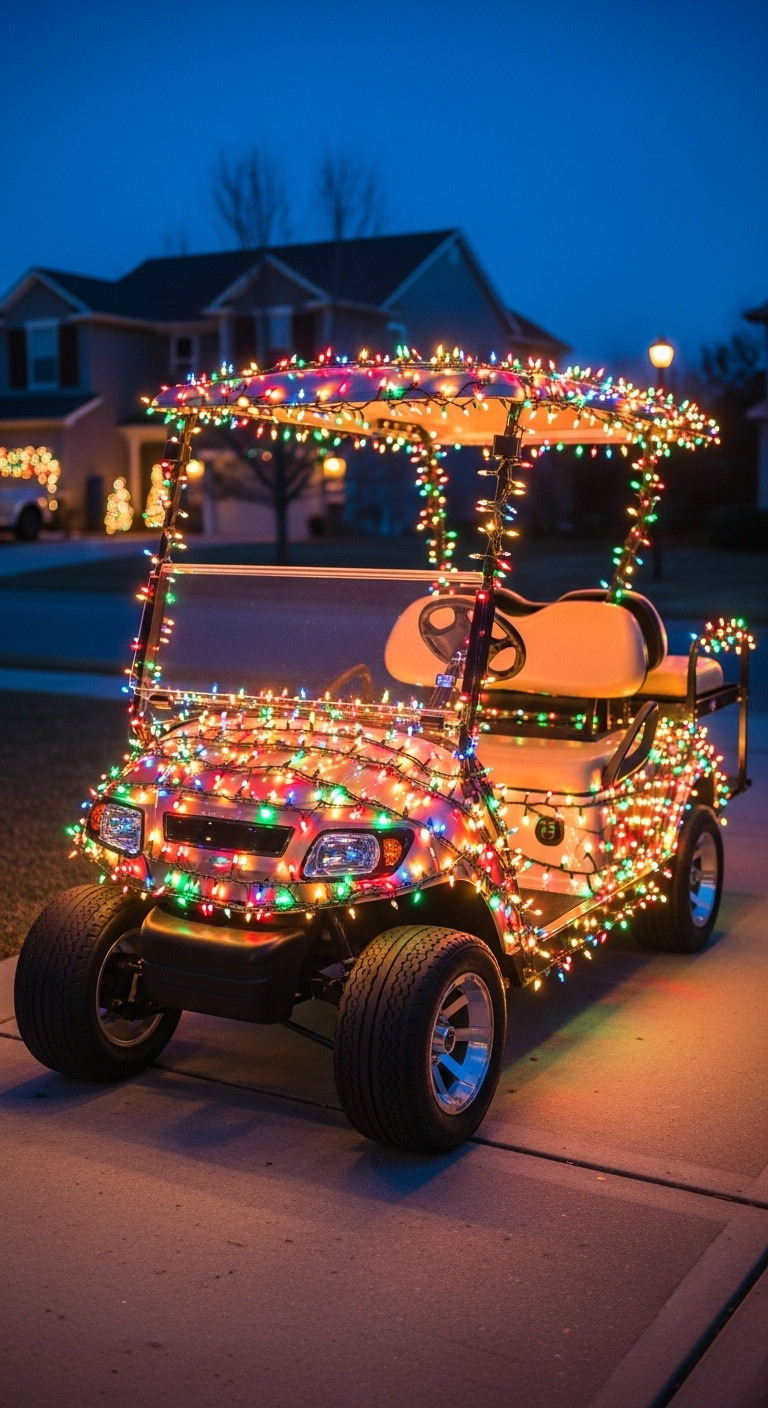
Pin this dazzling light idea to your ‘Christmas Parade Inspiration’ board!
A truly brilliant light display is the foundation of any standout Christmas golf cart. The key is using energy-efficient, outdoor-rated LED string lights that provide vibrant color without excessively draining your power source. Proper installation, concealed wiring, and a safe power connection are what separate a dazzling show from a dim disappointment.
Materials Needed:
- Outdoor-rated LED string lights (various lengths and colors, min. IP44 rating)
- Heavy-duty zip ties (UV-resistant, various sizes)
- Wire clips with adhesive backing or small screws
- Battery-operated light strands for accents (optional)
- DC-DC voltage converter (if tapping into golf cart’s 36V/48V battery for 12V lights)
- Auxiliary 12V marine battery and battery box (for extensive displays, optional)
- Electrical tape (outdoor-rated), wire cutters
- Automotive fuse kit (if hardwiring into golf cart’s electrical system)
Step-by-Step Directions:
- Plan Your Light Paths: Sketch out where you want lights on the canopy, frame, wheels, and front grille, ensuring no obstruction to controls or visibility.
- Test All Lights: Before installation, plug in all light strands to ensure they work correctly.
- Secure Main Strands: Start by attaching the longest strands to the golf cart’s canopy edges and main frame using zip ties, pulling them taut but not overly tight to avoid damage.
- Conceal Wiring: Use wire clips to neatly tuck and secure all wires along the frame, canopy supports, and under the cart, keeping them away from moving parts and heat.
- Connect Power Safely:
- For Battery-Operated Lights: Simply insert batteries and activate.
- For 12V Lights from Cart Battery: Install a DC-DC voltage converter (e.g., a 48V to 12V golf cart voltage converter) according to its instructions, wiring it to a fused circuit to protect the golf cart’s electrical system.
- For Auxiliary Battery: Connect your 12V lights to a separate, fully charged auxiliary marine battery, ensuring all connections are secure and weatherproofed.
- Add Accent Lights: Use smaller, battery-operated strands or rope lights to highlight specific features like wheel wells, cup holders, or unique props.
- Weatherproof Connections: Wrap any exposed electrical connections or converter boxes with outdoor-rated electrical tape or place them in a small weatherproof enclosure.
For optimal battery life and brightness for a parade, consider investing in an auxiliary 12V marine battery dedicated solely to your lights, preventing drain on your golf cart’s main propulsion battery.
2. Thematic Wonderland Transformation
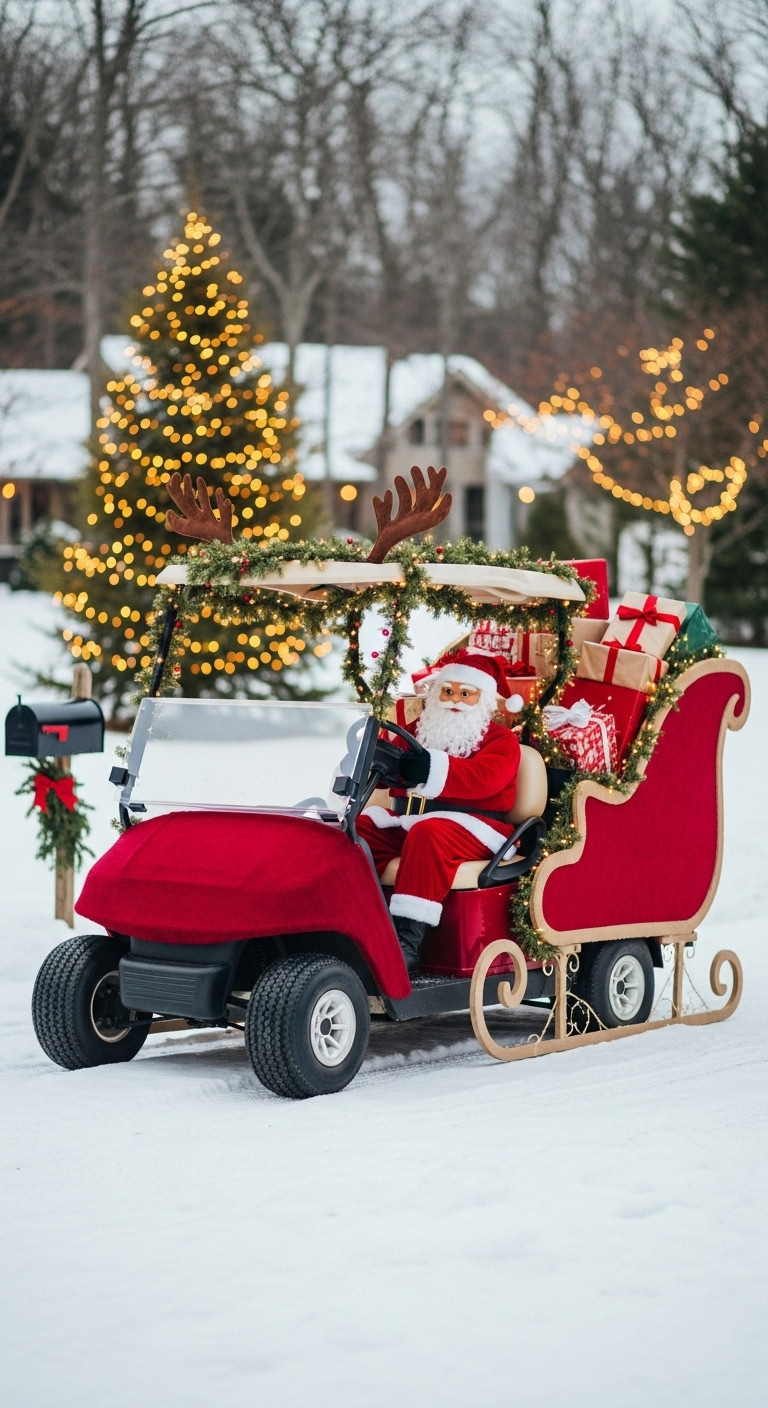
Save this creative theme idea for your next Christmas parade!
Choosing a cohesive theme elevates your golf cart from simply decorated to a true showpiece. Whether it’s Santa’s Sleigh, a Winter Wonderland, or a mischievous Grinch-mobile, a strong theme guides every decoration choice, from the color palette of your lights to the specific props you use.
Materials Needed:
- Theme-specific props (e.g., faux reindeer antlers for ‘Santa’s Sleigh,’ Grinch cutouts for ‘Who-ville’)
- Large sheets of fabric (red velvet, striped, or blue/silver for ‘Winter Wonderland’)
- Outdoor-rated spray paint (if temporarily coloring golf cart parts, e.g., wheels)
- Heavy-duty zip ties, bungee cords, industrial-strength Velcro (outdoor-rated)
- Double-sided outdoor adhesive tape
- Battery-operated LED lights matching theme colors
- Weatherproof sealant spray for non-outdoor fabrics/props
Step-by-Step Directions:
- Choose Your Theme: Select a theme that resonates with you and your audience (e.g., Santa’s Sleigh, Grinch, Winter Wonderland, Candy Cane Lane, Tropical Christmas).
- Sketch Your Design: Draw a simple diagram of your golf cart and where each theme element will go, including color schemes and primary focal points.
- Gather Main Props: Secure large, central props first. For ‘Santa’s Sleigh,’ attach large faux antlers to the golf cart’s roof securely with U-bolts or heavy-duty zip ties through existing canopy holes.
- Drape & Secure Fabric: Lay out your chosen fabric. For example, use red velvet to drape over the golf cart’s sides and back, securing it underneath the frame with bungee cords and industrial-strength Velcro along the edges for a clean look.
- Integrate Thematic Lighting: Use LED lights in colors specific to your theme (e.g., all white/blue for ‘Winter Wonderland,’ red/green for ‘Grinch’). Wrap them around props and outline the fabric.
- Add Character/Accent Details: Place character cutouts or smaller props (e.g., gift boxes in the back for Santa, oversized candy canes for Candy Cane Lane) using zip ties or strong double-sided outdoor adhesive tape.
- Final Touches & Weatherproofing: Ensure all elements contribute to the theme and are securely fastened. Spray any fabric or paper-based props with a weatherproof sealant for durability.
A strong, singular theme is often more impactful than trying to combine too many ideas. Focus on a few key elements that are instantly recognizable.
3. Garland & Wreath Weaving Magic
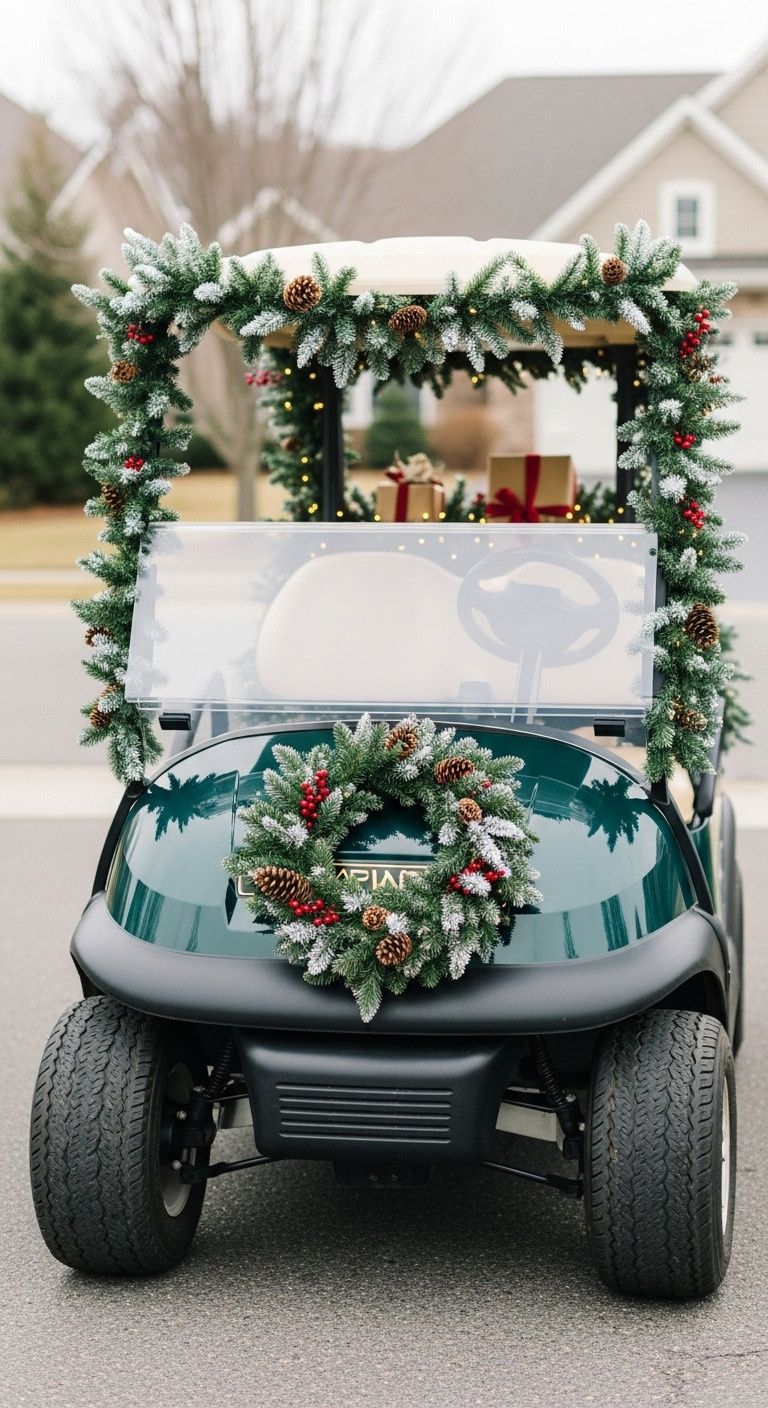
Pin this classic garland look for timeless holiday style!
For a timeless and elegant holiday look, you can’t go wrong with classic Christmas garlands and wreaths. The trick is to use weatherproof artificial garland and secure it tightly to the golf cart’s frame, outlining its shape for a polished appearance. A prominent wreath on the front serves as the perfect festive focal point.
Materials Needed:
- Outdoor-rated artificial Christmas garland (pre-lit or plain, with or without embellishments)
- Outdoor-rated Christmas wreath (appropriate size for golf cart front, preferably LED)
- Heavy-duty zip ties (green or black to blend in, UV-resistant)
- Small, soft-covered bungee cords or floral wire
- Outdoor-rated Command hooks or adhesive clips (for lighter accents)
- Shatterproof ornaments and waterproof bows (optional)
Step-by-Step Directions:
- Measure and Cut Garland: Measure the sections of your golf cart you want to adorn (roofline, windshield frame, side rails, back seat frame). Cut or connect garland sections to fit.
- Attach Garland to Roof & Windshield: Begin by securing the garland to the golf cart’s canopy frame and around the windshield. Use heavy-duty zip ties every 12-18 inches, wrapping them around the frame and through the garland branches, pulling tight.
- Drape Along Side Rails: Continue securing garland along the side rails and any other prominent frame elements. Ensure it doesn’t interfere with passenger entry/exit or the movement of the steering wheel.
- Mount the Wreath: For the front grille, center your wreath. Use two to four strong zip ties, threading them through the wreath’s frame and around the grille or frame behind it. Ensure it’s tightly secured and won’t obstruct airflow or headlights.
- Add Embellishments: If your garland or wreath is plain, add shatterproof ornaments, waterproof bows, or battery-operated fairy lights, securing them with floral wire or small zip ties.
- Final Security Check: Gently tug on all garland and wreath sections to ensure they are firmly attached and will withstand movement and wind during a parade.
For a more luxurious look, layer two thinner garlands together before attaching. This adds fullness and depth without excessive weight.
4. Custom Characters & Inflatables Galore
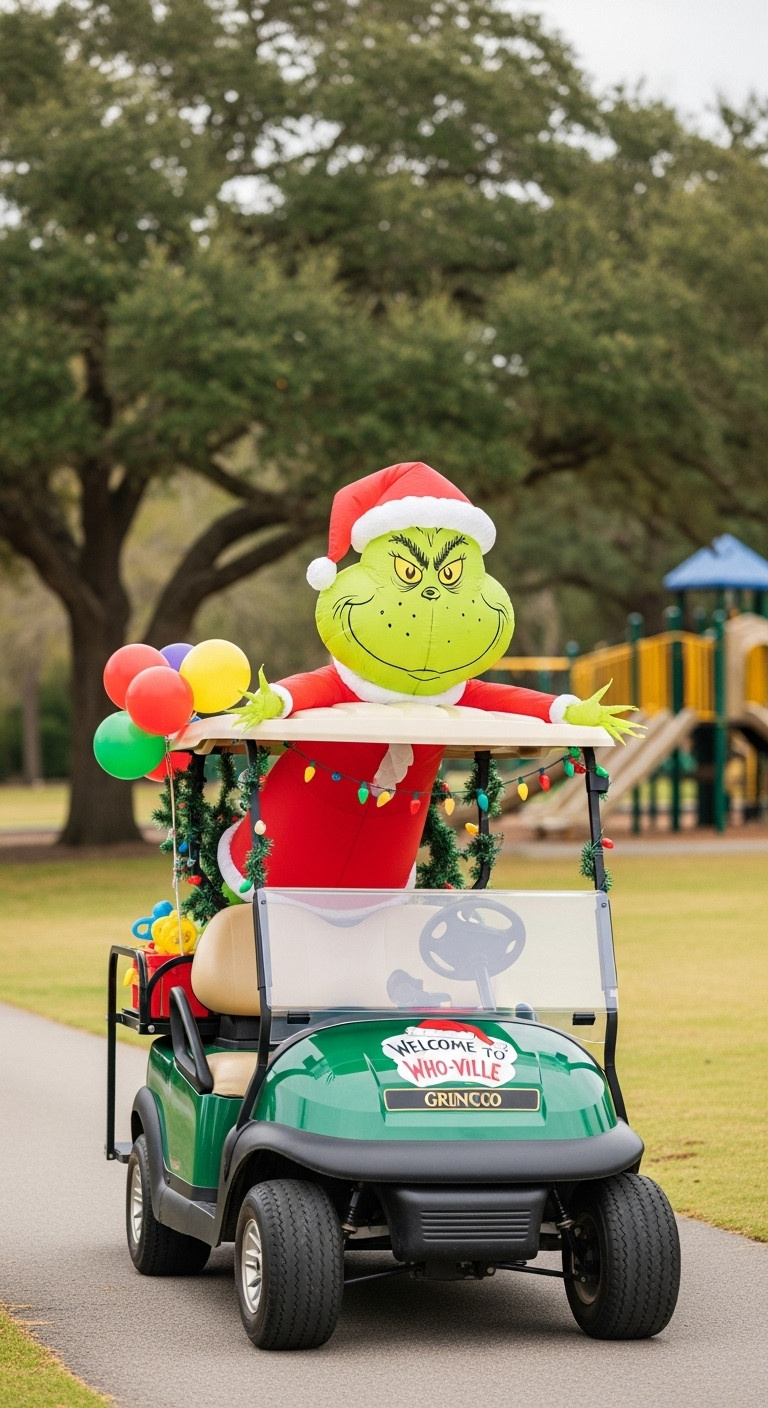
Save this fun character idea for your family’s next holiday event!
To make a big, bold statement, incorporate large character props or compact, battery-operated inflatables. Whether it’s the Grinch, Santa, or a friendly snowman, these elements create an instant focal point. The absolute priority here is secure attachment to handle wind and movement during a parade.
Materials Needed:
- Compact, battery-operated Christmas inflatable or weatherproof character cutout (e.g., Grinch, Santa, snowman)
- Heavy-duty zip ties (UV-resistant, long for large items)
- Soft-covered bungee cords (various lengths)
- Flat steel brackets or U-bolts (for securing heavy items to the frame)
- Portable power bank with AC outlet or an auxiliary 12V battery (for inflatables)
- Weatherproof outdoor extension cord (if using AC power from power bank)
- Adhesive-backed Velcro strips (industrial strength, outdoor-rated)
Step-by-Step Directions:
- Assess Placement: Determine the best location for your inflatable or cutout (e.g., roof, rear platform, passenger seat). Ensure it doesn’t obstruct the driver’s view, obscure lights, or extend dangerously beyond the cart’s dimensions.
- Secure the Base: For inflatables or large props, use heavy-duty zip ties or bungee cords to firmly attach the base to the golf cart’s frame, roof rack, or rear seat frame. If using brackets, bolt them to the frame (if safe and permissible for your cart model).
- Reinforce Top/Sides: Use additional bungee cords or guy lines (thin rope) to anchor the upper sections of inflatables or cutouts to the golf cart’s canopy or frame, especially for moving vehicles.
- Power Inflatables:
- For Battery-Operated Inflatables: Insert fresh, high-capacity batteries.
- For AC-Powered Inflatables: Connect to a portable power bank with an AC outlet via a weatherproof extension cord. Ensure the power bank is also securely fastened and weather-protected.
- Test for Movement: Inflate your character (if applicable) and gently rock the golf cart. Take a slow test drive to ensure the character remains stable and doesn’t shift or interfere with operations.
- Final Checks: Ensure no cords are dangling or susceptible to snagging, and all attachment points are hidden or blended for a clean look.
If using an inflatable, ensure it has its own power source (like a portable battery pack) to avoid draining your golf cart’s main battery, especially during long parades.
5. Budget-Friendly DIY Brilliance

Pin this smart, budget-friendly decor idea for your wallet!
Creating a stunning holiday golf cart doesn’t have to break the bank. With a little creativity, inexpensive materials like tinsel garland, weatherproof ribbon, and handmade ornaments can create a wonderfully festive and charming display. This is a perfect opportunity for a fun family project.
Materials Needed:
- Bulk rolls of colorful tinsel garland (various colors)
- Wide, weatherproof ribbon (e.g., wired edge for bows)
- Laminated oversized paper snowflakes or stars (for weather resistance)
- Sheets of felt or craft foam (for DIY ornaments/cutouts)
- Heavy-duty double-sided outdoor mounting tape or hot glue gun with outdoor-rated glue sticks
- Scissors, craft knife, hole punch
- Battery-operated fairy lights (for subtle glow, optional)
- Large plastic ornaments (shatterproof, inexpensive in bulk)
Step-by-Step Directions:
- Tinsel Streamers: Drape long strands of tinsel garland along the canopy edges, side rails, and across the front of the golf cart. Secure every 6-8 inches with small zip ties or double-sided outdoor tape.
- Giant Bows & Ribbons: Create large, voluminous bows from wide, weatherproof ribbon. Attach them to the front grille, side mirrors, or the back of the seats using zip ties or floral wire.
- Laminated Snowflakes/Stars: Cut out large snowflake or star shapes from cardstock, then laminate them (or cover with clear packing tape) for weather protection. Attach these to the golf cart’s windows (without obstructing view), canopy, or sides using double-sided outdoor mounting tape.
- DIY Felt Ornaments: Cut out simple shapes (trees, stars, candy canes) from felt or craft foam. Decorate with glitter glue or permanent markers. Punch a hole at the top and hang from existing canopy bars or garland with string.
- Repurposed Accents: Look for inexpensive plastic ornaments at dollar stores or use old holiday items. Thread them onto extra tinsel or ribbon and drape them around the cart.
- Strategic Lighting (Optional): Weave battery-operated fairy lights through tinsel or around bows for a subtle, magical glow that uses minimal power.
Utilizing reflective materials like tinsel and metallic ribbons maximizes the impact of even a few strategically placed lights, making your golf cart sparkle without a huge budget.
6. Parade-Optimized Safety Features
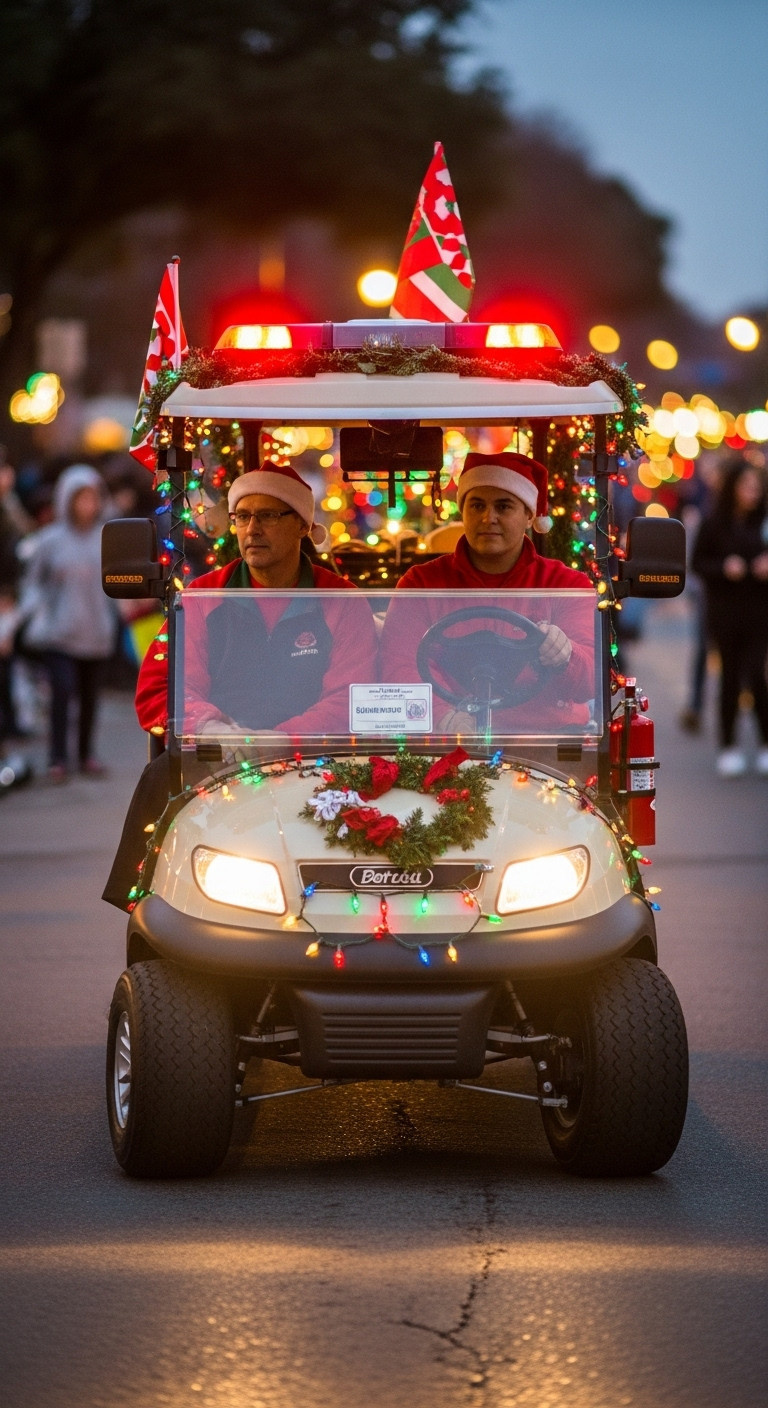
Save these crucial safety tips to ensure a worry-free parade!
While creativity is key, safety is paramount, especially for a Christmas parade. A truly genius design integrates safety features seamlessly. This means ensuring complete driver visibility, securing every single decoration firmly, and managing all electrical components to prevent hazards.
Materials Needed:
- Heavy-duty, UV-resistant zip ties (various sizes)
- Soft-covered bungee cords or strong rope
- Outdoor-rated electrical tape and wire clips
- Reflective tape or strips (red and white)
- Small, unobtrusive safety flag (optional, but recommended for parades)
- Automotive fuse kit (if modifying golf cart’s electrical system)
- Small fire extinguisher (mounted securely and accessibly, optional but wise)
Step-by-Step Directions:
- Ensure Driver Visibility: Before attaching any decor, sit in the driver’s seat and ensure your line of sight (front, sides, rear mirrors) is completely clear. Any decorations on the windshield or dashboard must be removed or repositioned.
- Unobstructed Controls: Confirm that all pedals (accelerator, brake), the steering wheel, and turn signal/light switches are fully accessible and operate without interference from decorations.
- Secure All Decorations: Use heavy-duty zip ties, bungee cords, and strong adhesive clips. For every decoration, identify at least two secure attachment points. Pull zip ties taut, but not so tight that they damage the cart’s frame or canopy.
- Manage Wiring Safely: All electrical wiring must be neatly bundled, taped, and secured away from moving parts, heat sources, and potential pinch points. Use wire clips to keep lines tidy and prevent snagging. Ensure all connections are weatherproofed.
- Check Electrical Load: If adding extensive lights, confirm your power source (golf cart battery or auxiliary) can handle the load. Use a voltage converter with a fuse if tapping into the main battery. Avoid overloading circuits.
- Add Reflective Elements: Strategically place reflective tape on the golf cart’s front, back, and sides, especially if your parade occurs at dusk or night. Ensure it doesn’t detract from the decor but enhances visibility.
- Final Safety Drive: Before the parade, take a slow test drive in a safe area to check if any decorations shift, block your view, or interfere with steering/braking. Listen for any unusual sounds.
Always review your local parade organizer’s rules and regulations well in advance. Some parades have specific guidelines for vehicle dimensions, power sources, or types of decorations allowed.
7. Post-Holiday Preservation & Storage
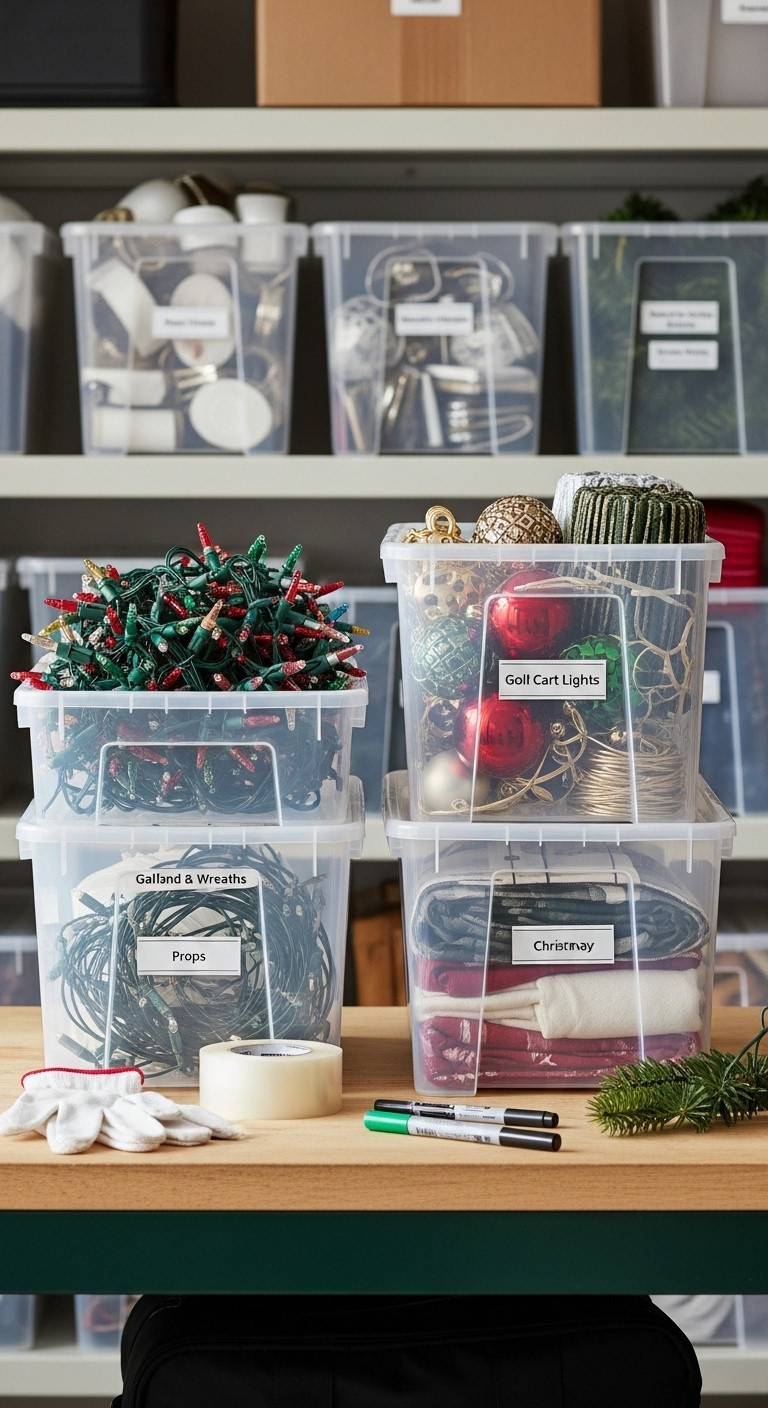
Save these smart storage tips to keep your decor pristine year after year!
A truly brilliant decorating strategy includes a plan for the takedown. Properly removing, cleaning, and storing your decorations ensures they’ll be ready to shine again next year, saving you time and money. This often-overlooked step is key to preserving your investment.
Supplies Needed:
- Large, clear plastic storage bins with airtight lids
- Light reels or cardboard cutouts for wrapping string lights
- Ornament storage boxes with dividers
- Garment bags or large plastic sheets for fabric/inflatables
- Soft cloths, mild all-purpose cleaner (for non-electrical surfaces)
- Weatherproof sealant spray (for touched-up props)
- Labels and permanent marker
Step-by-Step Directions:
- Disconnect Power First: Always start by disconnecting all power sources from your lights and inflatables to prevent any electrical hazards.
- Gentle Removal: Carefully detach all decorations, starting with the outer layers and working your way in. Avoid pulling or yanking, which can damage the decorations or your golf cart’s finish. Cut zip ties with wire cutters.
- Clean & Inspect: Lightly wipe down non-electrical decorations with a soft, damp cloth to remove any dirt or debris. Inspect all items for damage (frayed wires, cracked ornaments, torn fabric). Repair minor issues immediately.
- Untangle & Coil Lights: Wrap each strand of Christmas lights neatly around a light reel or a piece of cardboard to prevent tangling and damage. Secure the ends with a twist tie.
- Protect Ornaments & Wreaths: Store shatterproof ornaments in divided storage boxes. For wreaths, place them in large, flat boxes or specialized wreath bags to prevent crushing and dust accumulation.
- Pack Props & Fabrics: Fold fabrics neatly and place them in garment bags or large plastic storage bags. Deflate and fold inflatables, ensuring they are completely dry to prevent mildew. Store cutouts flat.
- Label & Store: Place all organized decorations into clear plastic bins. Label each bin clearly with its contents (e.g., “Golf Cart Christmas Lights,” “Santa Props”). Store bins in a cool, dry, temperate place, away from direct sunlight or extreme temperatures, ready for next 2025!
Before storing any decorations, ensure they are completely dry. Even a small amount of moisture can lead to mildew, rust, or electrical shorts when brought out again.
Key Takeaways: Your Quick Guide to Festive Golf Cart Decor
- Plan Strategically: Choose a cohesive theme and measure your golf cart’s dimensions.
- Prioritize Outdoor-Rated Decor: Select durable, weatherproof lights and materials.
- Secure Everything Firmly: Use heavy-duty fasteners like zip ties and bungee cords.
- Manage Power Safely: Consider auxiliary batteries or voltage converters for lights.
- Ensure Visibility & Access: Decorations must not obstruct driver’s view or controls.
- Store Smartly: Clean and organize decorations for reuse next season.
FAQs About decorating your golf cart for christmas
What kind of lights should I use for my Christmas golf cart?
Outdoor-rated LED string lights are highly recommended for golf carts due to their energy efficiency, durability, and vibrant colors. Battery-operated LED lights are excellent for minimizing drain on your golf cart’s main battery, while rope lights offer flexible outlining options. Always check for an IP44+ rating for weather resistance.
How do I attach decorations to my golf cart without damaging it?
To prevent damage, use non-permanent and secure fasteners. Heavy-duty zip ties, soft-covered bungee cords, outdoor-rated adhesive clips (like Command hooks), and industrial-strength Velcro are ideal. Avoid drilling unless absolutely necessary and always use felt padding under any decor that might rub against the paint.
How can I power Christmas lights on my golf cart?
You have three main options for powering lights. You can use dedicated battery packs for battery-operated strands, a DC-DC voltage converter connected to your golf cart’s main battery (with a fuse for safety), or a separate auxiliary 12V marine battery for more extensive lighting displays. This prevents excessive drain on your golf cart’s propulsion battery.
How much does it typically cost to decorate a golf cart for Christmas?
The cost to decorate a golf cart for Christmas varies widely. It can range from $50 for basic, budget-friendly designs to over $500 for elaborate, custom-themed displays. Factors like the quantity and type of lights, custom props, and whether you DIY or purchase kits significantly influence the total expense.
What are the essential safety tips for a golf cart Christmas parade?
Essential safety tips include ensuring decorations never obstruct the driver’s vision or access to controls. You must also securely fasten all items to prevent detachment and properly manage all electrical components to avoid shorts or fire hazards. Always check for local parade rules and conduct a test drive beforehand.
Final Thoughts
As you prepare to transform your golf cart into a dazzling holiday masterpiece, remember that the most successful decorations blend creativity with practicality and, most importantly, safety. Whether you opt for a twinkling light display, a whimsical character theme, or a classic garland look, your golf cart is sure to spread cheer throughout your neighborhood or parade route. With these 7 genius ideas and a focus on secure installation and power management, you’re ready to create a truly unforgettable Christmas golf cart.
What’s your all-time favorite Christmas golf cart theme you’ve seen or created? Share your festive ideas in the comments below
Last update on 2025-11-16 / Affiliate links / Images from Amazon Product Advertising API

